I’ve been reviewing a range of different Lombex products recently, and I have to say I’ve been very impressed so far with their smart products which are fantastic value for money I must say.
In case you’ve missed my previous reviews, I reviewed the Lombex Smart LED Bulb, the Lombex Dimmable Smart LED Light Bulb, and the Lombex Smart Plug.
This time it’s the turn of the Lombex Smart LED Strip (Amazon, #CommissionsEarned).
I’ve been very excited about this product ever since it arrived and I’m very excited about installing it as it’s really going to add a nice atmosphere and mood to my living room. I guess it takes me back to my youth when I used to install LED strips underneath the glove compartment and the pedals on my car! 🙂
It’s going to look great around Christmas too, along with the Christmas tree and my other decorations 🙂
Anyway, without further ado, here’s what I thought about it:
Unboxing
When the light strip arrived, it was well packaged in the standard Amazon packaging. Inside the Amazon packaging was the actual box that housed the light strip itself.
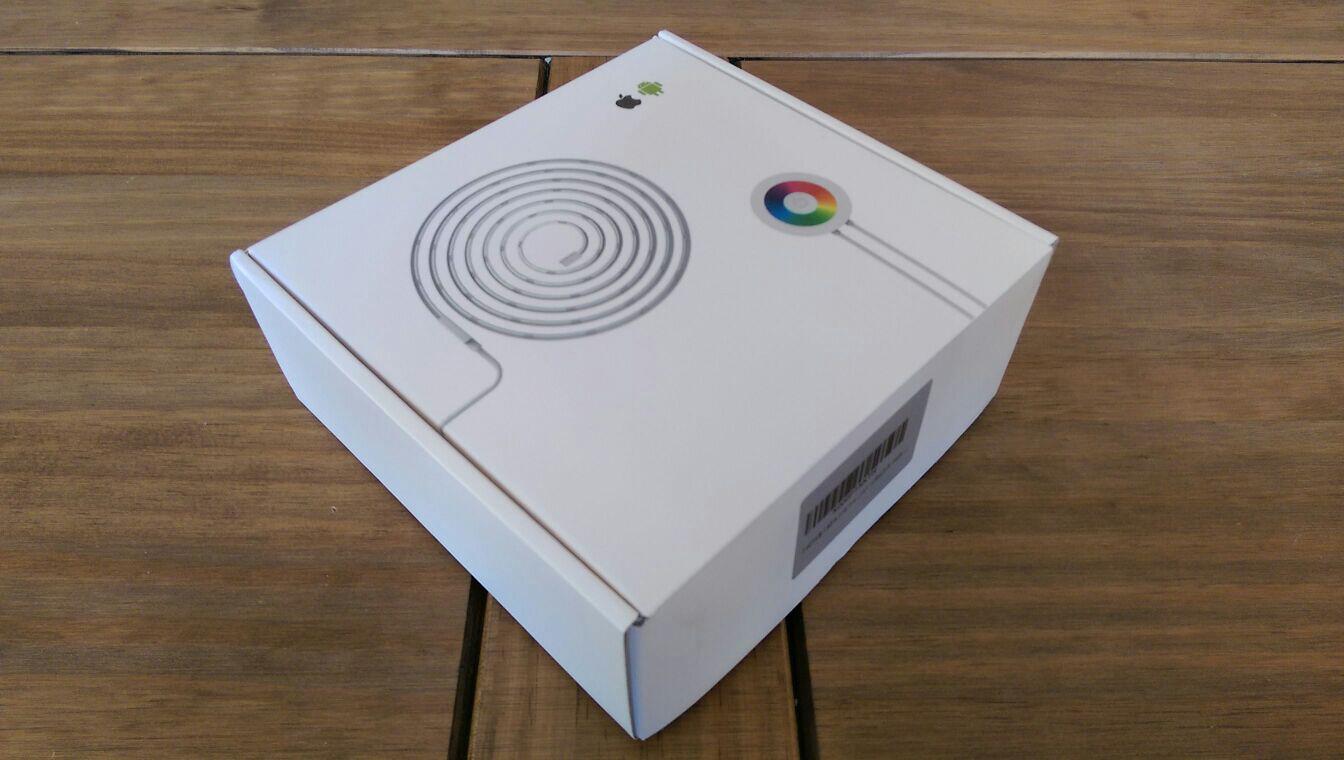
I have to say actually, the light strip is well packaged in a white box, with some neat pictures of the product on the front of it. Immediately I’m thinking, this is a premium product, because care and attention has been put into the presentation here.
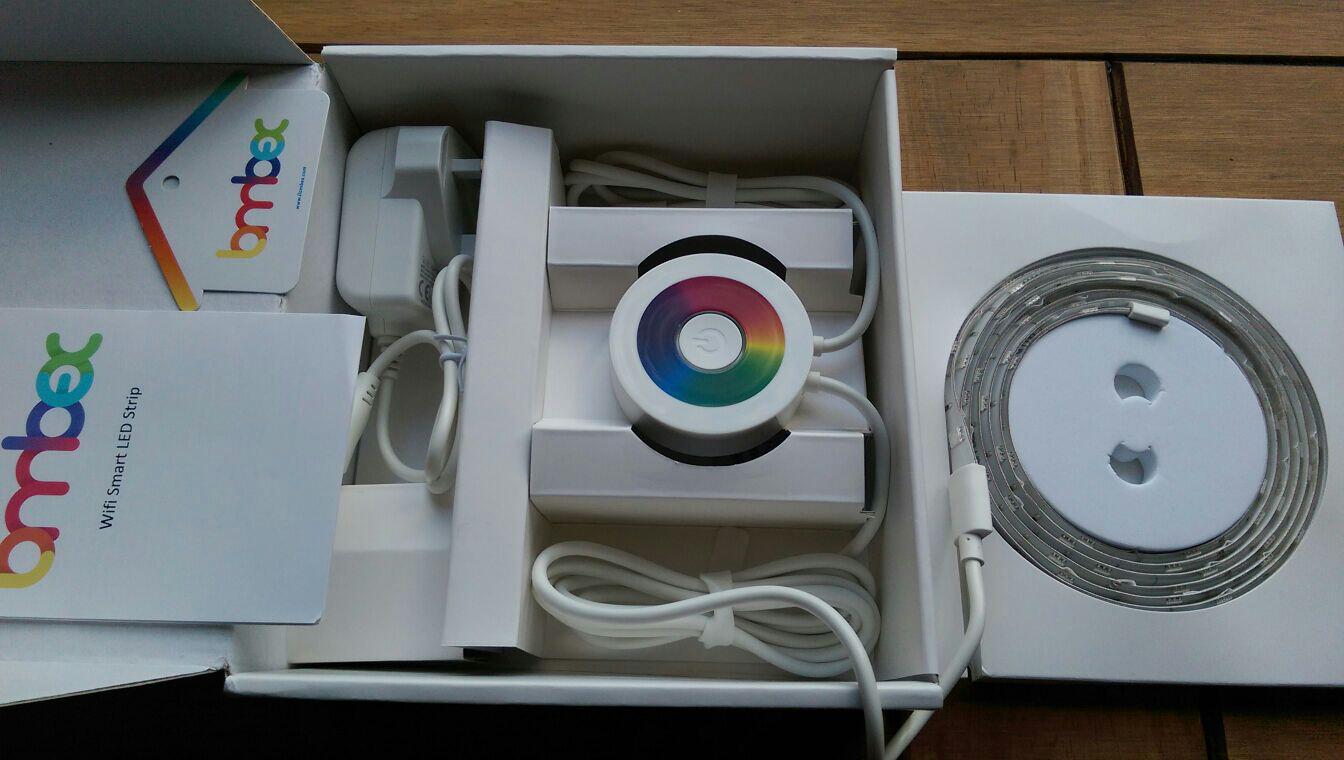
Opening up the lid on the box, reveals the light strip which is packed neatly in an inset of a thin white box. This thin box sits on top of a number of partitions within the main box which contains the mains adapter and a circular controller. You can use the circular controller to manually turn the strip on and off or change the colors of the light strip without using the app.
Also contained in the box is a user’s booklet containing a list of features and installation instructions, although I’ll be covering the setup later in this post. The booklet also mentions that you can cut the strip to a desired length if you find that it’s too long and how to mount the strip using the 3M adhesive tape (Amazon, #CommissionsEarned) that you simply peel off.
Build quality
The build quality of this light strip appears to be decent. It’s modern looking, both the adapter and the controller is made of smooth white plastic with rounded edges, so it feels good to hold.
The cable linking the mains adapter and the light strip is good quality too – on par with the quality of an iPhone cable I’d say, so no complaints here.
Here’s the light strip, adapter and the controller neatly packed inside the box:
Who’s it for?
Basically anyone that can use a smartphone can use this light strip but here’s a couple of ideas for you to put it to proper use:
The light strip adds a bit of extra atmosphere or mood to your room. For example you can choose between different modes such as night mode for when you’re watching TV in the evening, reading mode, soft mode and also party mode which is perfect for when you’re listening to music or having a few friends round for a party.
The light strip is also useful for anyone that wants to add a bit of security to their home, so you can schedule it to turn on/off if you’re away from home, giving the impression that someone is in the house.
Also, in the run up to Christmas, I think it makes quite a nice Christmas decoration! 🙂
How to set it up
Setup couldn’t be easier, here’s the steps I took:
Step #1
The first step is to download the app. If you have an Android device, then you download the Android app from the Playstore here.
Alternatively, if you have an iOS device, then you can get the app from app store here.
I have an Android device, but the steps should be almost identical for iOS devices.
Step #2
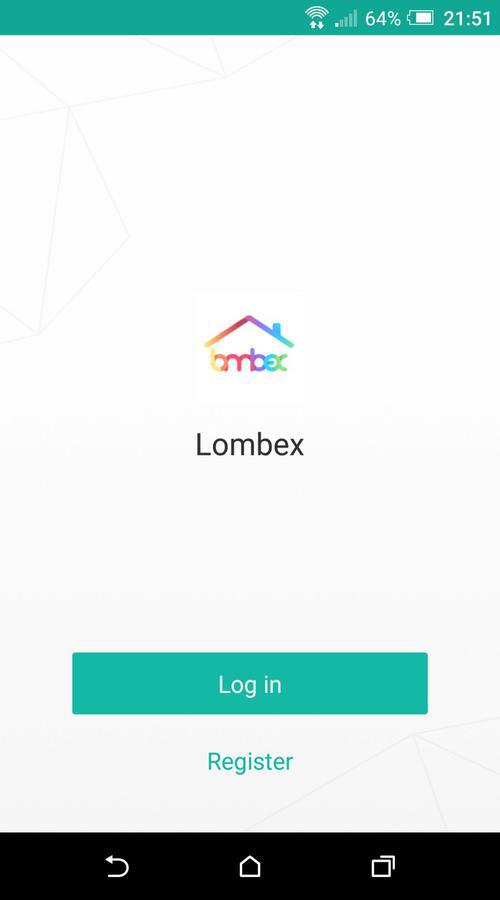
Once you’ve downloaded the app, open it and then hit Register.
Step #3
On the next screen, enter either your mobile number or email address and hit Next. I chose to enter my email address.

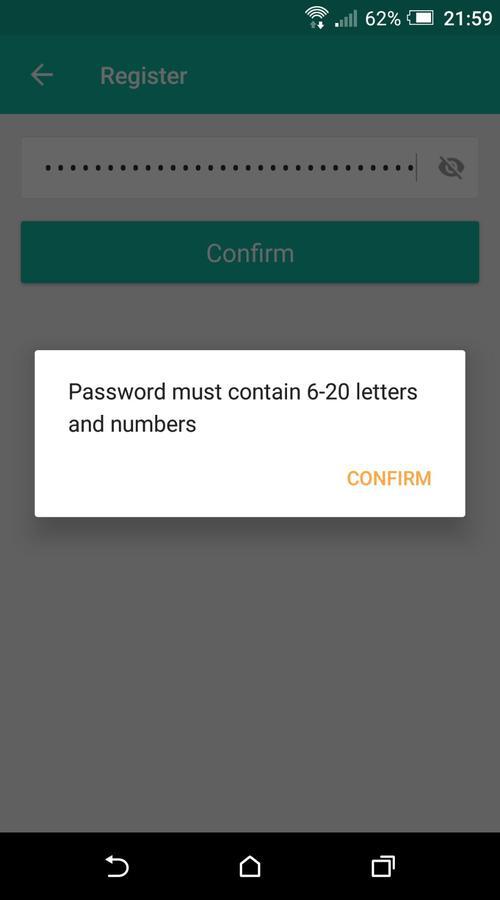
Step #4
On the next screen, enter a secure password and hit Confirm. I tried to use a 32 character password here as I use LastPass to remember my passwords, so I was a bit disappointed to find my password had to be a maximum of 20 characters.
Still, as long your password is complex enough and has a mix of letters and numbers, then you should be fine. If you’re unsure, test the strength of your password.
Step #5
Now, when when you first plug in the light strip for the first time, the lights on the strip should cycle through various colors and the blue LED’s around the button on the controller should start to flash on and off, which means that you’re in pairing mode.
If this doesn’t happen, then you’ll have to trigger the pairing process manually. To do this, first power on the strip and hold down the power button for at least 5 seconds and then unplug the adapter. Still holding the power button, plug the adapter back in and release the power button when the blue LED’s start to flash quickly.
Step #6
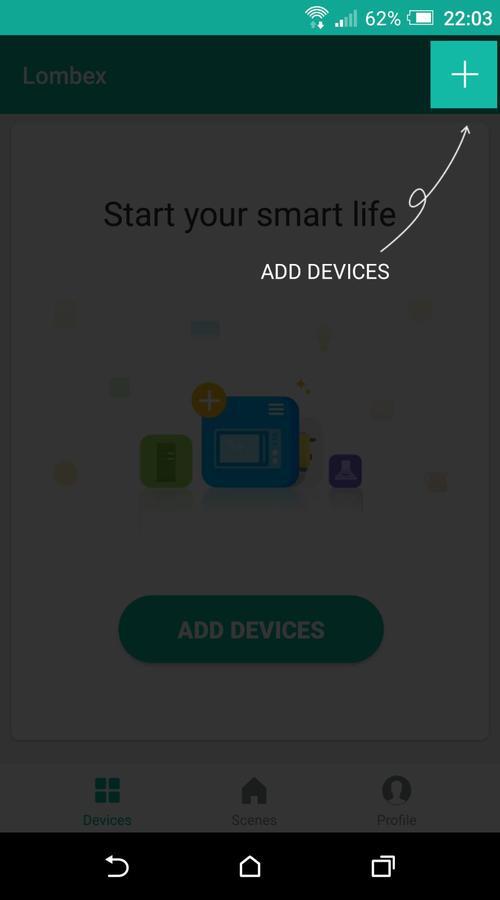
Within the app, hit the green ‘plus’ icon in the top right corner, or hit ADD DEVICES.
Step #7
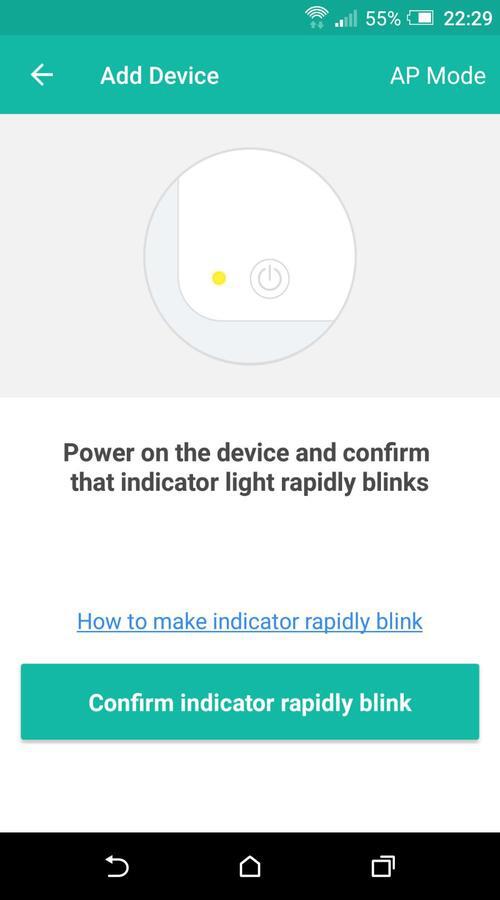
Now when the LED’s on the light strip are flashing on and off, the light strip is in pairing mode and ready to be connected to your WiFi. At this point, hit the Confirm indicator rapidly blink button on the app.
Step #8
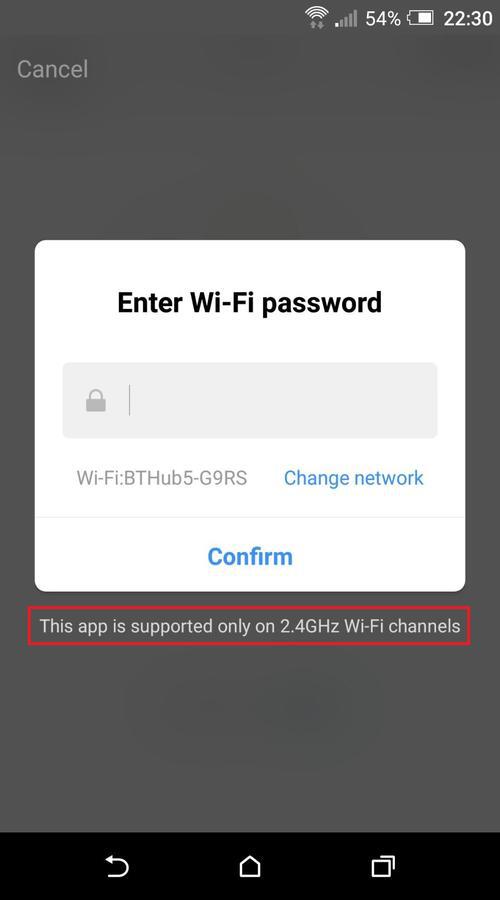
On the next screen, enter your WiFi password and hit Confirm. Please note the message at the bottom here, that the app only works on 2.4GHz WiFi. Don’t be alarmed by this, you can instruct your phone to use this frequency only in your device’s WiFi settings.
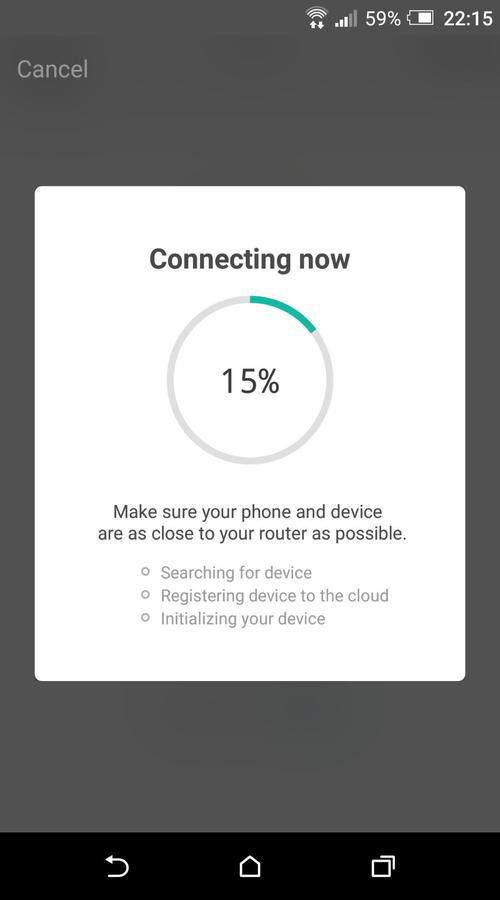
You should now see a progress indicator as it tries to connect to your WiFi router:
Step #9
Finally you should see “Successfully added 1 device(s)”, and if you’ve got this far congratulations, your device is fully set up. You can rename the light strip at this point if you like. If you decide not to, then you can always change it later in the settings.
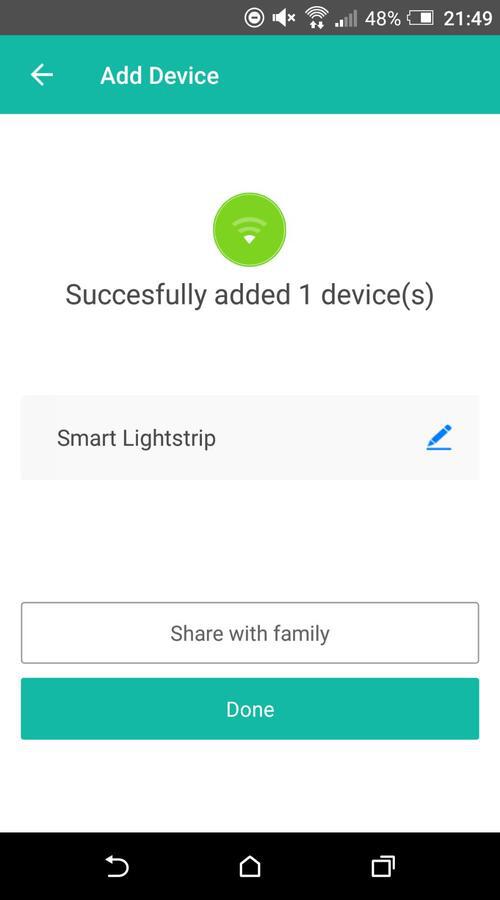
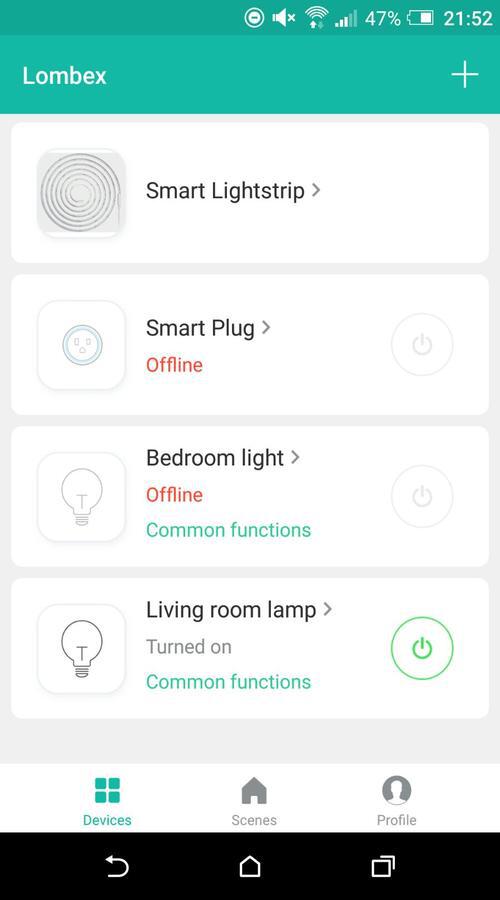
Hit done and then you can start interacting with your device. You should now see something like the following screen. In my case, the app lists all the Lombex devices that I have connected.
Tapping the power button next to the device at this point will toggle the light strip on and off.
Note: If you do have any issues, then double check that you’ve entered your WiFi password correctly, that your phone is connected to your WiFi and that you’re within close proximity to your router.
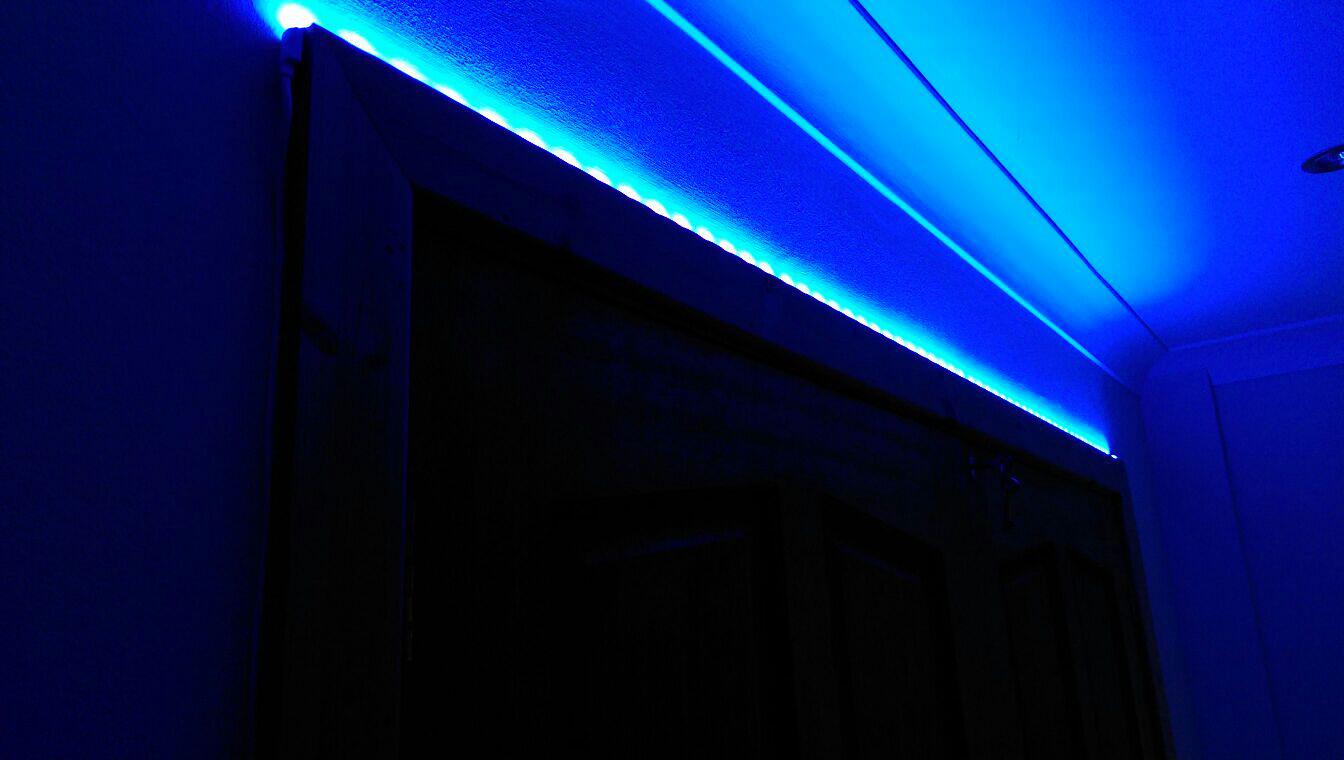
And here’s an image of the light strip working 😉
Features
OK, so once the light strip is set up, you’re done. You don’t need to go through that process again. Even if you uninstall the app and reinstall it again, the connection between the light strip and your router remains established, so you don’t have to enter your WiFi password again.
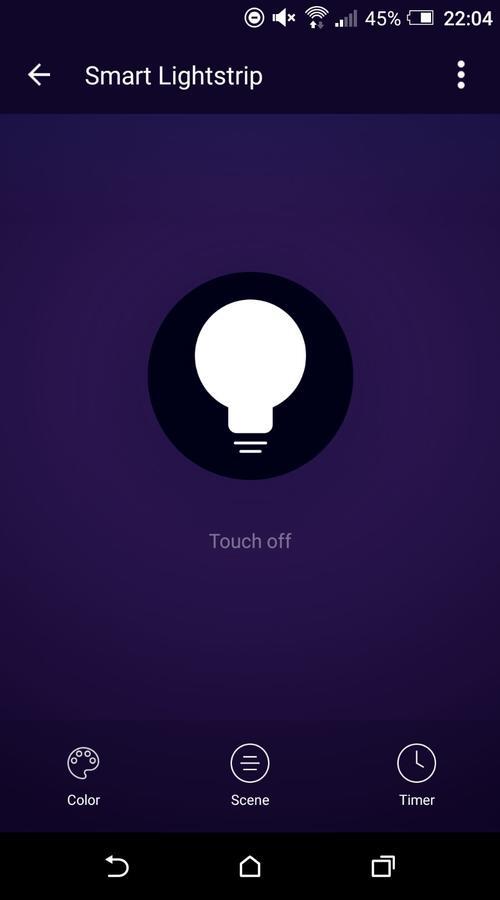
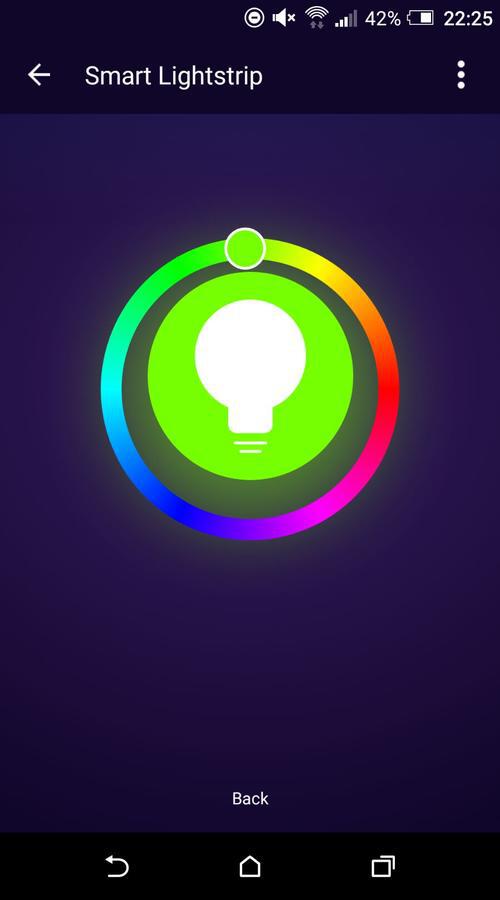
When you’ve got the light strip set up, you’ve got a number of options available in the app. To access the different features, simply tap “Smart Lightstrip” or whatever name you have chosen and you should see a screen that looks like this:
Let’s look at each of them:
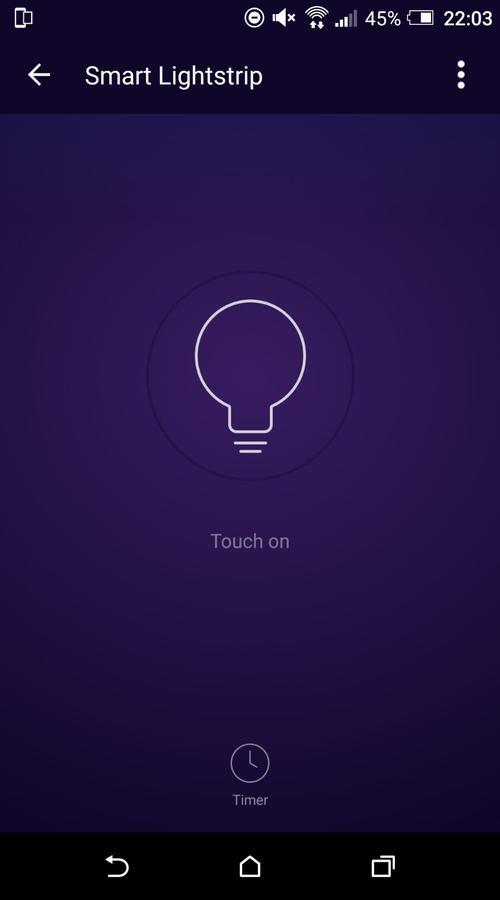
Toggle Switch
Not a lot you can say about this, as it’s pretty obvious what this does. You’ve got a huge button in the middle of the app which is basically a toggle switch so you can switch the light strip on and off manually. When the light strip is on, the bulb lights up on the app with a message saying “Touch off” (like the image above). And when the light strip is off, the bulb on the app extinguishes and the message changes to “Touch on” as you might imagine 😉 Simply as that really. When the light strip is turned off, the “color” and “scene” options disappear leaving just the “timer” option available (see image below).
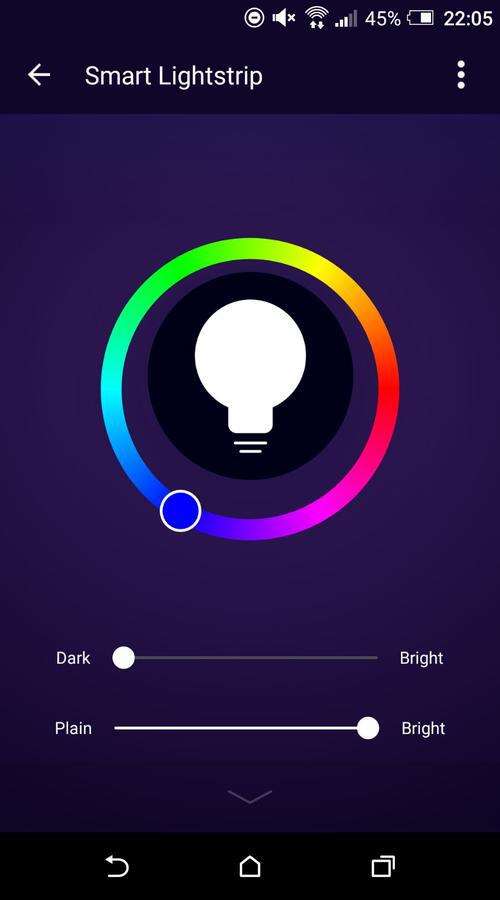
Color
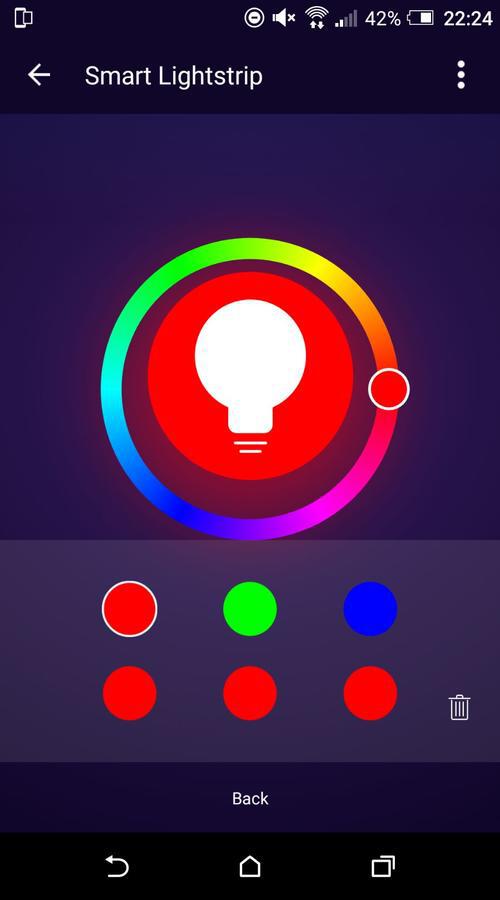
Next up is color, and as you’d expect, you can change the color of the LED’s to whatever you want. You simply move the white circle to the color you want. According to the product features, there are 16 million colors to choose from, though I think that’s the capability of the light strip as the app certainly doesn’t offer that many colors. There’s more than enough colors to choose from though, so it’s not really an issue.
In addition to the color wheel, you get two sliders. The first slider simply enables you to control the brightness of the LED’s on the light strip, far left being the darkest (Dark), far right being the brightest (Bright).
The second slider, the one underneath the first, basically gives you different shades of the color that you have chosen. Far left (Plain) gives you a lighter shade of your chosen color and the far right (Bright) gives you a darker shade of color that you have chosen.
Of course you don’t have to do this with the app, you can also use the touch control on the light strip to change the color of the LED’s manually.
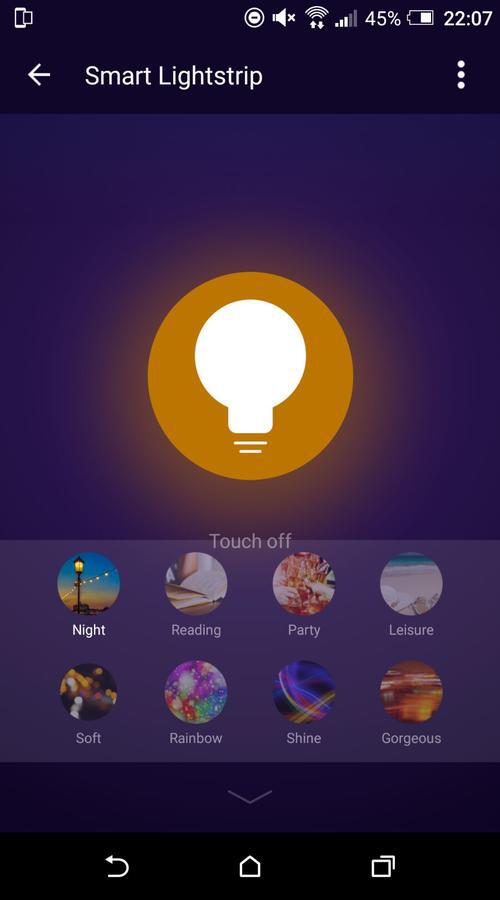
Scene
This is where it gets a bit more interesting. You can select a particular ‘scene’ which will give you a preset color for your light strip.
So for example, say you’re reading a book, you can select ‘Reading’ which will give you a pale blue light.
If you’re having a party or listening to music, then you can select ‘Party’ which gives you a pale yellow color. If you’re having a disco, you could select ‘Rainbow’ which will cycle through an array of different colors or ‘Gorgeous’, which again will cycle through various different colors but the transition between each color is a lot smoother.
There are eight preset modes available for you to choose from in total: ‘Night’, ‘Reading’, ‘Party’, ‘Leisure’, ‘Soft’, ‘Rainbow’, ‘Shine’ and ‘Gorgeous’.
It’s worth noting actually, that the latter four of these modes, ‘Soft’, ‘Rainbow’, ‘Shine’ and ‘Gorgeous’ can be configured further by selecting either the ‘hamburger’ icon or the ‘pencil/edit’ type icon. When you select the hamburger icon, you get three additional sliders:
- ‘Dark’ -> ‘Bright’ which controls the brightness of LED’s
- ‘Plain’ -> ‘Bright’ which controls the shade of the colors
- ‘Slow’ -> ‘Fast’ which controls the speed at which colors transition from one to another.
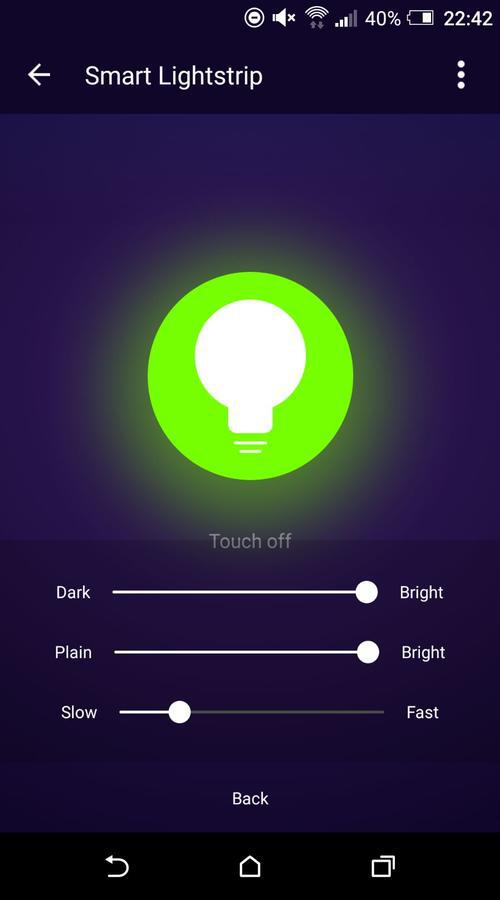
When you’re in ‘Soft’ or ‘Shine’ mode selecting the edit icon will enable you to choose the color that the device uses to display its particular pattern. The ‘Soft’ mode fades in and out very slowly, whilst ‘Shine’ mode flashes on and off about once per second.
When you’re in ‘Rainbow’ or ‘Gorgeous’ mode selecting the edit icon will also enable you to choose the color that the device uses to display its particular pattern and you also get six preset colors to choose from (in addition to those provided by the color selector wheel).
Timer
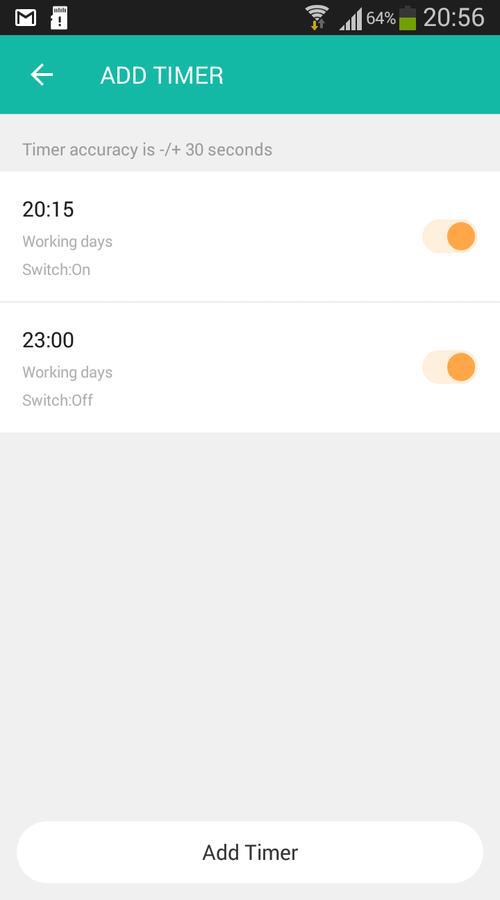
Should you wish to turn the lights on and off at specific times, then you’ve got an easy to use timer function.
Here’s the steps I’ve taken to get the light strip to turn on at 20:15. You can follow the same procedure to get the light strip to turn off again at whatever time you choose (using switch Off instead of On).
I’ve specified these timers to work only on weekdays, but you can select everyday if you like or particular days, it’s really up to you, it’s as flexible as you would like it to be.
Step #1
Click Add Timer, and choose choose 20:15 or whatever time you wish the light strip to turn on.
Step #2
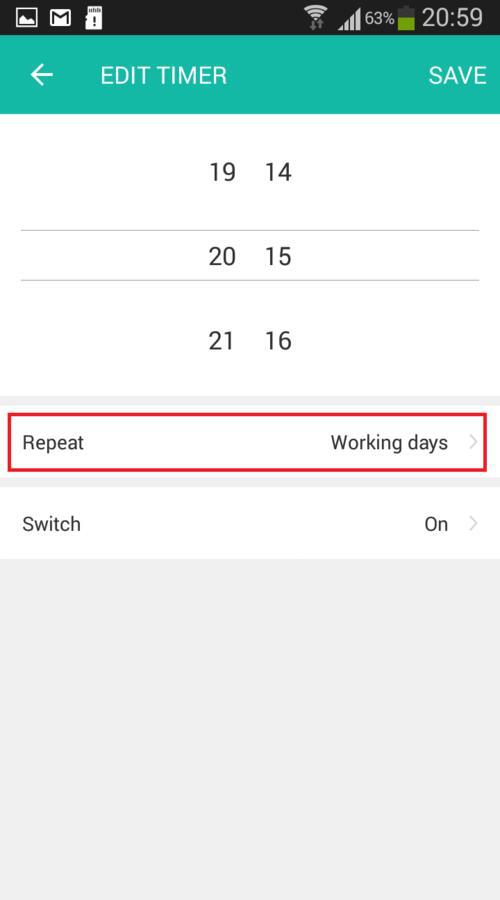
Click Repeat and select the days you wish the light to turn on. I’ve selected just the weekdays.
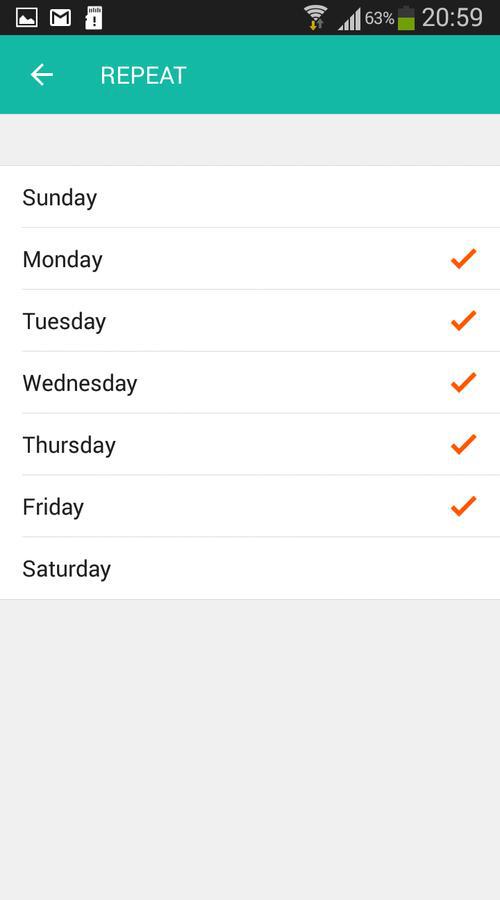
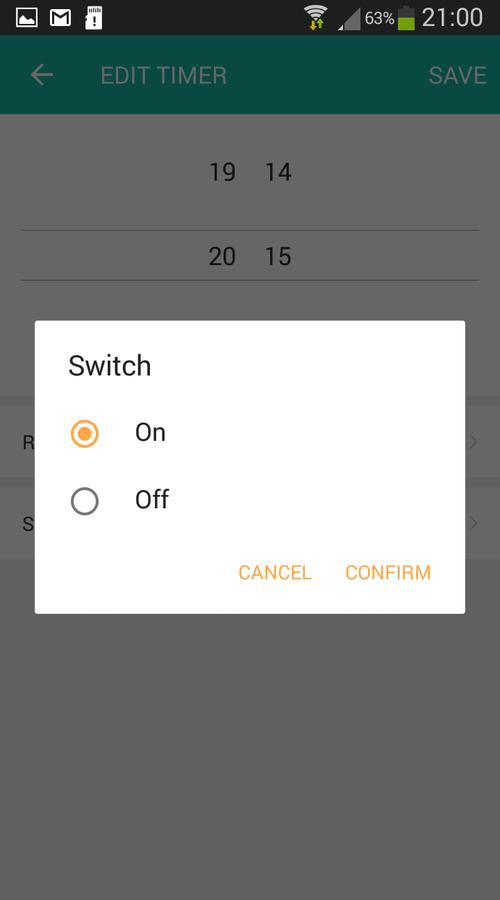
Step #3
Finally click Switch, select On and hit SAVE.
Of course, you can create as many of these timers as you like, enabling the light strip to turn on and off many times throughout the day. This I think is really useful as a security feature whilst you’re away from home.
More features
The Lombex smart LED light strip offers even more features, here they are:
- Grouping – When you own one or more Lombex bulbs or light strips, you can group them together and control their colors or toggle them on and off simultaneously.
- Control the color of the light strip and toggle it on and off using the attached controller instead of the app.
- Works with both Amazon Echo and Google Home devices.
- Check for firmware updates (I recommend you do this on a regular basis to get the latest security updates).
- Create your own scene – This is a bit like IFTTT in that you can get the light strip to turn on and off under certain conditions. For example, if the temperature is rises above 20 degrees, you can turn the light strip on. There are other preset conditions too that you can select from including humidity, weather, air quality and sunrise/sunset.
- In addition to creating your own scene, the light strip now actually works with IFTTT but currently it’s limited to just ON/OFF functionality, with more features to come. To use the IFTTT functionality, use IFTTT Smart Life.
Pricing
In terms of pricing then, the Lombex smart LED strip is not the cheapest on the market, but neither is it the most expensive.
At the top end of the price range you’ve got the LIFX Z (Starter Kit) Wi-Fi Smart LED Light Strip (Amazon, #CommissionsEarned) priced around $78 and the Philips Hue LightStrip (Amazon, #CommissionsEarned) priced around $72.
At the bottom end of the range you’ve got the YEELIGHT Smart Wifi LED Light Strip (Amazon, #CommissionsEarned) priced around $30.
And in the middle of this price range, is our Lombex smart LED strip (Amazon, #CommissionsEarned) priced around $40 for 2m of LED’s, which I still think is good value for money.
If you want the 5m Lombex light strip (Amazon, #CommissionsEarned) then you’re looking at around the $70 mark.
Of course one of the best things about Lombex products is that they work independently without a bridge, so there’s no extra expense involved there.
Pros
The Lombex light strip, whilst not the cheapest available, is considerably cheaper than the Philips Hue and the LIFX equivalents.
Secondly, it’s really easy to setup, and I’ve outlined the steps above that you need to take, to show you how easy it is.
And finally it’s great fun to use! I still find it amazing that you can control these smart devices from your smartphone no matter where you are in the world.
I also like the cozy atmosphere that you can create in your living room when you choose some of the warmer colors. It really does set the mood and allows you to feel more chilled out and relaxed when you’re watching TV in the evening.
The LED’s are quite bright too, and will easily light up a medium sized room. Of course you always reduce the brightness using the app.
Cons
I haven’t really come across anything that I don’t like about the Lombex light strip apart from, like all the Lombex products I’ve tested, the app only likes 2.4 GHz WiFi. This shouldn’t be too much of a problem however, as you can change your WiFi to 2.4GHz from 5GHz in your phone’s settings. You can also create a separate 2.4GHz channel on your router like I have so that the app works flawlessly.
Security
In terms of security then, I decided once again to look at the network traffic using Wireshark to find out if my WiFi password was being leaked in plain text because you have to provide your password on initial setup.
Fortunately, the traffic on the network flowing to and from the light strip appears to be ENCRYPTED gibberish and does not leak any passwords in plain text, which is a very good sign.
I also like the fact that you can check for firmware updates from within the app, so if there are any vulnerabilities that need patching, the manufacturer can issue a fix.
Finally it is important that you choose a strong password when you do register through the app, because this light strip is controllable from anywhere, so if anybody did get hold of your password to access your account, they could potentially control your lights. Again though, if your password is strong enough, this shouldn’t be an issue.
My final opinion
Overall then, the Lombex smart light strip is reasonably priced (although not the cheapest on the market), and does exactly what you’d expect. The light strip adds a really nice atmosphere to any room without the need for a central hub.
So if you’re looking for a smart light strip but not willing to shell out for a Phillips Hue, then the Lombex light strip (Amazon, #CommissionsEarned) offers a fantastic alternative.
I’m rating this light strip at 4 out of 5.