I’ve been contemplating getting an Internet of Things device for a while now because I love technology and I still think there’s something magic about being able to control household items with a smartphone!
The thing is, they’re still expensive and I can’t really justify the cost of buying a never ending number of smart doorbell, IP cameras and the like.
But I was on Amazon recently and noticed that the cost of smart bulbs had reduced significantly since the last time I looked, so I decided to get one and review it.
The bulb I got was the Lombex smart LED bulb (Amazon, #CommissionsEarned). It’s an an Edison (E27) fit and you can change the color of it to whatever you like via the app, as long as you have a connection to the Internet.
Here’s what I thought about it:
Unboxing
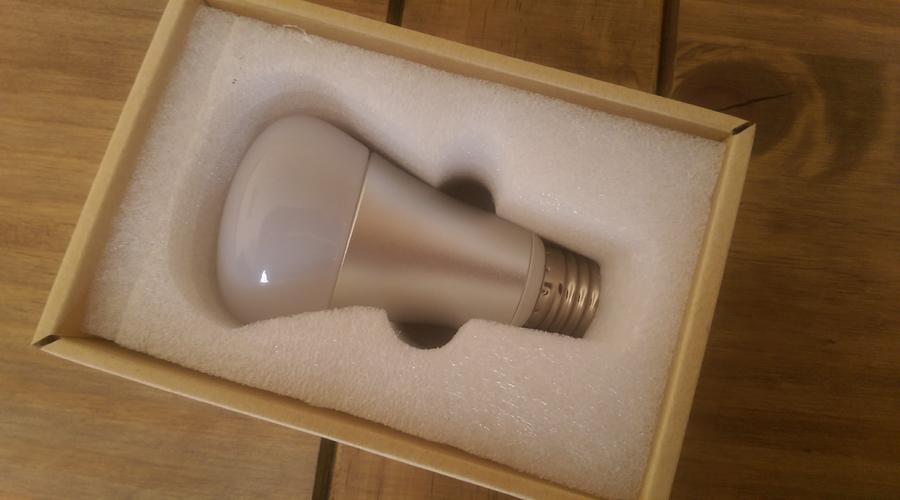
When the bulb arrived, it was well packaged in the standard Amazon packaging. Inside the Amazon packaging was the actual box that contains the bulb itself. The bulb was quite neatly packaged and the box is really easy to get into (completely fuss-free packaging) – you simply slide the outer sleeve of cardboard over the box which the bulb is packaged in.
Removing the outer cardboard sleeve reveals the bulb itself which sits securely in the center of a piece of spongy foam-like material, so there’s no chance of it moving around in transit.
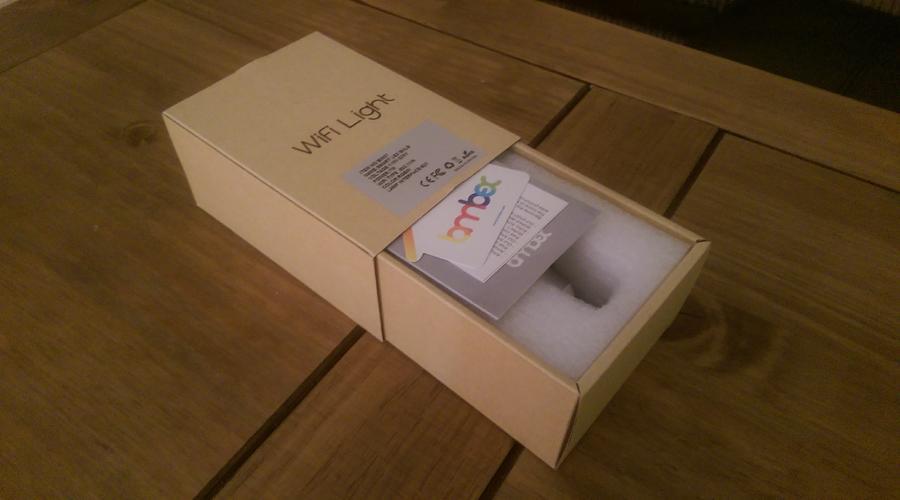
Also contained in the box is a users manual containing a list of features and also how to get it up and running, although I’ll be covering the setup later in this post.
You also get an ‘Using Amazon Echo Guide’ which guides you through setting the bulb up with an Amazon Echo, if you have one of those. Basically, you’ll need to enable the Lombex skill and search for new devices.
Build quality
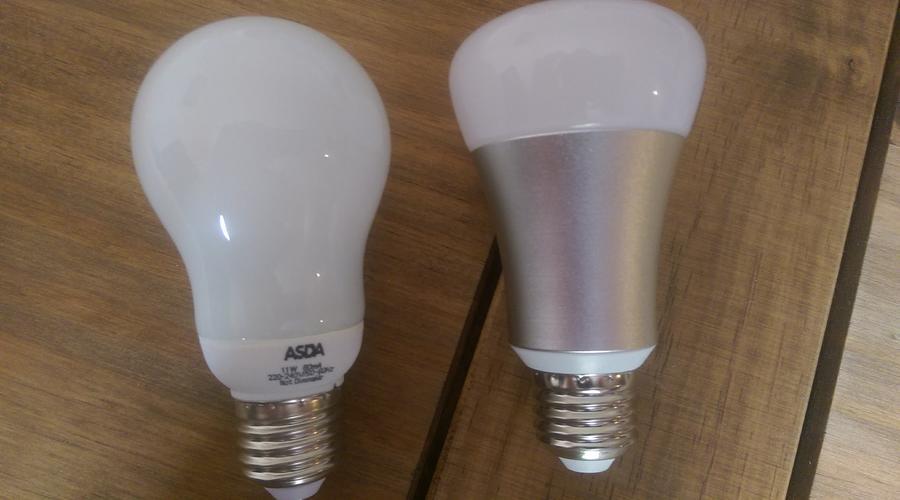
The bulb itself looks very similar to a Philips Hue bulb, has a little bit of weight to it, so it feels like a premium bulb.
The top of the bulb is actually made of opaque plastic rather than glass, which I suppose is good from a safety perspective. Most normal bulbs (filament bulbs) you buy these days are actually glass, so it will be interesting to see how bright the actual bulb is later on when I come to switch it on. Having said that the bulb itself uses an LED, which are a lot brighter than filament type bulbs.
The main body of the bulb looks like it’s made of brushed aluminium which gives the smart bulb more weight than a standard light bulb. I guess this is where the electronics live which allow it to communicate with your router.
And finally at the base of the bulb, you’ve got the standard Edison Screw (E27) fit at the bottom. I’m replacing this smart bulb with an ES GLS standard bulb, so the fit is exactly the same. If you find that your lamp is Bayonet fit, don’t worry, just get yourself an Edison to Bayonet converter (Amazon, #CommissionsEarned).
Who’s it for?
The best thing about this bulb is that it’s not just for geeks or for those fanatical about technology. Anyone that can use a smartphone, can use this bulb. I’ve even got my daughter using the app to help teach her the colors!
The bulb is also useful for anyone that wants to add a bit of security to their home. In fact, many people have timers attached to lamps to enable them them to turn the lights on at certain times – this bulb basically takes the humble timer into the 21st century.
The bulb adds a bit of extra atmosphere or mood to your room too. For example you can choose between different modes such as night mode for when you’re watching TV in the evening, reading mode, soft mode and also party mode which is perfect for when you’re listening to music or having a few friends round for a party.
How to set it up
Setup couldn’t be easier, here’s the steps I took:
Step #1
The first step is to download the app. If you have an Android device, then you download the Android app from the Playstore here.
Alternatively, if you have an iOS device, then you can get the app from app store here.
I have an Android device, but the steps should be almost identical for iOS devices.
Step #2
Once you’ve downloaded the app, open it and then hit Register.
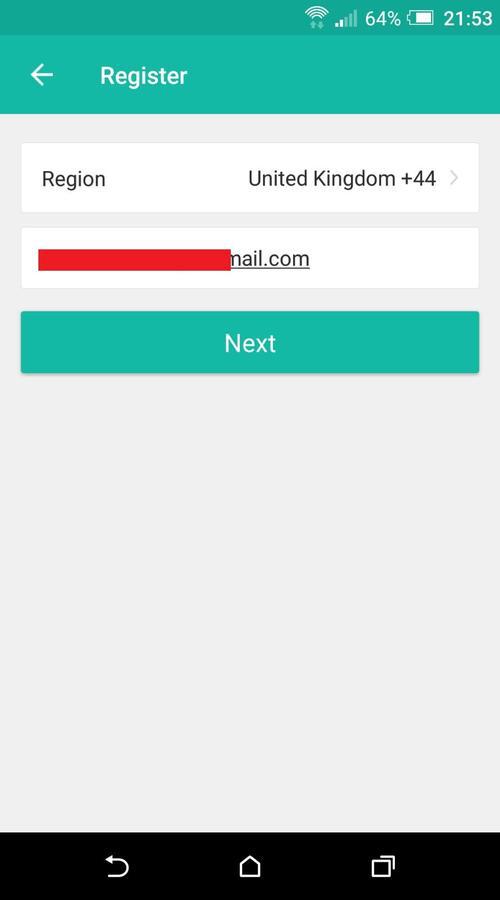
Step #3
On the next screen, enter either your mobile number or email address and hit Next. I chose to enter my email address.
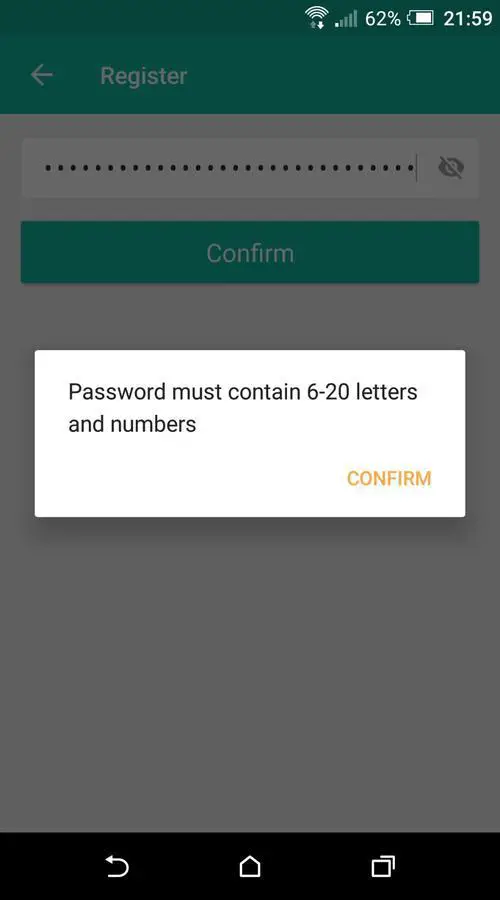
Step #4
On the next screen, enter a secure password and hit Confirm. I tried to use a 32 character password here as I use LastPass to remember my passwords, so I was a bit disappointed to find my password had to be a maximum of 20 characters.
Still, as long your password is complex enough and has a mix of letters and numbers, then you should be fine. If you’re unsure, test the strength of your password.
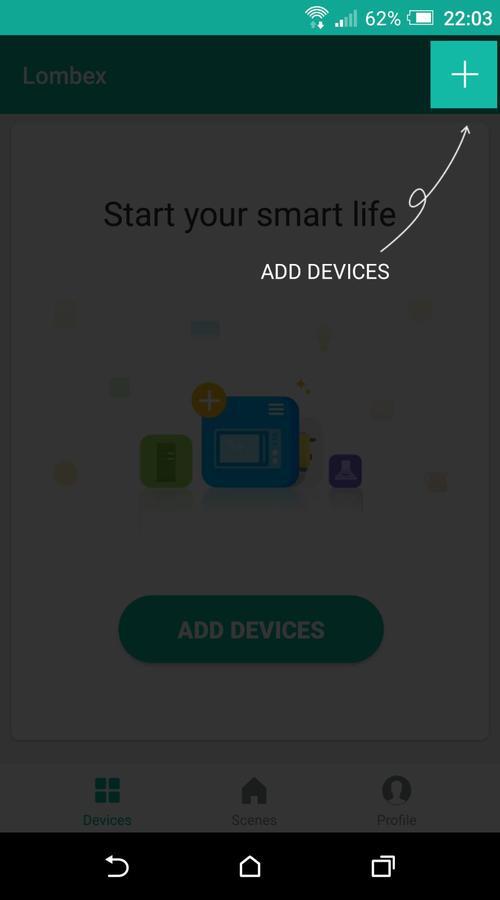
Step #5
Once you’ve entered your password, you’ll see the following screen where you’ll be directed to add your device. Go ahead and hit the green ‘plus’ icon in the top right corner, or hit ADD DEVICES.
Step #6
Replace your current bulb with your new Lombex smart bulb and power on the lamp.
Step #7
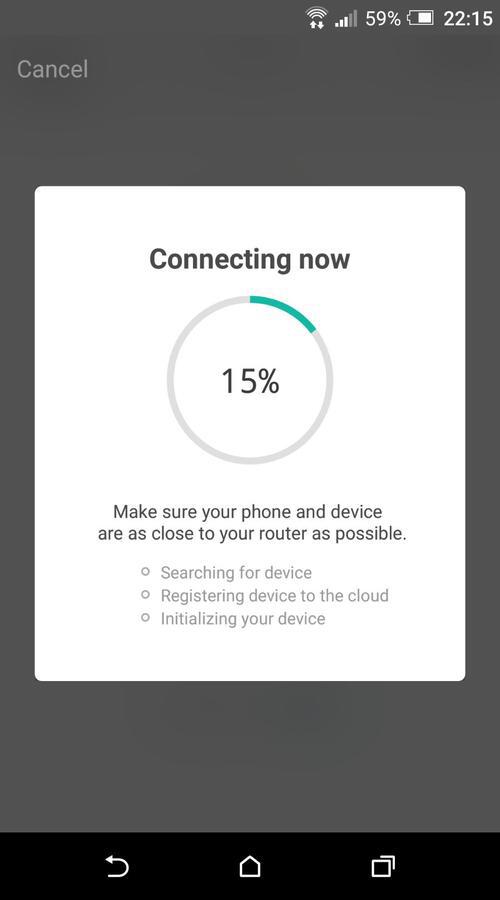
Now immediately after powering on your lamp, the bulb should start flashing on and off – this is perfectly normal and indicates that the bulb is in pairing mode and ready to be connected to your WiFi. When you see the bulb flash, hit the Confirm indicator rapidly blink button on the app.

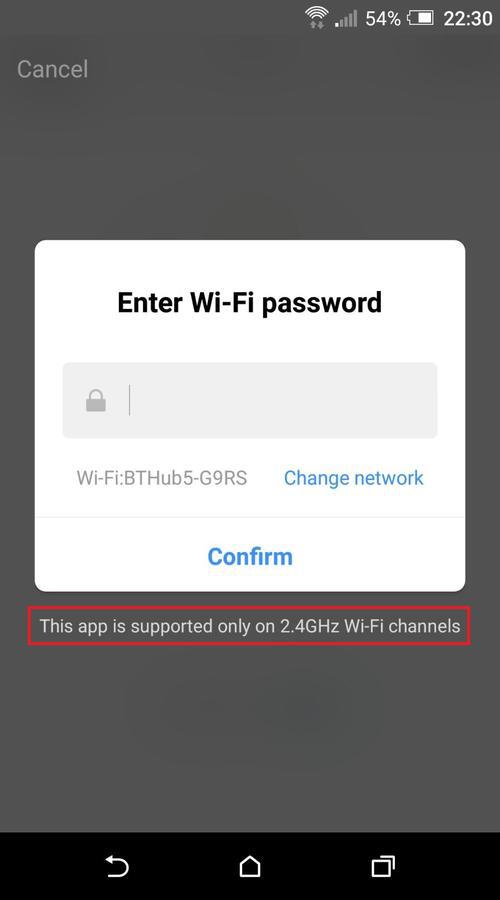
Step #8
On the next screen, enter your WiFi password and hit Confirm. Please note the message at the bottom here, that the app only works on 2.4GHz WiFi. Don’t be alarmed by this, you can instruct your phone to use this frequency only in your device’s WiFi settings.
You should now see a progress indicator as it tries to connect to your WiFi router:
Step #9
Finally you should see “Successfully added 1 device(s)”, and if you’ve got this far congratulations, your device is fully set up. You can rename the bulb at this point if you like, if you decide not to, then you can always change it later in the settings.
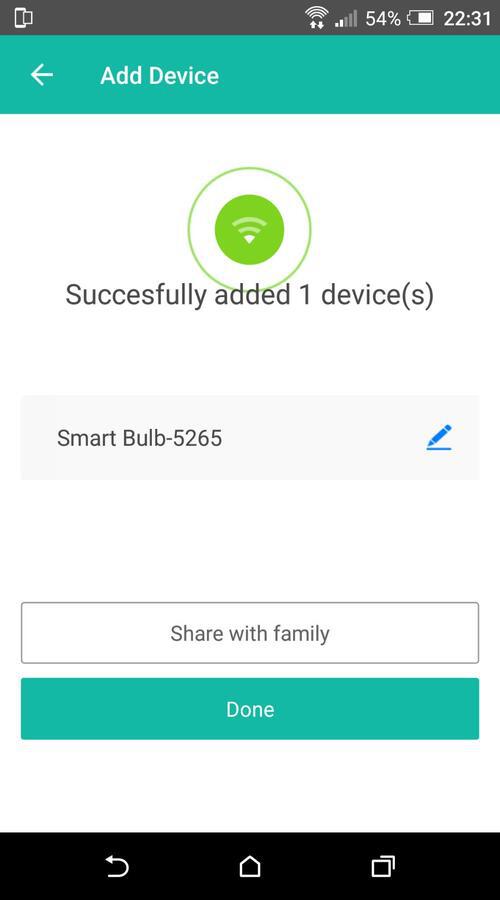
Hit done and then you can start interacting with your device. You should now see the following screen. Tapping the image of the bulb at this point will toggle the bulb on and off.

Note: If you do have any issues, then double check that you’ve entered your WiFi password correctly, that your phone is connected to your WiFi and that you’re within close proximity to your router.
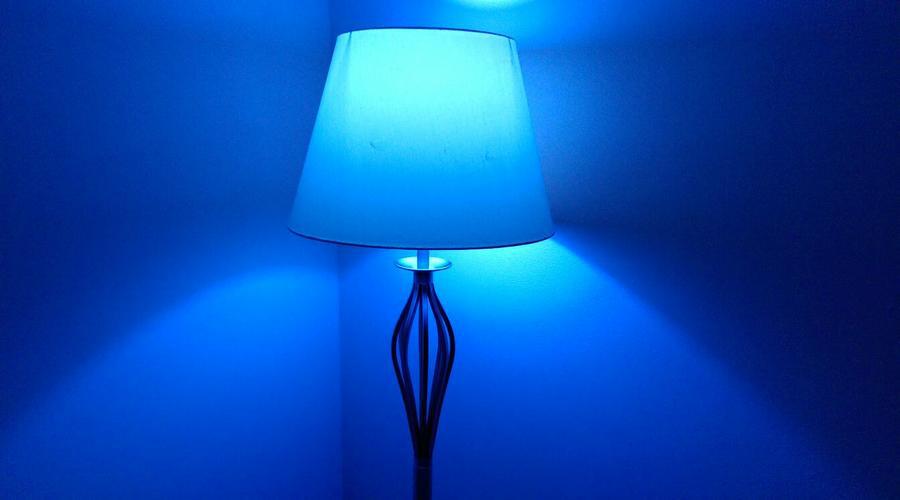
And here’s an image of my awesome bulb working 😉
Features
OK, so once the bulb is set up, you’re done. You don’t need to go through that process again. Even if you uninstall the app and reinstall it again, the connection between the bulb and your router remains established, so you don’t have to enter your WiFi password again.
When you’ve got the bulb set up, you’ve got a number of options/modes available in the app, besides being able to toggle the bulb on and off.
Let’s look at each of them:
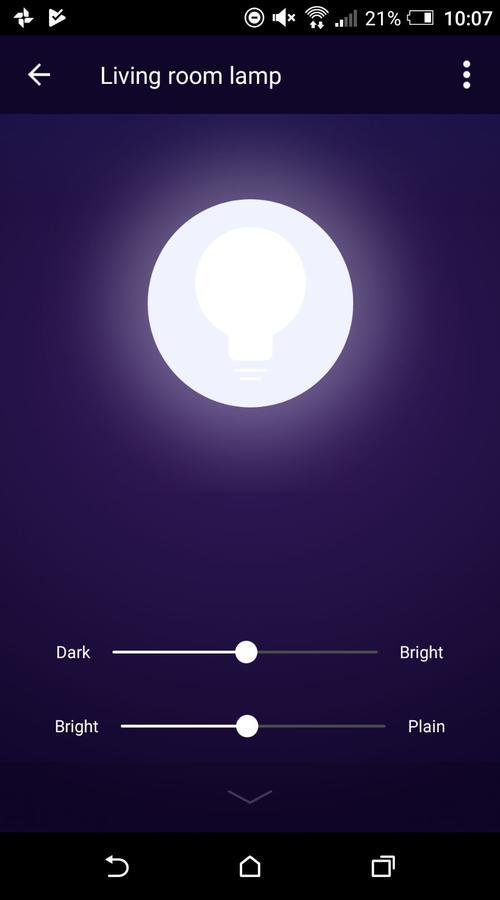
White
This is the mode you want if you just want a standard white light without any fancy colors. It has two sliders which you can control. The first slider simply enables you to control the brightness of the bulb, far left being the darkest (Dark), far right being the brightest (Bright).
The second slider, the one underneath the first, basically gives you different shades of white. Far left (Bright) gives you a darker shade of white and the far right (Plain) gives you a much whiter white.
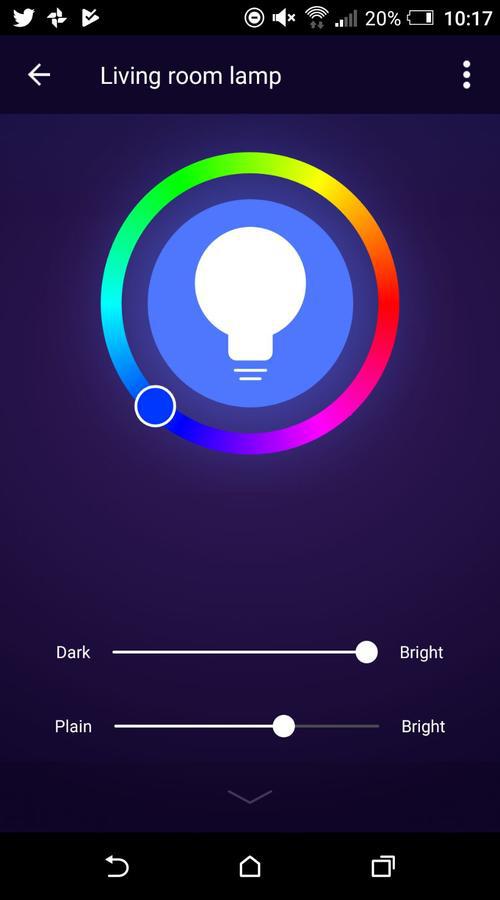
Color
Next up is color, and as you’d expect, you can change the color of the bulb to whatever you want. You simply move the white circle to the color you want. According to the product features, there are 16 million colors to choose from, though I think that’s the capability of the bulb as the app certainly doesn’t offer that many colors. There’s more than enough colors to choose from though, so it’s not really an issue.
Similar to ‘white’ mode, you get two sliders. The first slider simply enables you to control the brightness of the bulb, far left being the darkest (Dark), far right being the brightest (Bright).
The second slider, the one underneath the first, basically gives you different shades of the color that you have chosen. Far left (Plain) gives you a lighter shade of your chosen color and the far right (Bright) gives you a darker shade of color that you have chosen.
Scene
This is where it gets a bit more interesting. You can select a particular ‘scene’ which will give you a preset color for your bulb.
So for example, say you’re reading a book, you can select ‘Reading’ which will give you a pale blue light.
If you’re having a party or listening to music, then you can select ‘Party’ which gives you a pale yellow color. If you’re having a disco, you could select ‘Rainbow’ which will cycle through an array of different colors or ‘Gorgeous’, which again will cycle through various different colors but the transition between each color is a lot smoother.
There are eight preset modes available for you to choose from in total: ‘Night’, ‘Reading’, ‘Party’, ‘Leisure’, ‘Soft’, ‘Rainbow’, ‘Shine’ and ‘Gorgeous’.
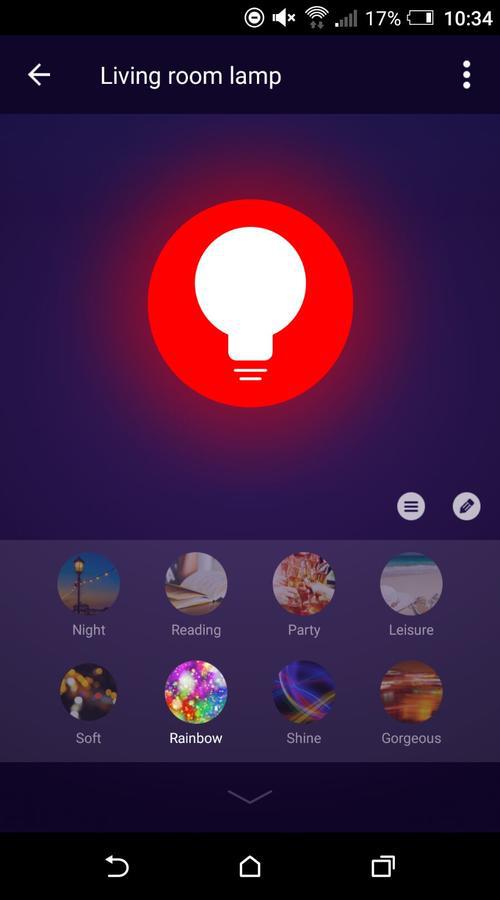
It’s worth noting actually, that the latter four of these modes, ‘Soft’, ‘Rainbow’, ‘Shine’ and ‘Gorgeous’ can be configured further by selecting the ‘hamburger’ icon. When you select this icon, you get three additional sliders:
- ‘Dark’ -> ‘Bright’ which controls the brightness of bulb
- ‘Plain’ -> ‘Bright’ which controls the shade of the colors
- ‘Slow’ -> ‘Fast’ which controls the speed at which colors transition from one to another.

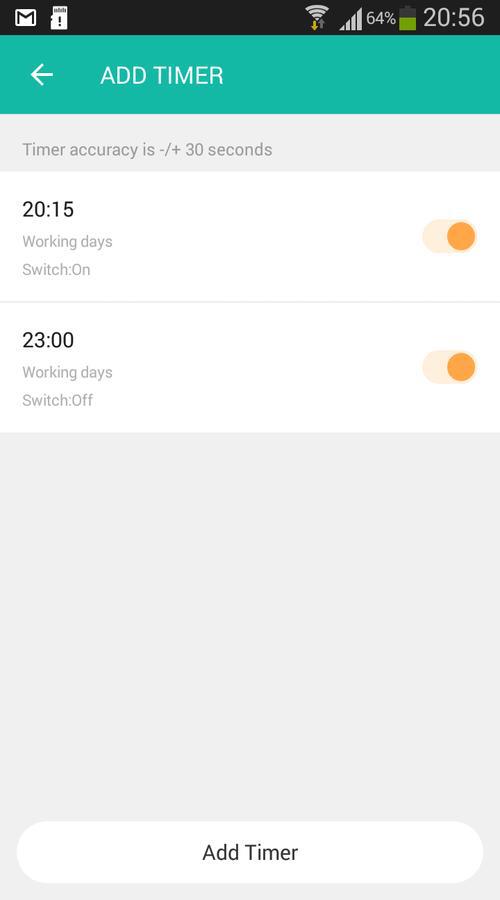
Timer
Should you wish to turn the lights on and off at specific times, then you’ve got an easy to use timer function.
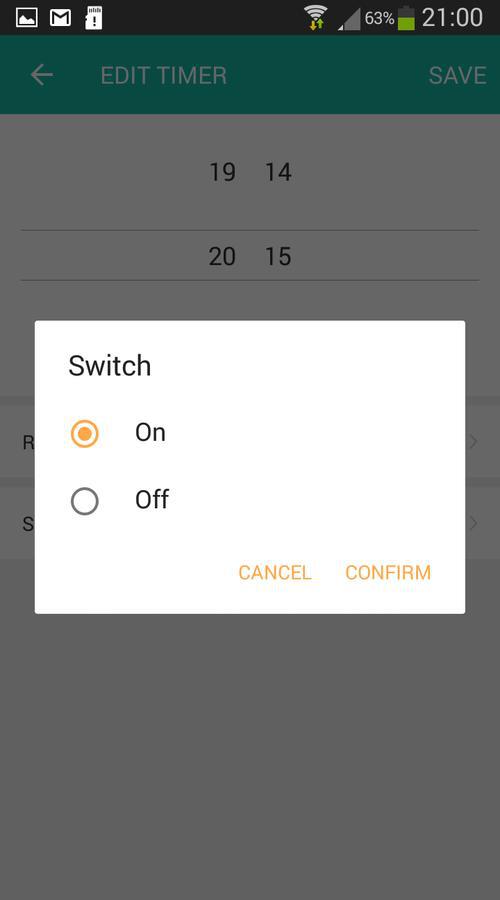
Here’s the steps I’ve taken to get the bulb to turn on at 20:15. You can follow the same procedure to get the bulb to turn off again at whatever time you choose (using switch Off instead of On).
I’ve specified these timers to work only on weekdays, but you can select everyday if you like or particular days, it’s really up to you, it’s as flexible as you would like it to be.
Step #1
Click Add Timer, and choose choose 20:15 or whatever time you wish the bulb to turn on.
Step #2
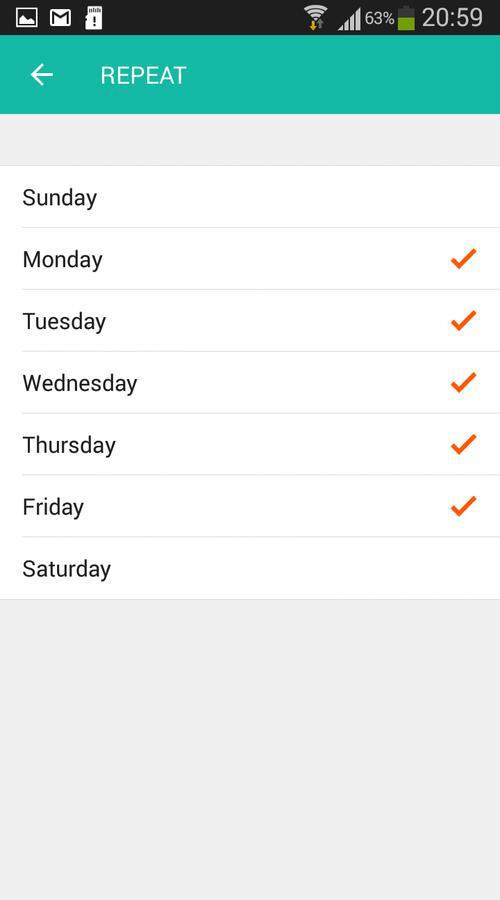
Click Repeat and select the days you wish the light to turn on. I’ve selected just the weekdays.
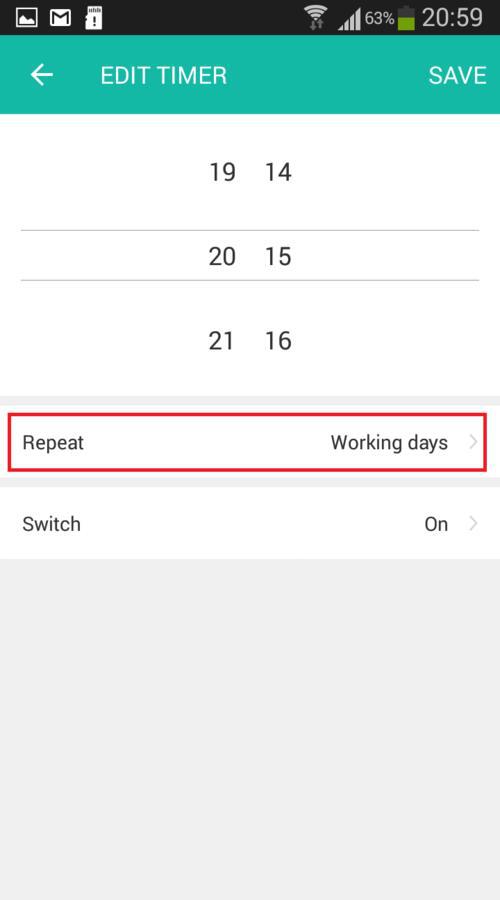
Step #3
Finally click Switch, select On and hit SAVE.
Of course, you can create as many of these timers as you like, enabling the light to turn on and off many times throughout the day. This I think is really useful as a security feature whilst you’re away from home.
More features
The Lombex smart bulb offers even more features, here they are:
- Group smart bulbs together. When you own more than one of these smart bulbs, you can group the together and control the color of the bulbs simultaneously.
- Works with both Amazon Echo and Google Home devices.
- Check for firmware updates (I recommend you do this on a regular basis to get the latest security updates).
- Create your own scene – This is a bit like IFTTT in that you can get the bulb to turn on and off under certain conditions. For example, if the temperature is rises above 20 degrees, you can turn the bulb on.
There are other preset conditions too that you can select from including humidity, weather, air quality and sunrise/sunset.
Pricing
The main reason I went for this bulb was because of the price.
The Philips Hue is currently the market leader in terms of smart bulbs, but given that you have to buy a Hue bridge to get the bulbs to work, it starts becoming expensive.
The Philips Hue starter pack (Amazon, #CommissionsEarned) is around $140 and for that you get three bulbs and the bridge. However, you can get the Lombex smart bulb (Amazon, #CommissionsEarned) for around $20 and it works independently without a bridge.
Enough said really.
Pros
As I’ve said above, the main thing I like about this smart bulb is the price. For a smart device, it’s cheap, and considerably cheaper than the Philips Hue.
Secondly, it’s really easy to setup, and I’ve outlined the steps above that you need to take, to show you how easy it is
And finally it’s great fun to use! I still find it amazing that you can control a bulb from your smartphone no matter where you are in the world.
I also like the cozy atmosphere you can create in your living room when you choose some of the warmer colors. It really does set the mood and allows you to feel more chilled out and relaxed when you’re watching TV in the evening.
Cons
There’s not really any negative things I can say about this bulb. But having said that, no product is perfect.
I noticed that the app only likes 2.4 GHz WiFi. This shouldn’t be too much of a problem however, as you can change your WiFi to 2.4GHz from 5GHz in your phone’s settings. You can also create a separate 2.4GHz channel on your router like I have so that the app works flawlessly.
The only other negative I can think of is that it doesn’t have any support for IFTTT. Having said that, there are some custom scenes that you can create for yourself which will allow the light to switch on and off based on certain conditions which I highlighted above.
Security
In terms of security then, I decided to look at the network traffic using Wireshark and find out if my WiFi password was being leaked in plain text because you have to provide your password on initial setup.
Fortunately, the traffic on the network flowing to and from the smart bulb appears to be ENCRYPTED and does not leak any passwords in plain text, which is a very good sign.
I also like the fact that you can check for firmware updates from within the app, so if there are any vulnerabilities that need patching, the manufacturer can issue a fix.
Finally it is important that you choose a strong password when you do register through the app, because this smart bulb is controllable from anywhere, so if anybody did get hold of your password to access your account, they could potentially control your lights. Again though, if your password is strong enough, this shouldn’t be an issue.
Alternative/Similar Products
If a well known market leading brand is important to you, then go for a Philips Hue (Amazon, #CommissionsEarned). It’s expensive, but in the starter pack you do get three bulbs and a bridge. Also, if you decide to get more Philips products down the line, then you can use the same app with them all.
Another good alternative is the LIFX WiFi Smart LED Light Bulb (Amazon, #CommissionsEarned). This is cheaper than the Hue but more expensive than the Lombex smart bulb that I’ve tested. This bulb also supports dimming.
My final opinion
For me, the Lombex smart bulb (Amazon, #CommissionsEarned) does exactly what it says on the tin. You’ve got a bulb and an app which you can use anywhere to set the color of the bulb, toggle it on or off without using a central hub.
It would be great if the bulb supported 5GHz WiFi and IFTTT but considering the price, I can’t really complain too much.
To sum up then, the Lombex smart LED bulb may not be a well known brand, and it may not be of the same quality as the Philips Hue (it’s not far off though), but I think it offers a fantastic alternative.
It does everything you’d want a smart bulb to do, works brilliantly with Alexa, and has a wide range of colors. It is also very easy to set up.
Considering that it costs considerably less than the Philips Hue, it’s hard not to overlook its minor flaws.
