Image credit: Albaniaman (Own work) [CC BY-SA 3.0], via Wikimedia Commons
I’ve got a top tip for you guys. When you go to a website and you have to login, whether it’s to access your Facebook account or do your online banking, your password get’s converted to a string of asterisks (like this ********).
And for good reason, it prevents people from looking over your shoulder and stealing your password.
The problem is, if you’ve got a decent password that’s hard to guess, it’s very easy to make a mistake and type the wrong password.
Some websites give you the opportunity to show the password in plain text so that you can check what you’ve typed in before you hit login, but most don’t.
In this post I’m going to show you how you can use the developer tools in your browser to reveal the password you have just typed in.
Don’t be put off by the words ‘developer tools’ by the way, it’s really easy to do and I’ll show you step by step how to do it in the most popular browsers.
What you’ll learn
- How to reveal hidden passwords in Google Chrome
- How to reveal hidden passwords in Mozilla Firefox
- How to reveal hidden passwords in Microsoft Edge and Internet Explorer
Your password on any site is generally stored in an “Input” field in the website’s HTML code.
There are different types of HTML Input fields for storing different types of information. The common ones are “text” and “password”.
Text input fields leave the input completely intact when you type something into them, but “password” input fields convert each character that you type to an asterisk.
What I’m going to show you now is how to change the type of an input field from “password” to “text”, so that you can see exactly what you typed in and correct any mistakes you may have made.
Let’s look at Google Chrome first:
How to reveal hidden passwords behind asterisks in Google Chrome
Step 1
Go to any website in Chrome that allows you to enter your password and navigate to the login page. In this example, I’m using Facebook.

Step 2
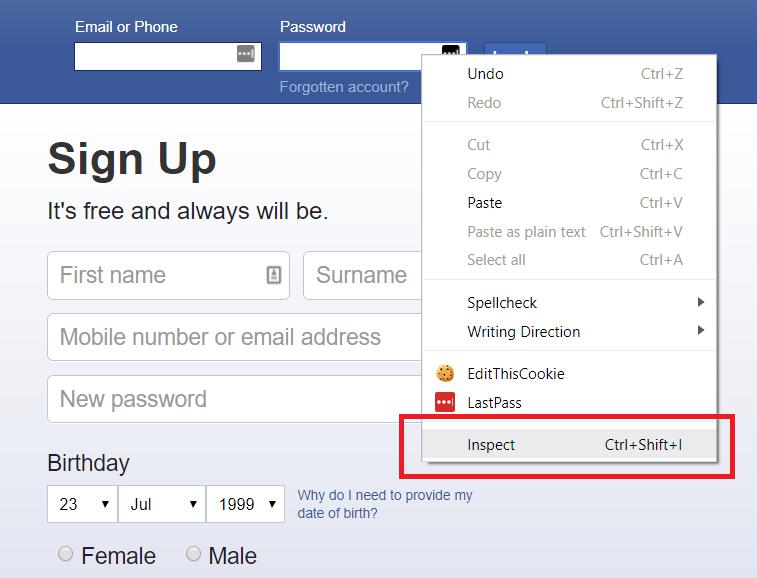
Right-click on the password field and when the context menu pops up, click on Inspect. Make sure that you actually right-clicked on the password box itself, otherwise when you click “Inspect” it can sometimes be difficult to find the input field that we want to modify.
Step 3
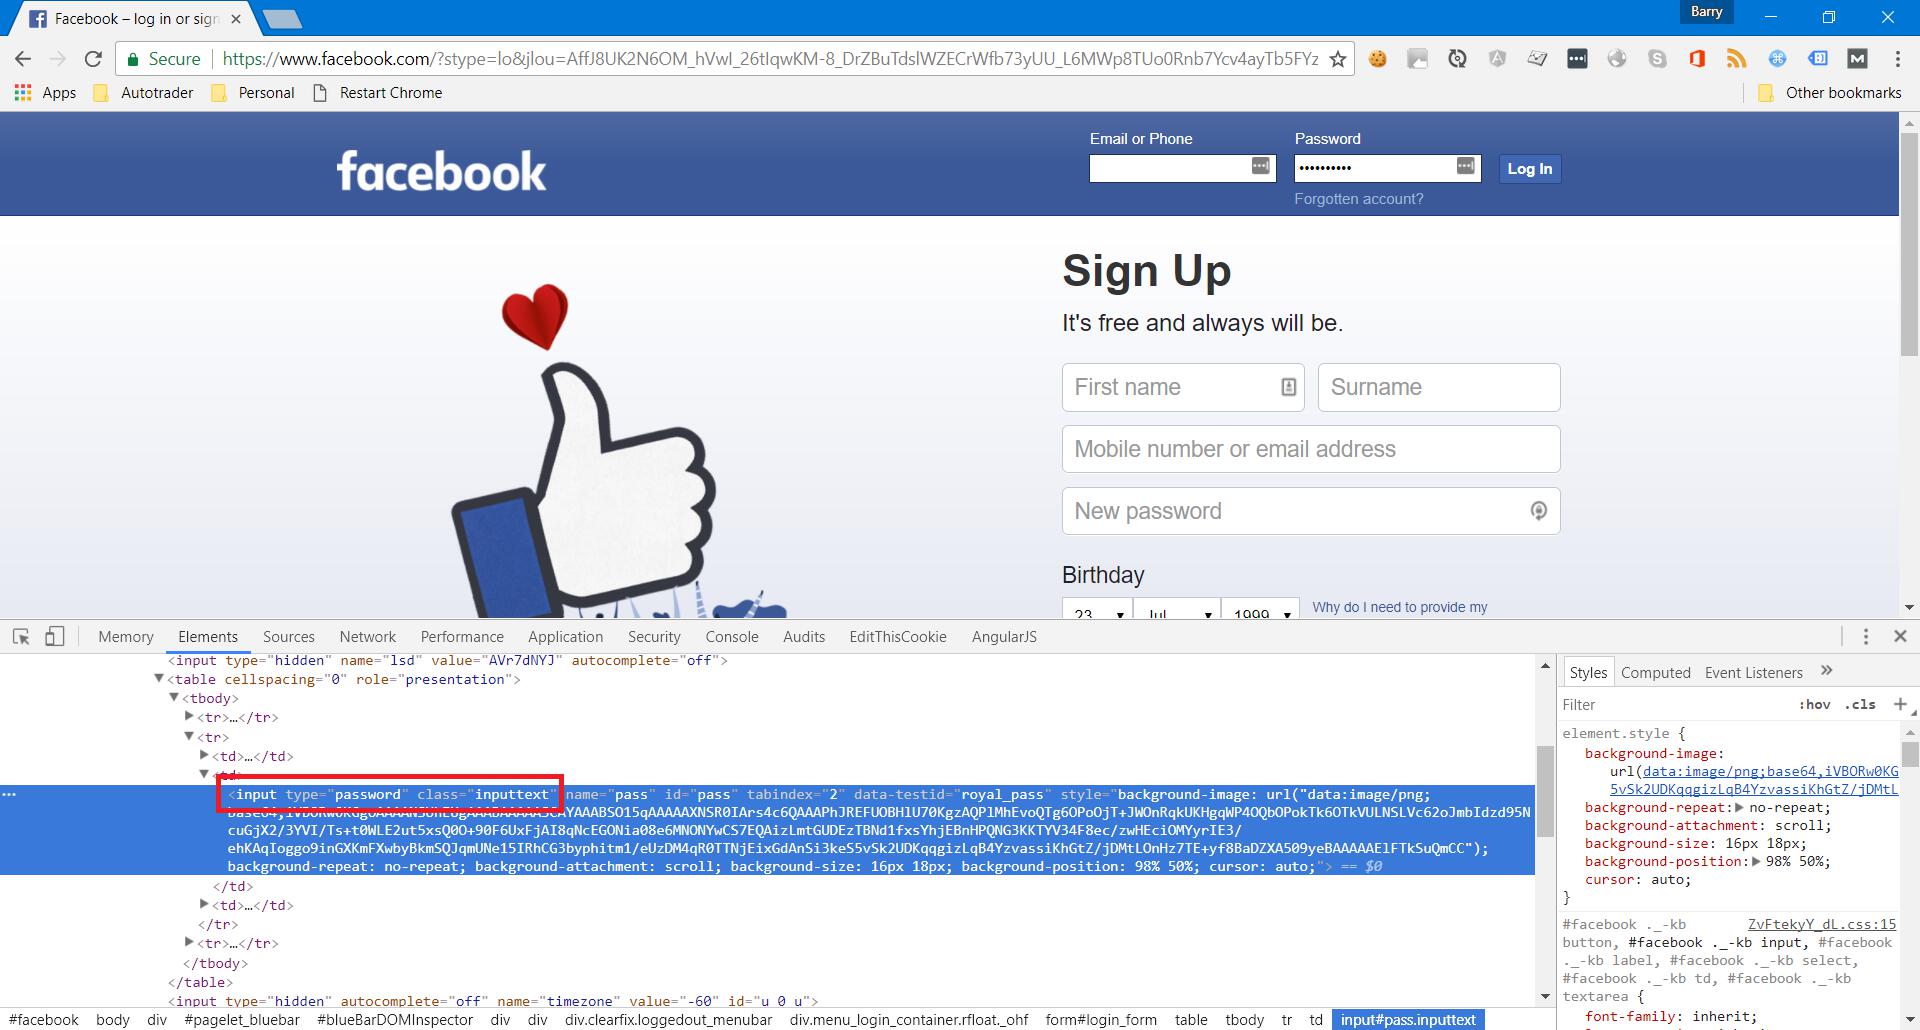
When you click “Inspect”, a window will cover the bottom quarter of your screen containing the actual HTML code for the website under the “Elements” tab.
Don’t worry about what this all means, just look at the bit that’s highlighted in blue, which is the password input field.
Step 4
Look for where it says type=”password” and then double click on it. This allows you to edit the type of the input field
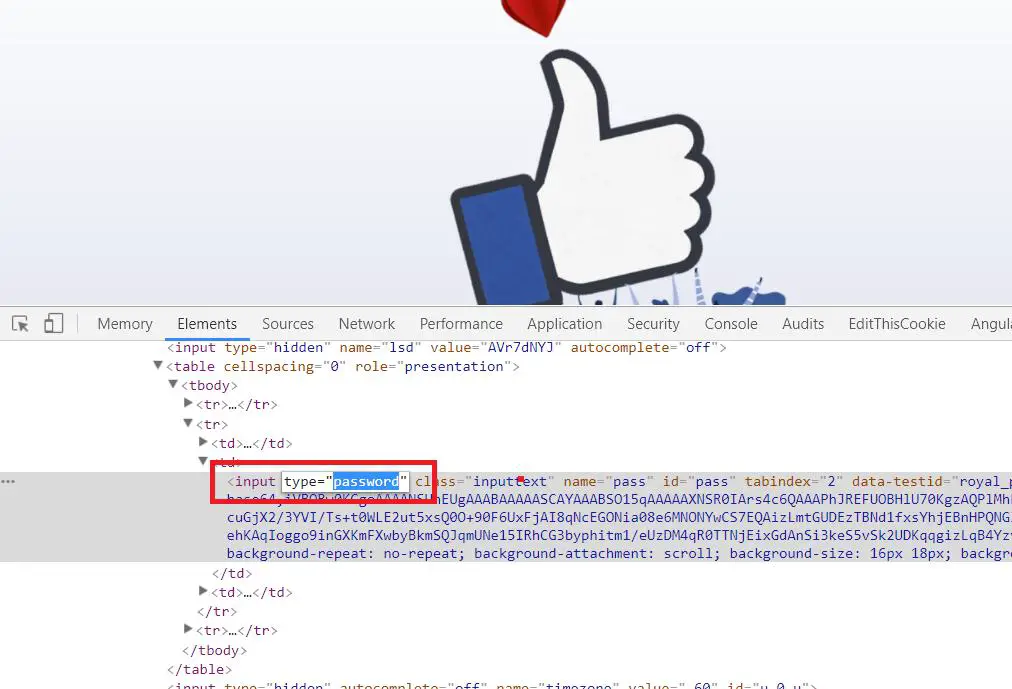
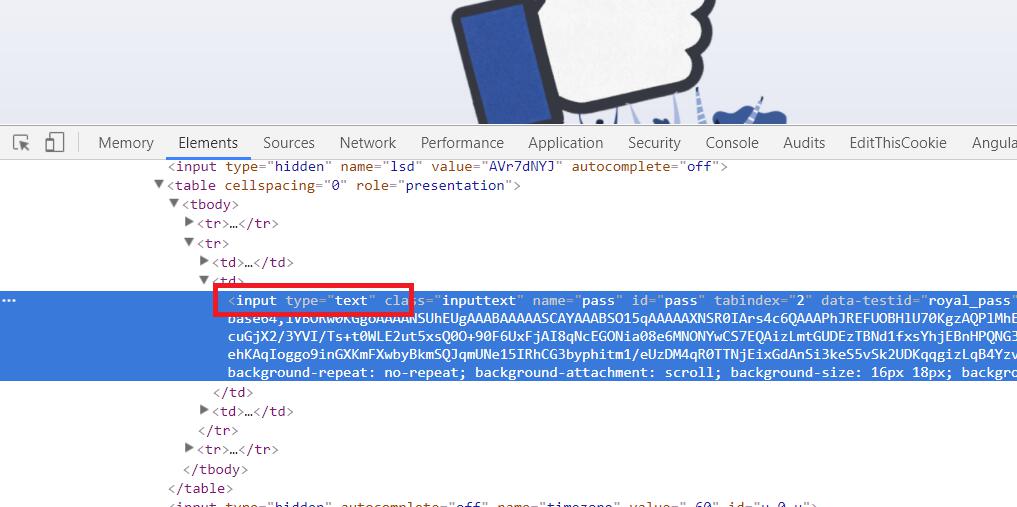
Replace the word “password” with the word “text” so that it now shows type=”text”.
When you’ve done this, hit Enter.
Step 5
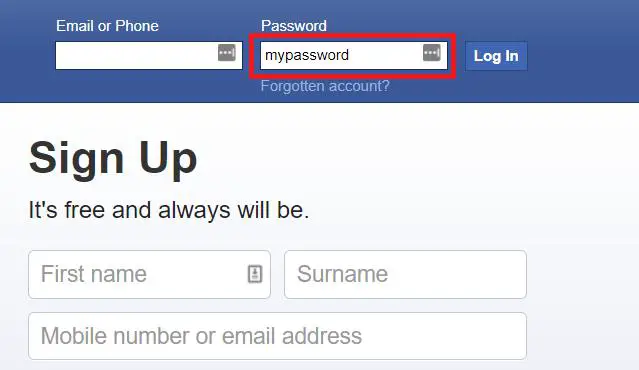
If you’ve completed steps 1-4 successfully, you should now be able to see your password in plain text!
How to reveal hidden passwords behind asterisks in Mozilla Firefox
The process of revealing a password in Firefox is very similar to Chrome, with some slight differences in terms of the developer tools. The concept is the same however.
Step 1
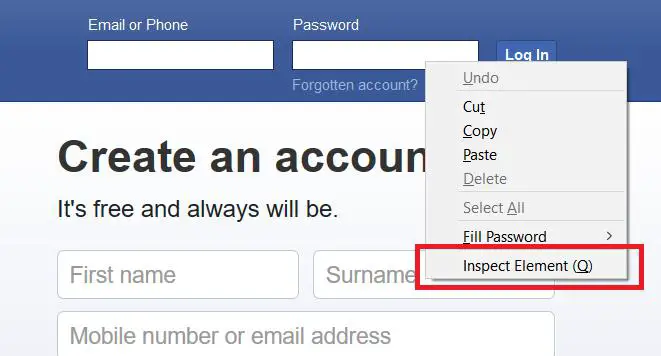
Right-click on the password field and when the context menu pops up, click on Inspect Element (similar to the Chrome example).
Step 2
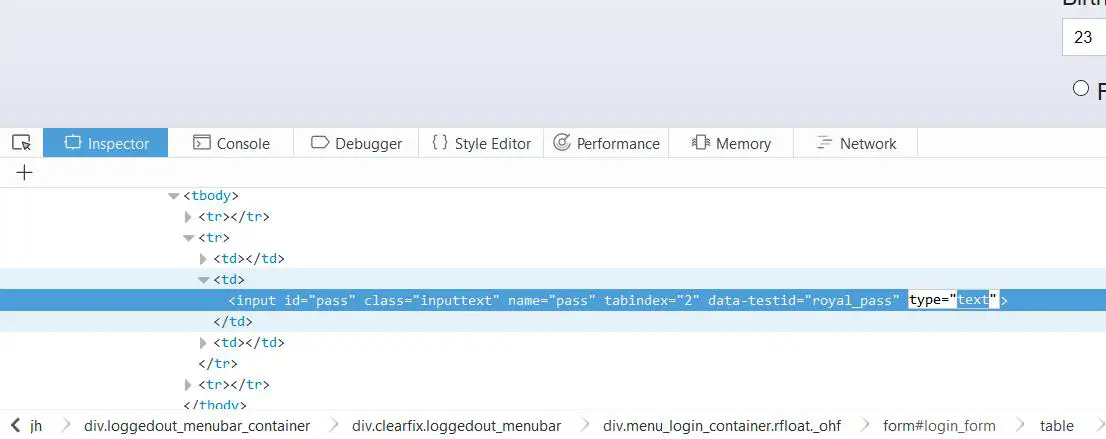
Make sure that the “Inspector” tab is selected, although this should be selected by default. Again, just look at the bit that’s highlighted in blue, which should be the password input field.
Step 3
Just like in the Chrome example, look for where it says type=”password” and then double click on it. This allows you to edit the actual code.
Replace the word “password” with the word “text” so that it now shows type=”text”.
When you can see this, hit Enter.
Step 4
If you’ve done it correctly, your password behind the asterisks should be revealed.
How to reveal hidden passwords behind asterisks in Microsoft Edge and Internet Explorer
Surprisingly the process is exactly the same in Edge and Internet Explorer.
Again, just follow the steps above i.e. right-click and select Inspect Element and change the input field type to “text”.
The code is displayed in the “DOM Explorer” rather than “Elements” or “Inspector” like in Chrome and Firefox respectively, but it’s essentially the same. It’s just an area where you can view a website’s HTML and CSS code and modify it locally in your browser.
Of course it’s not just the type of an input field you can modify, you can modify any of the code that you can see in your browser.
Have a play around in this area and have a bit of fun by modifying bits of a website’s code. Maybe alter a headline or two on a news website and have a laugh with your friends with your new found skills!
Of course it doesn’t really alter the code of a website, only you can see the changes you’re making and once you refresh, your changes will be removed.
Wrapping up
So there you go, hopefully this tip should prevent you from having to retype your password if you made a mistake.
I hope I have explained this well and in plain English and hopefully you’ve learnt a little about HTML.
Cheers!
Baz
