Whether you’re searching for important information about the pandemic or you’re looking for the Abrams cut of the latest Star Wars movie, there is very little that’s more annoying than the ‘site can’t be reached’ error on Chrome.
During this quarantine season and you stumble onto a website that has this error is probably about 10x more frustrating.
Luckily, it’s easy enough to fix this problem.
The difficult thing is, you’re going to have to do some research and perform a little bit of trial and error.
I understand that no one in their right minds is going to volunteer to do either research on this or to do the trial and error bit, but it has to be done if you want to get through to the site that you’re after.
Now, because your time is precious, I’ll save you the research bit by putting some of the most common fixes to the dreaded ‘site can’t be reached’ error.
So, if your fingers are sore from hitting that refresh button on Chrome, just read on.
The error could stem from a lot of different reasons.
Fortunately, the fixes you’re about to read are geared towards solving all of them with just one solution.
Lengthy diagnostics, therefore, are not required. I’ve put these in order of ease of execution:
Give Your Network Adapter an Update or RollBack
Windows, especially Windows 10 doesn’t have the best reputation when it comes to smooth system updates.
While this ‘final version’ of Windows, as they like to call it, is pretty cool and all, the constant updates can be both intrusive and sometimes even damaging to your system.
Your network adapter drivers are not safe from this.
A bad update can result in your network adapter driver getting screwed up.
If this is the case, a quick rollback or update can be all that you need to get back to browsing.
Here’s how to do it:
- Launch your computer’s Control Panel.
- Click on View network status and tasks.
- Click on the Change adapter settings button on the left side of the application.
- Right-click on the internet connection you’re currently using and select ‘Properties’.
- On the new window, find the ‘Configure’ button.
- A new window should appear where you can select a tab called ‘Driver’. Choose whether to roll back or update your driver.
Check if your desired website can be loaded successfully after the update.
If that doesn’t work, then move on to the next method on this list.
Restart Your DNS Client
From your desktop, click on the Windows button on your keyboard and type in ‘Services’. This should show you an app suggestion.
Launch that application. Scroll through the content and find ‘DNS Client’. It should be easy enough to find because the list is alphabetically arranged.
Right-click on that and select restart. The process should be quick.
After you’ve restarted the DNS Client, go ahead and give the erroneous website a check.
If it loads up properly, then your job is done. If it doesn’t, time to try the next one on this list.
Change the DNS Protocol
Machines, the internet included, communicate via numbers. So, typing words into your address bar shouldn’t really bring you anywhere.
Your network DNS is a nifty Rosetta stone of sorts that translates human language to machine speak.
If you haven’t changed it already, you’re most probably using one that’s provided by your internet service provider.
Sometimes, these ISP-provided DNS can’t correctly translate your instructions to the internet which is why some of these errors occur.
Fortunately, you’re not stuck with that one.
Google provides some of the most secure and easy-to-use DNS there is.
Here’s how to use it:
- Launch your computer’s Control Panel.
- Click on View network status and tasks.
- Click on the Change adapter settings button on the left side of the application.
- Double click on the internet connection that you’re currently using.
- Double-click Internet Protocol Version 4 (TCP/IPv4).
- Change the properties and enter 8.8.8.8 and 8.8.4.4 on the preferred DNS and alternate DNS server addresses accordingly. Make sure that you validate settings upon exit.
Check your desired website again and see if it works.
If it still doesn’t, then maybe a more intrusive method would work.
Be warned, however, that there may be unintended side effects that the next methods can cause to your system.
Clear Chrome’s History, Cache, and Cookies
Over the course of your internet usage, enormous amounts of data are downloaded and stored in your computer which could end up clogging up your browser.
This is because browsers, especially Chrome, automatically stores all your browsing history, cache, passwords, and cookies.
Your computer and browser should have more than enough memory to store them and power to sort through them at first.
But, it’s important to understand that they’re not unlimited.
We use our computers for years, sometimes even decades and data can build up really fast especially if you’re a heavy internet user.
That weird website you visited a couple of years ago might still be occupying some cache space on your browser right now.
All that data is surely going to cause some redundancies which can cause the browser to slow down and it may even cause the ‘site can’t be reached’ error.
If you suspect that this is the case, just clear your browser cookies, cache, and history.
To do this, follow these easy steps:
- Click on the triple-dot icon on the upper right side of the browser and select settings.
- From there, scroll down to privacy and security and click on ‘Clear browsing data’.
- You can customize which data you’d like to purge. You can, for example, just scrub all cache first before deleting anything else. But, for the sake of efficiency, I’d recommend that you just delete all three at once.

This should not only solve the ‘site can’t be reached’ issue, but it can also speed up your browser.
While purging data from your Chrome is one of the easiest things to do (you don’t even have to leave the app to execute it), there are repercussions to this method that a lot of us don’t want to have to face.
Logging you out of your social media accounts is one of them.
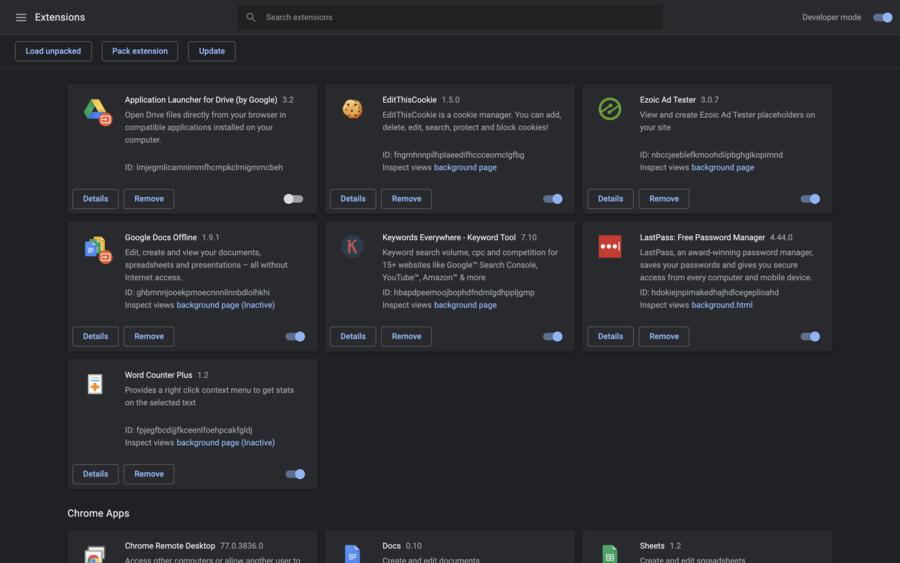
Disable Extensions and Plugins that Might Be Interfering with Your Browsing
Chrome has become such a staple in the world of internet browsing partly because of the vast market of plugins and extensions.
They personalize your browsing experience by adding functionalities that most of the other browsers don’t have.
There is, for example, an extension that compares the best deals online for online shoppers.
For e-commerce business owners, some plugins help you track which items are selling like hotcakes.
However, these extensions and plugins, with all the benefits that they offer, can also interfere sometimes with your browsing experience by preventing some websites from loading properly.
So, you might want to experiment by deleting them for the time being, which may help you load up your desired webpage.
Here’s how to do this:
- Launch your Chrome browser.
- Click on the triple-dot icon on the upper right side of the browser and select settings.
- Mouse over the ‘More tools’ from the menu and click on the ‘Extensions’ option.
- Select which extensions to delete or disable. I suggest disabling them all in the meantime.
- Close and restart your Chrome app.
This should do the trick if your extensions are causing your error. If not, then move on the next on this list.
Use Chrome’s Incognito
Another great option if you suspect that one of your extensions is messing up your browser is by using Chrome’s built-in Incognito mode.
If you choose this option, a new Chrome window will launch that’s both plugin and extension free.
It’s also not going to save your browsing history.
Here’s how to access this mode:
- Launch your Chrome browser.
- Click on the triple-dot icon on the upper right side of the browser.
- Click on the ‘new incognito window’ option.
Or, you could also press ctrl+shift+n.

Try A Different ISP
Sometimes ISPs can choose not to give access to specific sites or they might mistakenly ban a website.
If you think this is the case with the website you’re trying to access, then you can try to access it using a different ISP.
If you’re on a laptop, this should be easy enough to do. Just ask your friends if they’re using a different ISP and use the website on their Wi-Fi.
However, if you want to access the site on your desktop, then that can be a more difficult proposition albeit not an impossible one.
Reset Chrome Settings to Default
If purging history, cache, and cookies don’t work, then maybe your Chrome settings are causing the problem.
There’s a chance that you could have accidentally changed a couple of settings that are messing up with your browsing.
If that is the case, restoring your Chrome to default settings should be the quickest way to resolve it. Here’s how to do that:
- On your Chrome’s Omnibox/ address bar, type the following: chrome://flags/.
- Click reset to default
- Do a reboot of your computer
Go ahead and check the problematic website. If it still doesn’t load properly, then move on to the next method.

Do a Complete Reinstall and Start from Scratch
If none of the aforementioned methods work up to this point and you’re desperate, maybe a complete reinstall of Chrome would work.
At this point, you probably have nothing much to lose because you’ve already deleted all there is to delete and changed everything you can change back to default.
There are multiple ways to uninstall your Chrome. Here are a few of my favorites:
Direct from the Start menu
- Click on the ‘Start’ menu.
- Scroll down and right-click on ‘Google Chrome’
- Select uninstall and double-click on the Google Chrome option on the ‘Programs and Features’ application that automatically launched.
- Follow the instructions until you’ve completely wiped Chrome from your system.
Apps and Features
- Click on the start menu and type ‘Apps & Features’
- Launch the suggested application which should bring you to one of the windows from within your computer’s ‘Settings’ menu.
- Click on the Google Chrome icon and choose ‘Uninstall’
After deleting Chrome, go to Google’s official website and download the latest version of Chrome from there.
This should give you a stock version of the browser without any settings changed.
If that doesn’t help you load up the webpage successfully then your options are quickly running out.
Run a Virus Scan
Viruses don’t only cause pandemics in the physical world; it can also cause chaos in the virtual one.
One of the things it can do is to prevent you from accessing the internet or certain sites.
So, if you suspect that a computer virus is causing your browser to fail, then you should run a scan. A quick scan should be enough to find the most common ones.
Your laptop or computer may already have a third-party antivirus software pre-installed but, in case yours doesn’t rest assured that Windows comes with its own antivirus software.
Here’s how to run a scan with it:
- Launch system settings.
- Select ‘Update & Security’
- Click on Windows Security and search for Virus & Threat protection.
- Click on the Quick Scan button and the scan should commence from there.
If viruses are stopping you from accessing certain sites, they should appear in the scan.
Try a VPN
I was supposed to put this on the last item of the list because a lot of the good VPNs aren’t free.
My personal recommendation is IpVanish (#CommissionsEarned), however be sure to read more about my VPN recommendations here.
But, considering the potential cost of the actual last item on the list, then a couple of dollars shouldn’t be a problem.
Some sites are region-specific.
This means you can’t access it from regions other than where the site owners designate it.
Netflix, for example, makes some content available only for certain markets.
Have you ever tried accessing your account from let’s say, Asia?
It’s surely going to look different from the Netflix you’re used to in Europe or North America.
This might be the case for your browser’s failure to access certain websites too.
The websites themselves may just be unavailable in the current region you’re accessing it from.
Don’t let that discourage you. There are VPNs made specifically for this reason.
Installing a VPN on your computer masks your internet connection and lets you choose from which servers you can access it from.
If, for example, you choose to use a US server, websites are going to think that you’re accessing it from the US.
So, if you think the website you’re trying to access is locked to certain regions, then you may want to try accessing it with the specific region’s servers.
The alternative is you can physically go to that region and access the website from there.
Both options cost money. But, between a VPN subscription or a plane ticket, which one’s more worth it?
Temporarily Disable Antivirus
On the flip side, your anti-virus might also be preventing access from sites that it suspects are carriers of computer viruses.
This is a great feature that can prevent chaos from spreading through your system if you’re blindly accessing the website.
However, it can also be bothersome if you’re sure the site you’re trying to access isn’t a virus-laden one.
So, if you’re the latter, you can try to disable your antivirus while you’re using your desired website.
Be sure to enable it again after you’ve finished because it’s going to bite you on your behind if a malicious site sees this opening.
Here’s how to temporarily disable your antivirus:
- Launch system settings.
- Select ‘Update & Security’
- Click on Windows Security and search for ‘Virus & Threat protection’.
- Find the ‘Manage settings’ option and click on it.
- Toggle ‘Real-time protection’, ‘Cloud-delivered protection’, ‘Automatic sample submission’, and ‘Tamper Protection’ off.
- Close the app and search for your intended website again in Chrome.
Check your desired website again.
If this method works, then you can tell that your computer just thinks that there are potential viruses on the website you’re trying to access.
Wrapping Up
From faulty DNS servers, ISP bans, to bad updates and viral infections, these, and many other possibilities can be the cause of the error.
This makes resolving the issue seem more difficult than finding a needle in a digital haystack.
But, don’t throw in the towel just yet. There are still a lot of things you can do. I’ve compiled this list to help you.
If, however, none of the suggestions on this list helps you, then maybe it’s time to admit that the problem might be on the web developer’s end.
If that’s the case, there’s literally nothing we can do.
