If you're not aware, there's a feature on Windows 10 that enables you to switch on a "Night Light".
Displays in TVs, computer screens, smartphones and tablets often use LEDs which are rich in short wavelength light (blue and blue-green light) which our retinas are more sensitive to.
This blue light can be disruptive to our sleep, at least more so than incandescent lighting.
The new Night Light in Windows 10 works by reducing the amount of blue light emitted from your display and shows warmer colors (red and orange colors) which is easier on the eyes and will help you sleep better at night.
So if you want a better night's sleep after an evening on your laptop, follow these steps to configure the Night Light on Windows 10.
How to enable "Night Light" on Windows 10
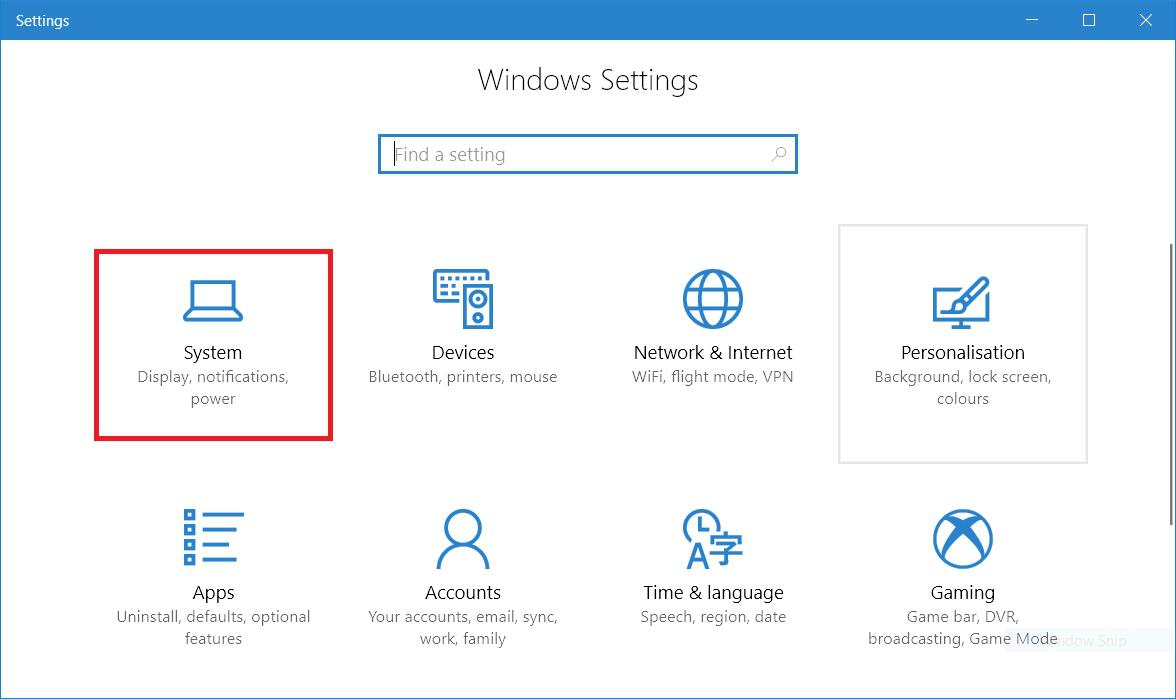
Step 1
Go to the Start Menu and click on Settings

Step 2
Next click System
Step 3
In the Display section, under Brightness and color, you can now turn ON the Night Light.

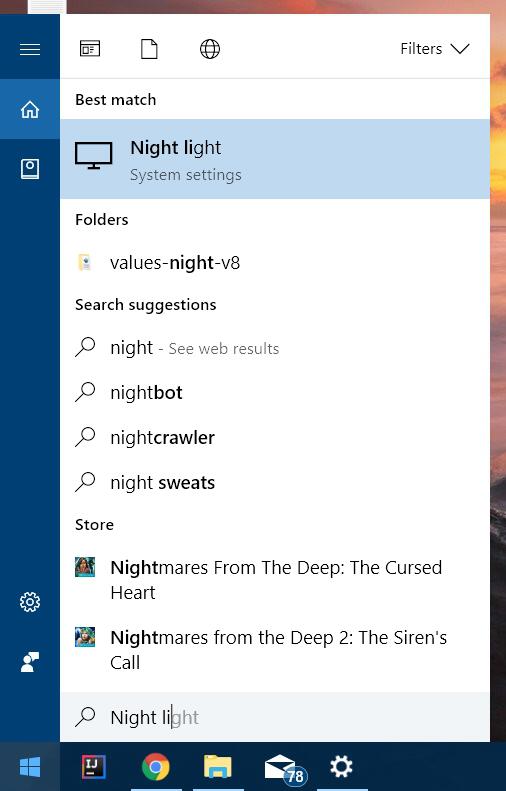
Alternatively, if you'd like to use Cortana, you can simply type the words "Night light" into the search bar and that will take you directly to the Display section of the Windows 10 System Settings where you can turn on the Windows 10 Night Light.
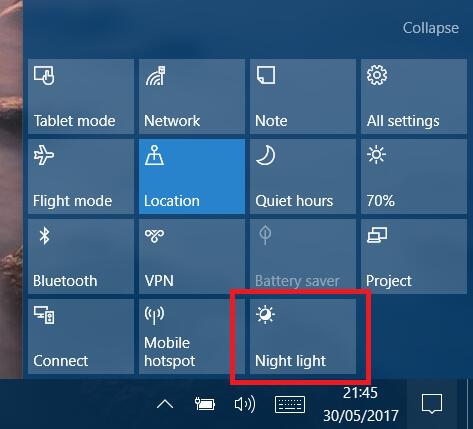
You can also enable the Windows 10 Night Light by using the Action center (press Windows key + A) and then clicking the "Night Light" button.
If you can't see the button, it's probably just hidden away or you may need to update Windows and get the Creators Update. Try clicking on the "Expand" link first to see if it's been hidden from view.
How to adjust the "Night Light" color temperature on Windows 10
By default, the Night Light is configured to switch on automatically at sunset and switch off at sunrise, which will obviously vary depending on where you live.
The colors emitted by the Night Light are also preset but if you want, you can configure these options by following these steps:
Step 1
Go to the Start Menu and click on Settings
Step 2
Next click System
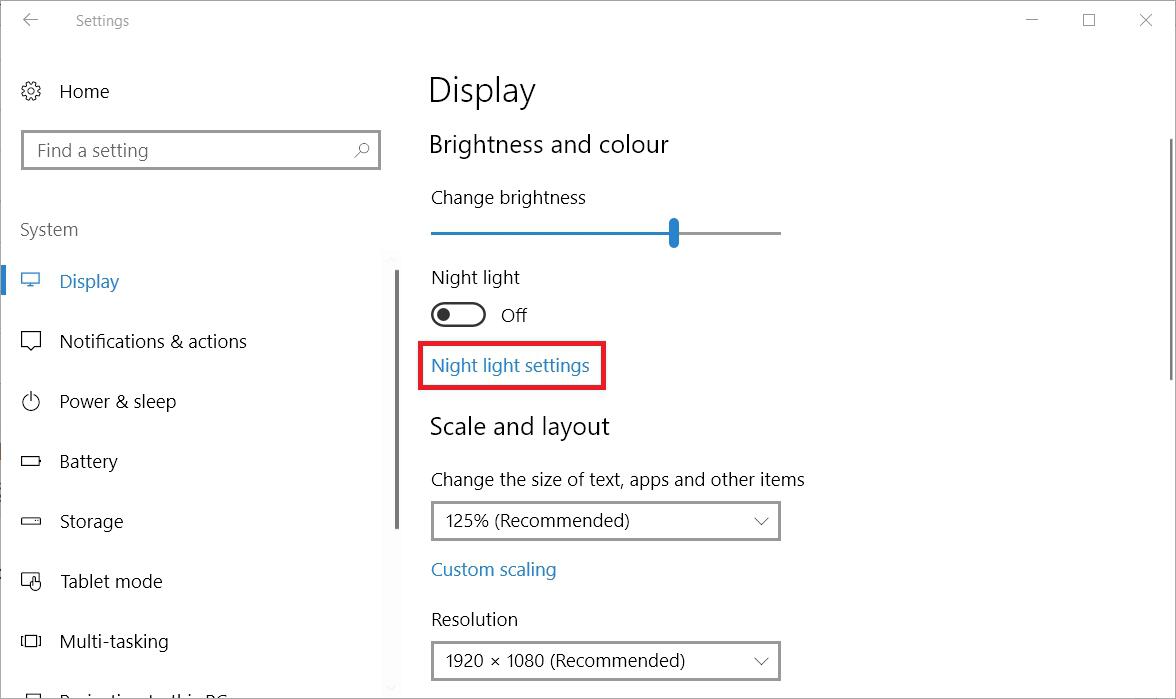
Step 3
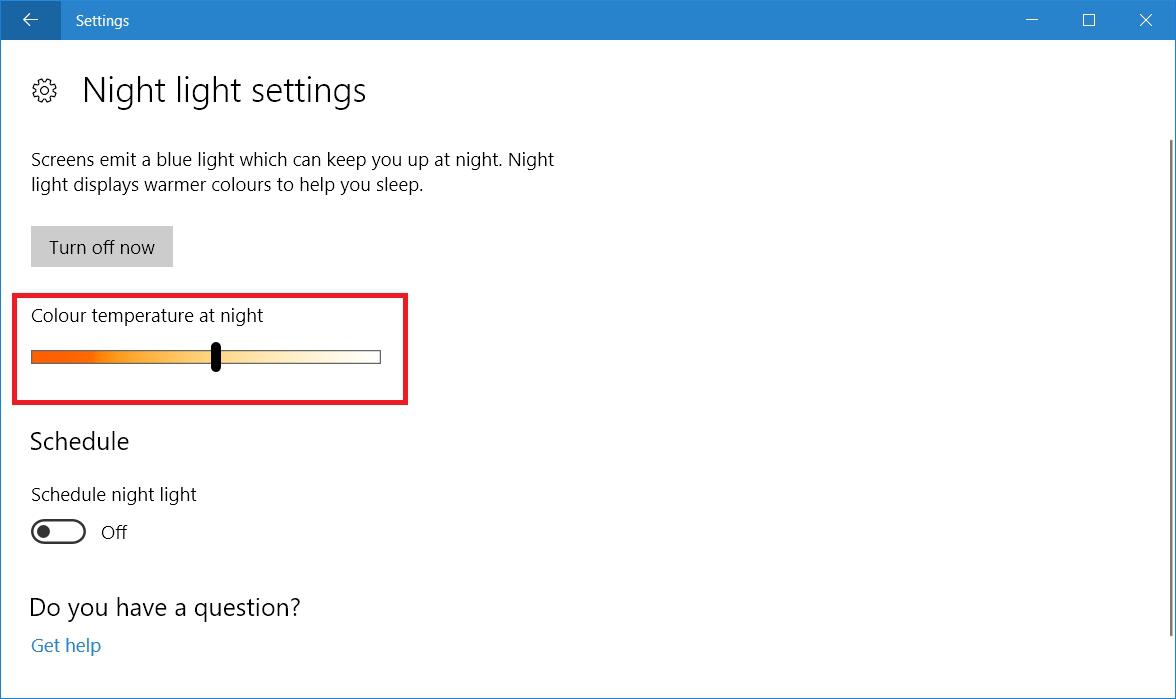
In the Display section, under Brightness and color, click on the Night light settings link.
Step 4
To change the color temperature, simply adjust the slider to the color you'd like to see.
How to schedule the "Night Light" on Windows 10
If you'd like more control over when the Night Light turns on and turns off, follow these steps:
Step 1
Navigate to the Night light settings page by following steps 1-3 above.
Step 2
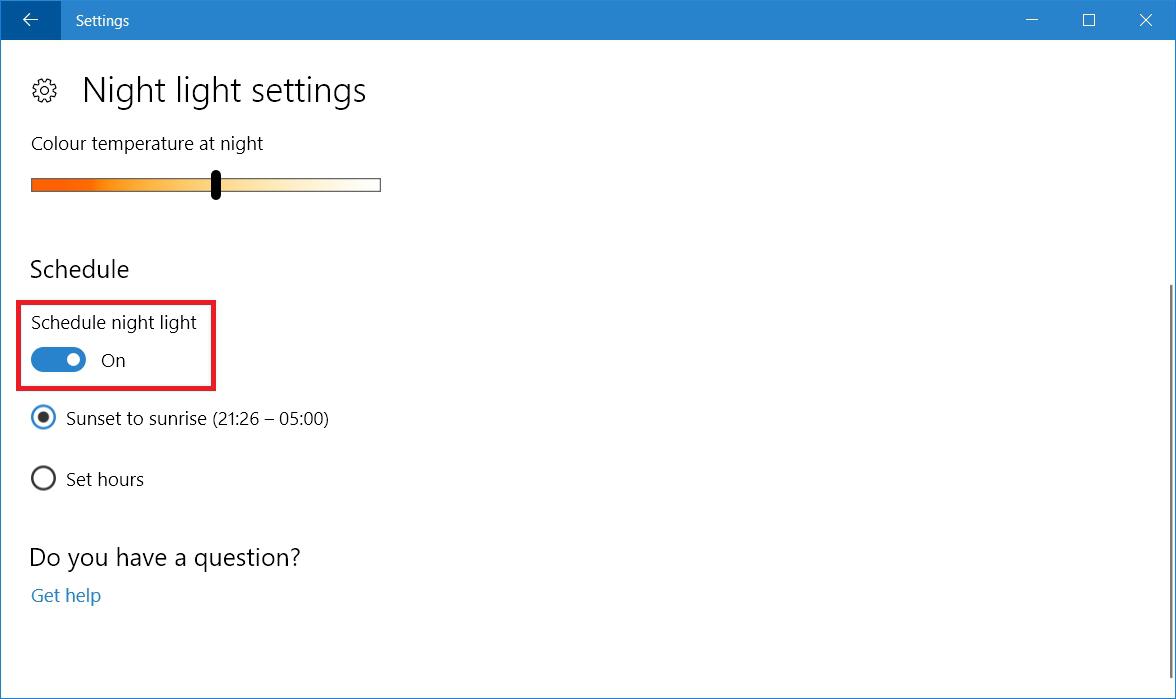
Turn on the Schedule night light toggle switch to manually configure when the Night Light should turn on.
Step 3
You now have two options. You can either select Sunset to sunrise and Windows 10 will automatically detect your location and configure the Night Light appropriately.
Or you can choose Set hours which will allow you to specify the time of day you want the Night Light to turn on and turn off.

So that's it guys, if you've followed the steps above, then the Night light will automatically turn on and off as required. When turned on the you'll see warmer colors emitted from your display which will be much easier on your eyes especially at night.
I think this is a great feature by Microsoft as it will really help reduce the strain on your eyes, which is essential if you spend long hours on your PC or laptop like I do. So I definitely recommend taking full advantage of this feature.
Does this feature help you? Have you had a better night's sleep as a result? Please let me know in the comments!
Cheers!
