Creating a guest login on your mac is simple and can be very useful – if you know how of course and that’s where this article comes in!
This is a particularly useful thing to do if you have relatives visiting or you want to share your computer without sharing all of your files.
So, simply follow the steps below to create a guest account that allows someone to use your computer without risking your privacy.
Steps to Create a Guest Login
You can follow these steps to create a guest login on your mac:
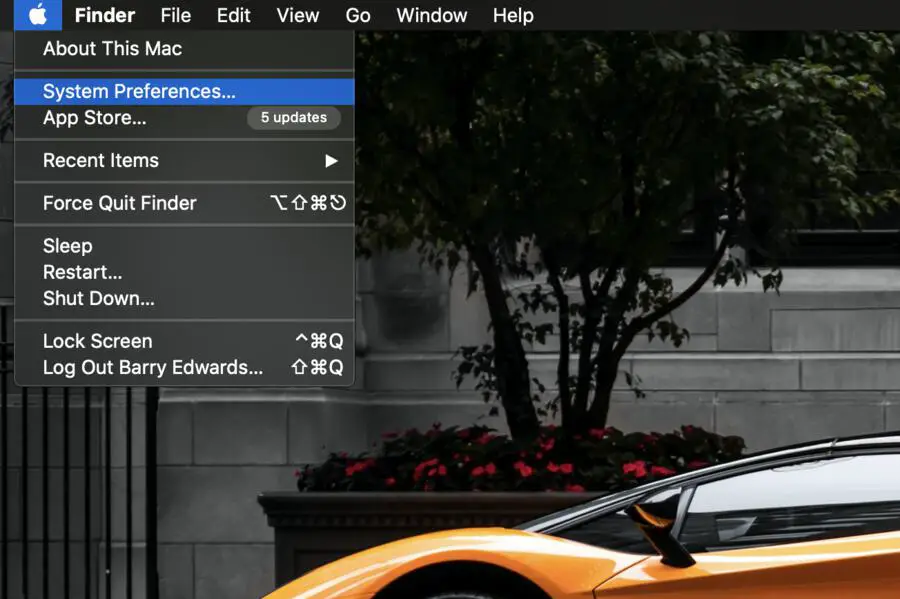
- Click the Apple logo at the top left corner of your screen
- Click on System Preferences
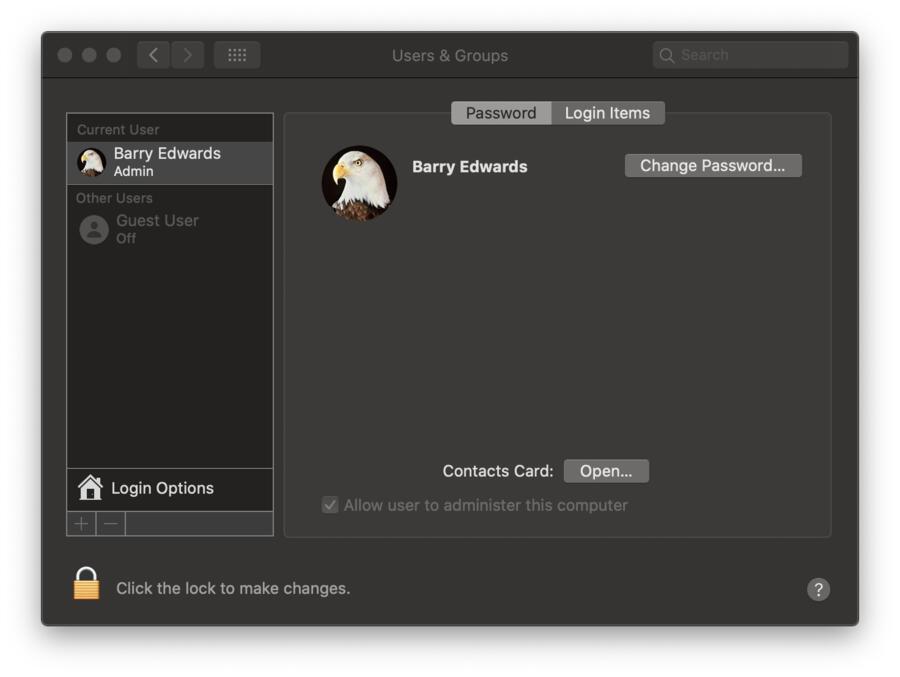
- Click Users and Groups
- Click the Lock at the left corner of this window
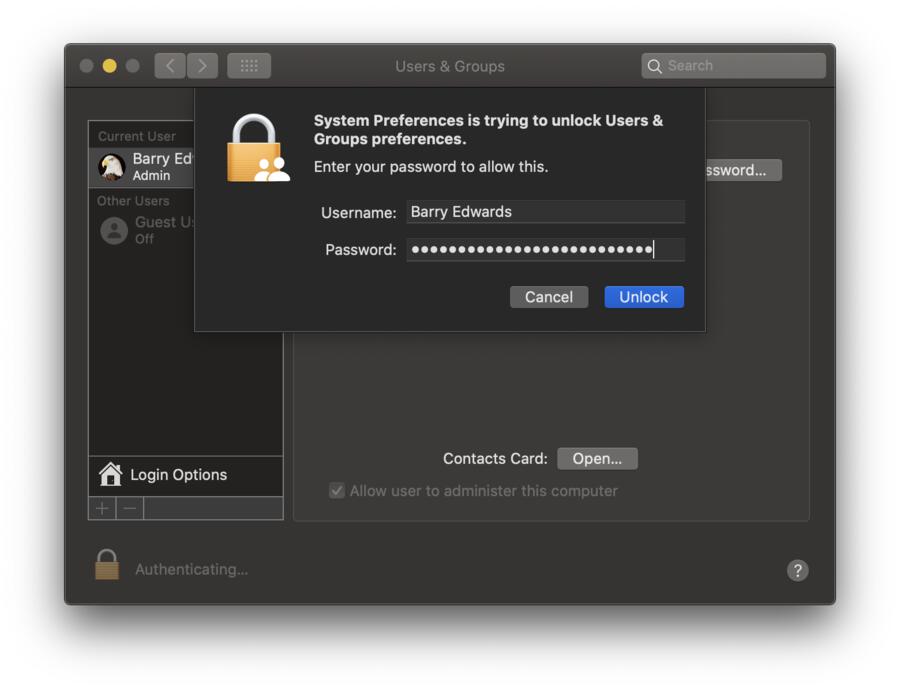
- Type in your Admin Password; if you don’t have one, skip this step
- Click Unlock
- Click Guest User
- Click the Box to Allow Guest User
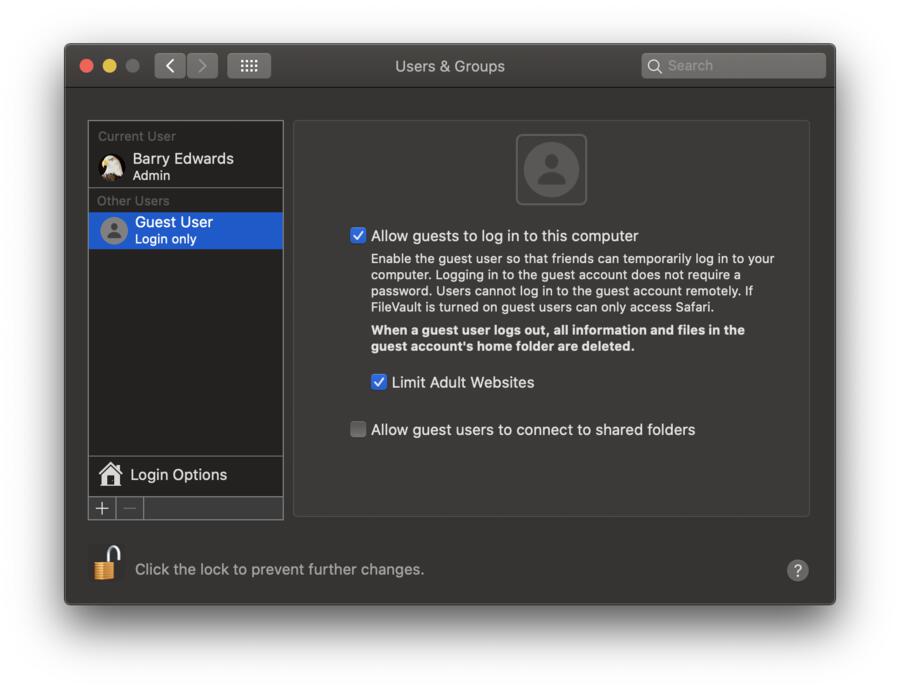
It is really that simple.
So now that you have a Guest user account set up, your friends, family members, or children can access your computer without you having to worry about losing important files.
Benefits of Setting up a Guest Login Account
You might think that it isn’t necessary to set up a Guest User account because you have nothing to hide. However, there are benefits to this feature that go beyond keeping your information private.
Let’s take a look some of the benefits:
Privacy
Even though privacy is not the only reason to set up a guest login, it is a good reason to do so. If you let someone sign onto your computer, they can access any of your files, your passwords, your browser history, your emails, and more.
Often people store all kinds of personal information on their computers, and it should be kept secure. In addition, someone could accidentally click a button and delete an important folder.
You probably have everything stored on your Mac for a reason, so it is a good idea to keep it safe and secure. You can set privileges for guests and control which files they can access.
You will be able to keep your confidential and personal files separate so that they are off limits. In addition, when your guest signs on to your Internet browser, they will not see your search history.
Although this may not seem that important, there are good reasons for keeping this information private.
For example, often when you log onto different websites, they keep you logged in until you tell them otherwise, so you really shouldn’t have other people signing on to your browser. Macs can store your passwords, so even if you have logged out, people may be able to access your stored passwords and sign in.
When you create a guest account, none of this is an issue. They can use the browser, but they will not access your history or your accounts.
It will give you peace of mind without having to worry about this.
Disk Space
Your account can save anything you ask it to save. So, if you want to save a file, you just click save, and it stays on your hard drive.
When guests sign onto your account, they have this same privilege. In addition, the computer stores certain information every time anyone logs on, so it will be cluttering up your disk space.
However, when someone signs on to a guest login, they cannot save anything. They simply use the computer, and the guest account is wiped clean when they sign off.
Disk space is hard to come by for many people, as files take up so much space, and it is great to be able to allow someone to use your computer without clogging up your disk.
Protection
Even if you don’t have someone who wants to use your Mac, it is still a good idea to set up the guest login. For example, if you’re unlucky enough to have your computer stolen, you will need the guest account to track it through Find My Mac.
You can’t use this feature unless your computer is turned on and connected to the Internet, and a thief won’t be able to connect to the Internet if they can’t get into your account.
If you have the Guest login feature turned on, it is likely that a thief will use your computer to access the Internet, and you will be able to locate it.
There are a number of reasons that you might want to use parental controls on a guest account. Maybe your kids are using the computer, or maybe you want to allow access to some apps and not others.
Whatever the case may be, you can set up parental controls to restrict access to guest users on your mac.
Start by clicking on the apple icon again, and click on System Preferences. You can then choose Parental Controls, and you will have a range of options for what you will allow guests users to access.
How to Use Parental Controls on the Guest Account
Some of these controls are designed for children, which is great if your child is the one using your computer. You can limit website access or music and video content in the following categories under Parental Controls:
- Apps: Under Apps, you can restrict the use of your camera. This might be a good idea for children, but if your computer is stolen, you might want to be able to snap a photo of the thief. You can choose whether or not guests can play games, and you can limit mail and applications.
- Web: This is where you will set up browser restrictions. You can limit access or allow it.
- Stores: This has limits for iTunes and iBooks as well as restrictions for movies, tv shows, music, apps, and books.
- Time: You can set screen time and bedtime in this section.
- Privacy: You can choose information that you share with the guest account here such as social media, contacts, location services, calendars, and more.
- Other: This allows you to control features such as Siri, DVD burning, and dock modifications.
Setting up your parental control for a guest account is a good idea, and you can choose which features you should block and allow depending on who will be using your mac. If you want to protect yourself from theft, make sure that location services are enabled and a thief is able to access the Internet.
Parental Controls on macOS Catalina
On MacOS Catalina, things are different and you can’t restrict settings on a guest account in the same way you can on previous versions of MacOS. This is because guest accounts on Catalina are very locked down by default.
Restrictions on Guest users on MacOS Catalina are as follows:
- Guests don’t need a password to log in.
- Guests can’t change user or computer settings.
- Guests can’t log in remotely when remote login is turned on in Sharing preferences.
In addition, any files that are created by a guest are stored in a temporary folder, however when the guest logs out, the contents of that folder and the folder itself is deleted.
By default, guest access works with the Find My Mac app. This will help you find your Mac if you lose it. This is particular handy if your Mac ever gets stolen because you can locate your Mac if they log in as a guest, and then use Safari to access the internet.
Content and Privacy Restrictions (non-guest accounts)
If you want to control who has access to what on normal (non-guest) accounts on MacOS Catalina, you can click on the apple icon again, and click on System Preferences. You can then choose Screen Time and then Content & Privacy, and you will have a range of options for what you will allow users to access.
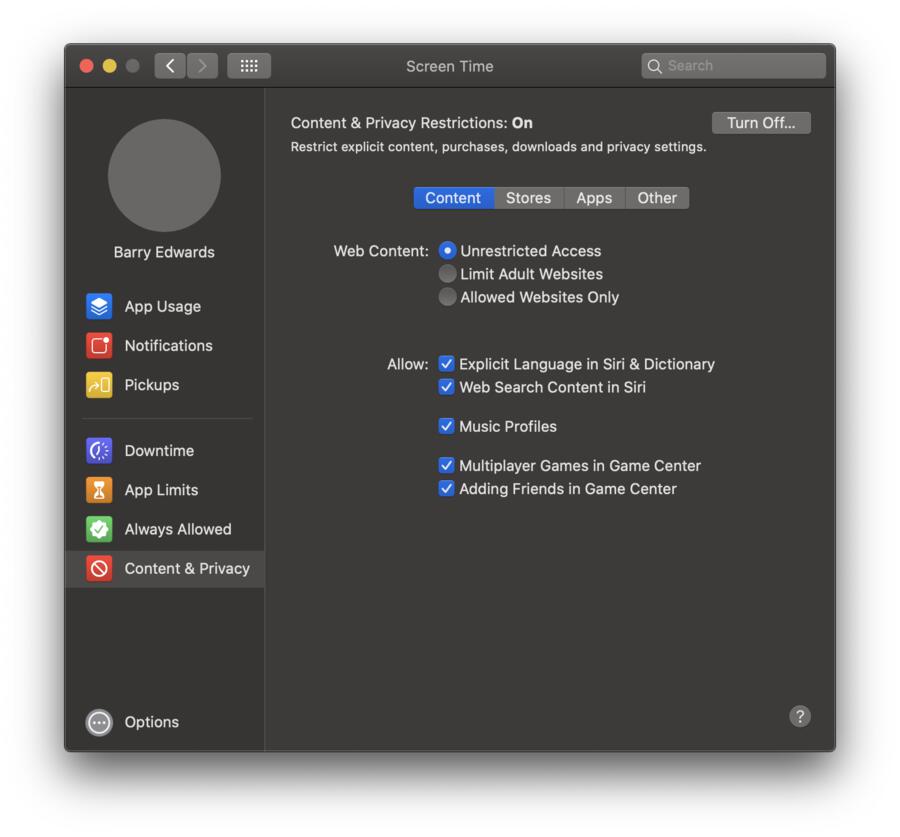
Some of the controls are designed for children, which is great if your child is the one using your computer. You can limit website access or music and video content in the following categories under Parental Controls:
- Content: This is where you will set up browser restrictions. You can limit access or allow it.
- Stores: This has limits for iTunes and iBooks as well as restrictions for movies, tv shows, music, apps, and books.
- Apps: Under Apps, you can restrict the use of your camera. This might be a good idea for children, but if your computer is stolen, you might want to be able to snap a photo of the thief. You can choose whether users (including guests) can play games, and you can limit mail and applications.
- Other: This allows you to control whether or not to allow passcode changes, account changes and background app activities etc.
How to Customize the Login Screen on Your Mac
You can also customize your login screen according to your personal needs. You can require a username and password or bypass the whole thing. It really depends on what is best for you.
You will find the login screen settings in your System Preferences. You can access them through the apple icon on the top left corner of your computer.
You can choose whether to show the sleep, restart, and shift down buttons, and you can choose whether to show a list of users or the name and password. There are a number of options available to you.
Automatic login will allow you to bypass the need to enter your name and password, which is fine as long as you aren’t worried about someone else accessing your computer.
Another option is the input menu, which allows the user to choose what language to use. This can be useful if you share your computer with someone who uses another language or if you switch back and forth between languages.
The password hint button will allow you to create hints for your passwords so that you can have some help if you forget yours.
There is also an Accessibility Options button, which will give you choices for zoom, sticky keys, slow keys, voice over, and more. Whatever selections you make will enable or disable them for all users.
Another thing you can do is to add a custom message to the bottom of the login screen. You could write your name or your favorite inspirational quote or you could write a personal message to your spouse or child if you share the computer.
If you want to write a personal message, start by clicking on the apple icon, and then go to System Preferences. Once you are there, look for Security & Privacy and click the General tab where there should be a box for Set a Message to Appear on the Lock Screen.
You can type your message in, and it will be displayed on the lock screen.
Finally, you can create or change a profile picture. If you have a list of users, each one can have a profile picture to go with their name.
Go back to the apple icon, and click System Preferences again. Now you can click on Users & Groups, and you can select your user profile on the left side of the box.
When you move your cursor over your picture, you can click Edit, and then you can either upload a picture from your files or take a new picture with your camera. Click on save, and you will have a new profile picture.
Wrapping up
So that’s how you can easily create a guest login your Mac.
We’ve established that it is a good idea to create a guest login on your Mac, not only from a privacy standpoint, but to also keep your hard disk space from being cluttered by others. We have also seen how setting up a guest login can also help to locate your Mac, should you be unlucky enough to have it stolen.
Finally, we discussed customizing your lock screen and controlling who has access to your computer.
