This is the first time I’ve reviewed backup software on Bonkers About Tech, but I know from experience that having decent backup software can really save you a headache when things go wrong with your computer, so I thought I’d share my thoughts on this software by AOMEI Technology with you guys.
I’m sure you’re thinking “why do I need this software”, so I’ll give you some compelling reasons why you should use backup software before we get into the nitty gritty of the application.
This article is over 3000 words long as I’ve tried to cover everything a user would want to know. If there is something that I haven’t covered and you have a burning question to ask, feel free to contact me or leave a comment below.
Ready? OK, let’s go!
Highlights and Features
- Super easy to use
- Real-time sync of files and folders
- Clone HDD to SSD and vice-versa
- Backup your entire system to keep Windows and your apps safe
- Automatic and scheduled full backups or incremental backups to save time and storage
- Clone a smaller HDD to larger HDD
- Backup to an external hard drive or NAS
My Verdict
The AOMEI Backupper is a great solution to backing up your whole system or just a select number of important files. Whilst the UI is a little dated, it is extremely easy to use and intuitive and the underlying functionality is sound.
AOMEI Backupper Full Review
I’m sure you’re wondering why you need backup software and backing up a computer is not something that everyone does. However, there are a couple of compelling reasons why I think backups are essential.
First of all, backups are essential in protecting yourself against ransomware viruses that we all came to know about last year with the WannaCry virus.
Also, not only is backup software your friend when it comes to recovering from ransomware attacks, it is also extremely helpful if your system crashes or you lose important documents or photos.
With that said, if you’re going to be backing up your files on a regular basis, then you need something that’s reliable, easy to use and gets the job done. You also want something that’s not going to grind your computer to a halt or cost you the earth either. Enter AOMEI Backupper Free.
AOMEI Backupper certainly fulfills these criteria as it is very straightforward to use, well designed and quickly backs up your your whole system or just a few important files that you don’t want to lose.
So let’s get into the nitty gritty and examine this software in more detail and see what it’s capable of.
First up then is the installation process…
Installation
Wonderfox DVD ripper runs perfectly on Windows, even on older versions like Windows XP. However, it isn’t designed for Mac OS X or Linux users. So you’d have to use a Virtual Machine if you’re a user of one of these Operating Systems.
Installing this software really couldn’t be less painful. The setup executable is just over 88 MB, and the software installs in under a minute on my HP Envy laptop (Amazon, #CommissionsEarned). Installation time may be quicker or slower for you depending on the spec of your machine, in any case though, it shouldn’t take any longer than a few minutes.
So to get started, simply visit the AOMEI Backupper website and hit the Download Freeware button.
Once you’ve downloaded the software to your PC you can start the installation by double clicking on the installer.
On the first step of the installation it asks you to to select the language to be used during setup. However, it should automatically detect the language from your system. If it doesn’t, simply select your language from the dropdown and hit OK.
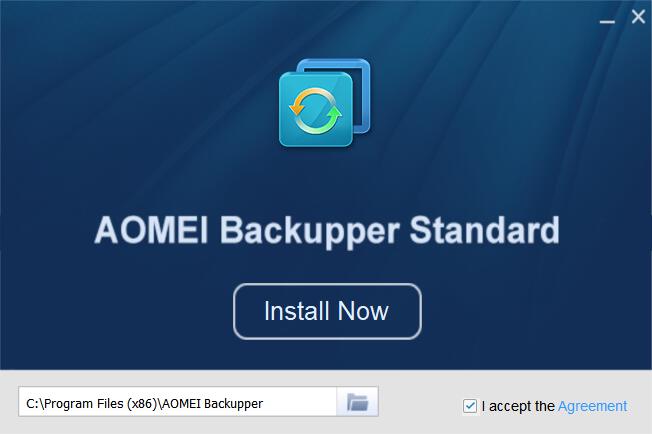
On the next step, you’ll be given the option to choose an Install Location. The default location is in C:Program Files (x86)AOMEI Backupper. Feel free to change the Destination Folder or use the default location like I did. When you’re happy with the location, hit Install Now.
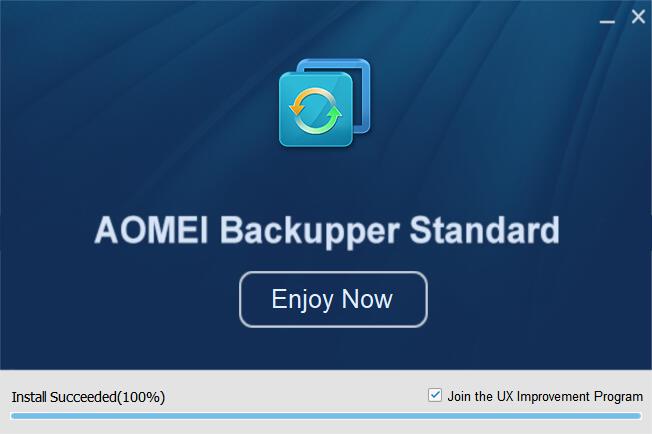
The software should now be installed at the location that you selected. The last step of the wizard allows you to run the application, to do this hit Enjoy Now. There’s also an optional check box to participate in the UX Improvement Program. I assume that the program will send anonymous usage statistics so help improve the User Interface. I kept the box checked and opted-in.
The total space that the application takes up once installed is 209 MB which is a reasonable amount of space, but for this kind of software, it’s nothing out of the ordinary.
Next, we’ll have a look round at the User Interface (UI) and look at the overall user experience.
User experience
The UI does look a bit outdated and reminds me of Lotus Notes from back in the day. But it you look beyond that, the UI is actually very intuitive and really easy to use.
The application has five tabs in total to choose from (home, backup, restore, clone and utilities), each of which has a number of backup and restore options to choose from, so it’s very well laid out and it’s pretty obvious which tab to choose.
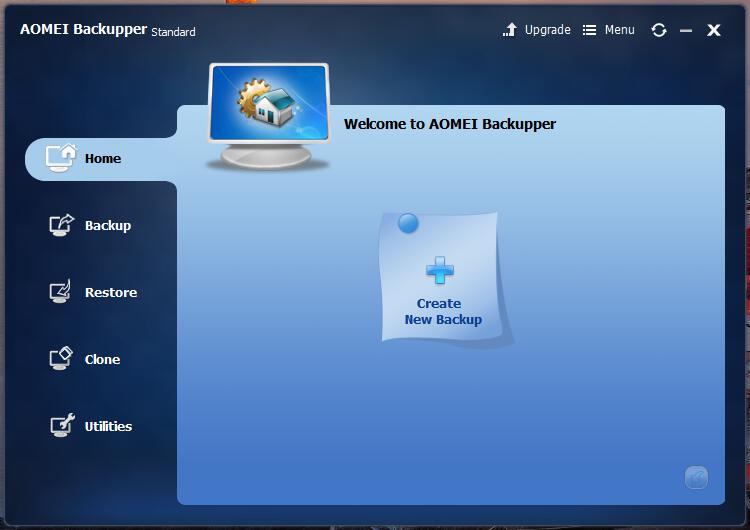
When you first fire up the application, you’re immediately taken to the “Home” tab as you’d expect. So the first thing I did was click “Create New Backup”, which immediately took me to the Backup tab.
I guess this is just a shortcut, but not sure it’s actually required because you still have to choose what type of backup you require and there are five different backup options available, but we’ll look at those in more detail later in the post.
Another thing I noticed is that some may find it difficult to scroll through all of the options on the tab, especially using a track pad, mainly because the scroll bar is almost the same color as the background. Personally I found it easier to use the arrow keys on the keyboard to reach the last option.
Although you can expand the application window (menu -> settings -> other-> enable large window mode) it does make some of the images a little blurry. It does however make the UI easier to use.
These are slight cosmetic issues, but definitely not a show stopper and if you set up the application to perform regular, scheduled backups, then all that happens in the background without having to touch the UI.
Let’s have a look round the rest of the UI and see what the main options are shall we?
User Interface options
Once you install and open the application, you’ll find a well laid out interface and as I said early, it’s very intuitive and straightforward enough that even a complete novice could backup their entire system in no time.
On the left hand side there’s a tabbed sidebar allowing you to choose between “Home”, “Backup”, “Restore”, “Clone” and “Utilities”. These are clearly labeled and it’s pretty obvious what each of them are for, but there’s more options within each tab, so we’ll look at each one in turn:
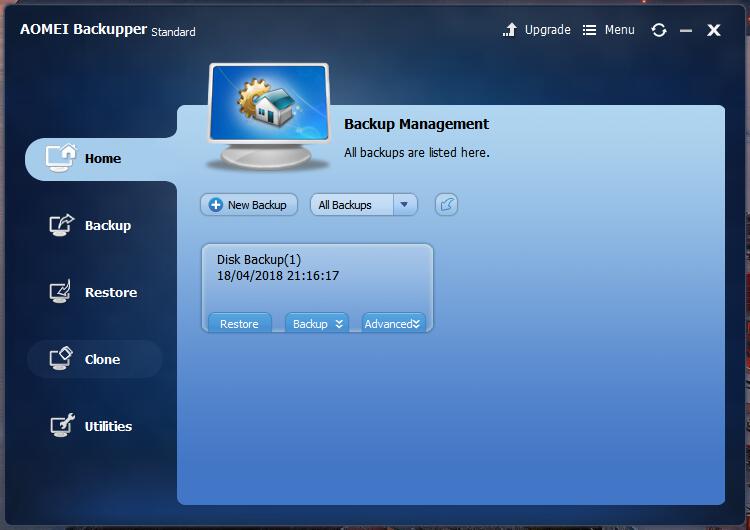
- Home tab is the first tab you will see opened when you first launch the application. At first, there’s a button to create a new backup which shortcuts you to the Backup tab. However, when you perform new backups, you’ll see them listed here.
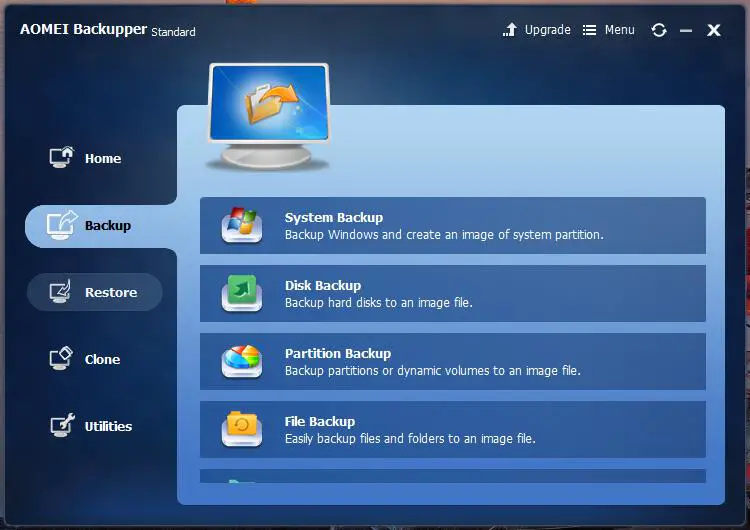
- Backup provides a comprehensive list of backup options. The first option allows you to create a system image which basically backs up Windows, applications and your custom settings. The second option is the Disk Backup which is the most comprehensive backup but takes longer to complete as it backs up everything on your entire drive.
If you prefer to backup specific partitions or volumes and not your entire disk, then there’s an option for that too aptly named Partition Backup. If you wish to backup specific files or folders, then you can choose File Backup which will backup important files and folders that you specify. These could be an image folder or a folder containing important documents that you don’t want to lose. Finally there’s File Sync which, unlike the previous options, doesn’t backup up files and folders to an image file. It backs them up automatically with a schedule (either daily, weekly or monthly) or you can synchronize files and folders automatically to particular target path whenever the application detects a change (such as add, modification or delete).
- Restore basically takes your backed up files and folders and restores them to their original loccation. To see how the restore function works, see Restoring your backup below.

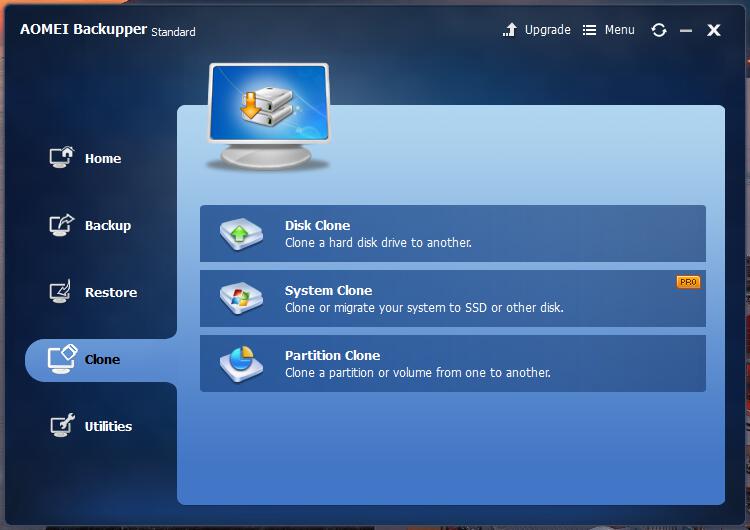
- Clone is a really useful feature that enables you to make an exact and complete copy of a disk or a particular partition. Within the clone tab, you can perform a Disk Clone which will copy one hard drive to another (including operating system, apps, settings, partitions etc). This is useful if your disk starts to run out of space or if you want to upgrade from a HDD to an SDD. To be honest, I wish I had this software when I added my Samsung SSD (Amazon, #CommissionsEarned) to my laptop (Amazon, #CommissionsEarned) as it would have saved me a lot of time and effort in reinstalling the Operating System etc.
The second clone option (only available in the Pro version) enables you to migrate your operating system to another device (like an SSD for example). Basically, it will clone everything that is required to run your operating system on your new drive.
The third option allows you to clone a single partition rather than the entire disk. So, your C: drive could be cloned to a virtual drive (or partition) such as D: for example.
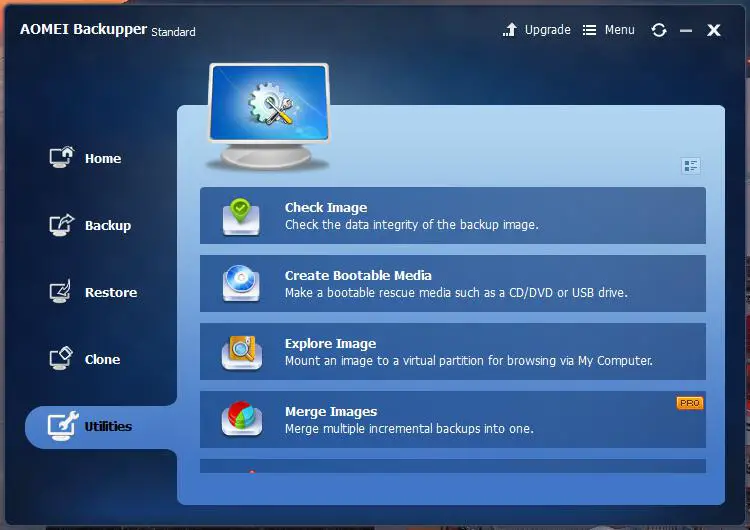
- Utilities provides you with a bunch of extra tools that really make this application a comprehensive backup solution. There are tools here for checking the integrity of your backup images, creating boot media to a CD/DVD or USB drive, exploring the contents of your images, merging incremental backups into one and more.
Now let’s delve a little deeper into one of the one of the options in the Backup tab and have a look at the process of backing up your entire hard disk.
How to backup your hard disk
This section will go over how to use the AOMEI Backupper tool to create a backup of your entire hard disk to an image file which is the most comprehensive type of backup that you can do.
Bear in mind though, because it copies your entire hard drive’s content, it can take a while to complete.
Step 1
OK, so first of all fire up the AOMEI Backupper tool and click on “Create New Backup” on the home screen which will take you to the Backup tab.

Step 2
In the backup tab, there are a number of options to choose from, but in this example, we’ll be looking at Disk Backup, so go ahead and click on the Disk Backup button.

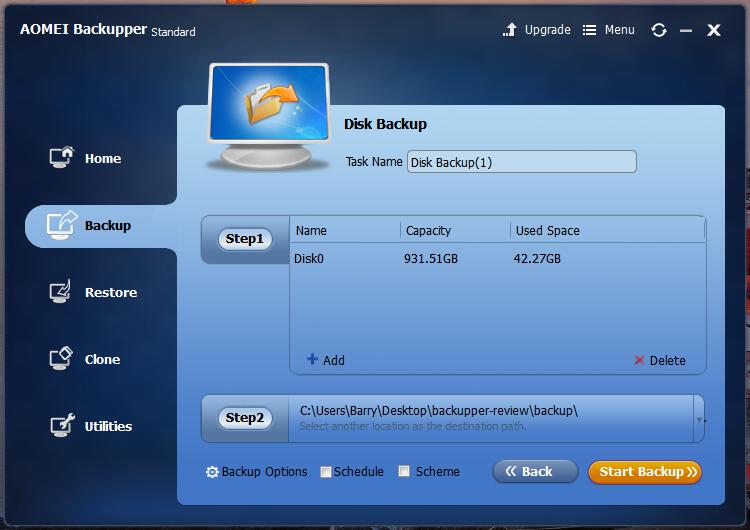
Step 3
On the Disk Backup screen, you simply select the disk you want to backup by selecting the “Step1” button and then select the “Step2” button to choose the location of your image file.
As AOMEI notes, you can actually backup several disks at a time by clicking the “+Add” button, but they need to be restored individually because it’s not possible to restore multiple disk images to one larger disk.
Step 4
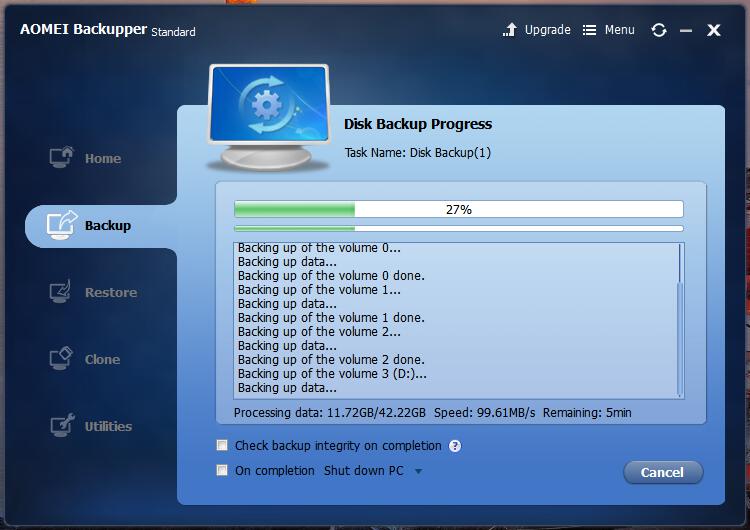
Finally, click on Start Backup and let the application work its magic! There’s a couple of check boxes that become available once the process has started. The first one checks the integrity of the backup to ensure that it can be restored and the second allows to you to shut down your PC once complete. You can also choose to restart, hiberate or sleep your PC.
When the backup has been created for you, click Finish. You are then taken to the Home tab where you can see all your backups and pick the one’s you wish to restore.
Restoring your backup
Restoring your backup is just as easy:
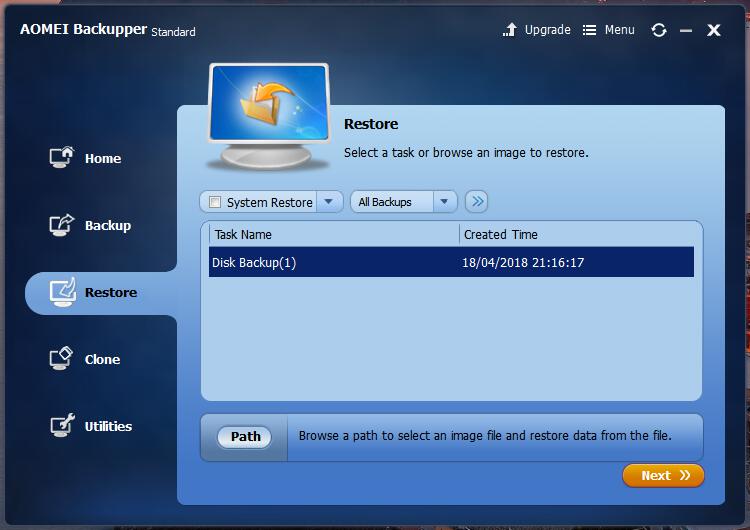
Step 1
Click on the Restore tab on the left hand side and select one of your backups and click Next.
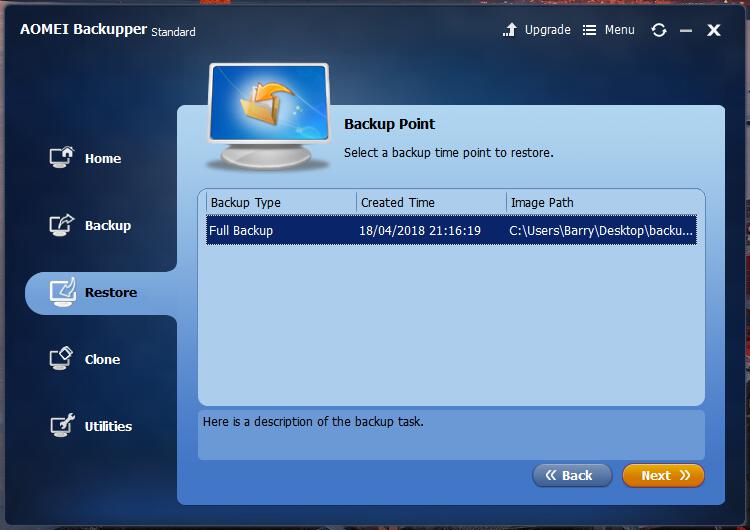
Step 2
Next click on the backup time point you wish to restore and click Next.
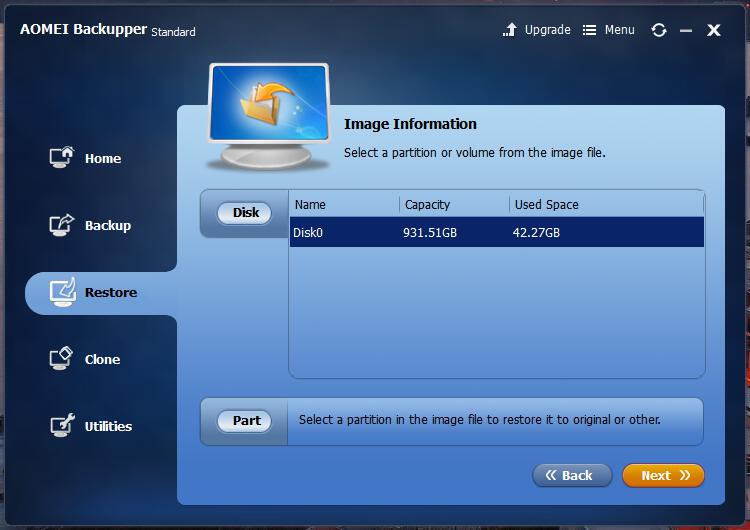
Step 3
Select the partition or volume from the image file and click Next.
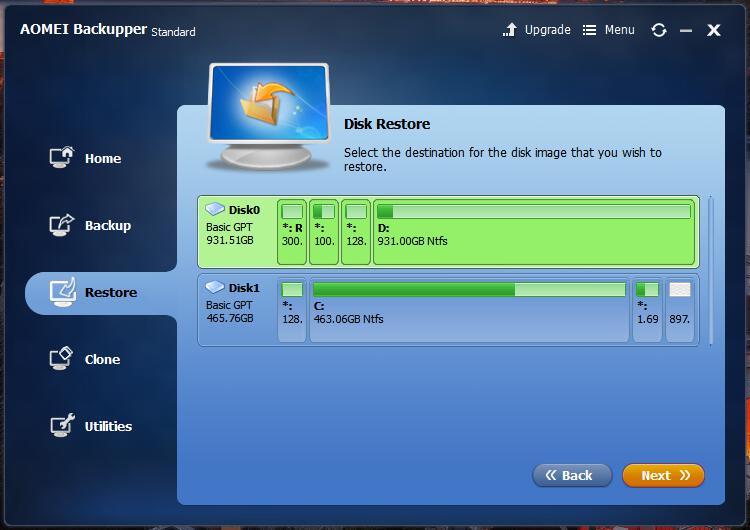
Step 4
Select the destination where the image should be written to and click Next. It’s important to note here that the destination partition will be overwritten by your image.
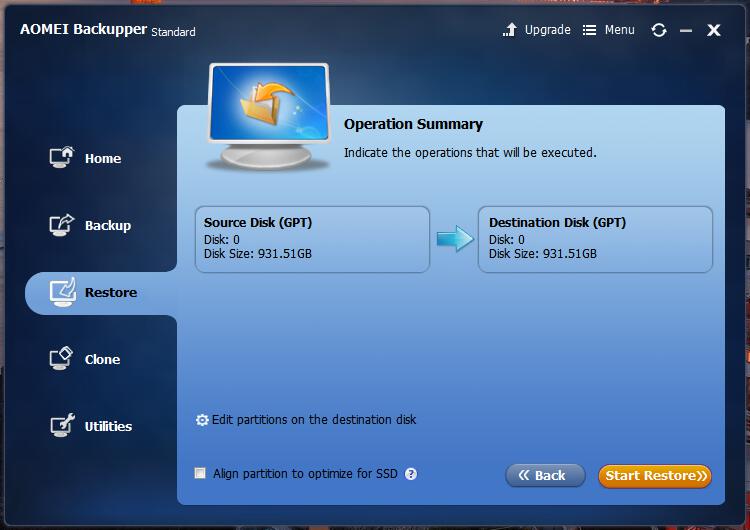
Step 5
Finally click Start Restore. If you’re restoring to an SSD, then you have the option to check the Align partition to optimize for SSD check box which will help to speed up the process.
Additional features and settings
The default options should be good enough for most people but if you do fancy playing about with some of the settings, then you can access them by clicking on ‘Menu’ and then ‘Settings’ in the top right of the application’s window.
Let’s see what else we can do:
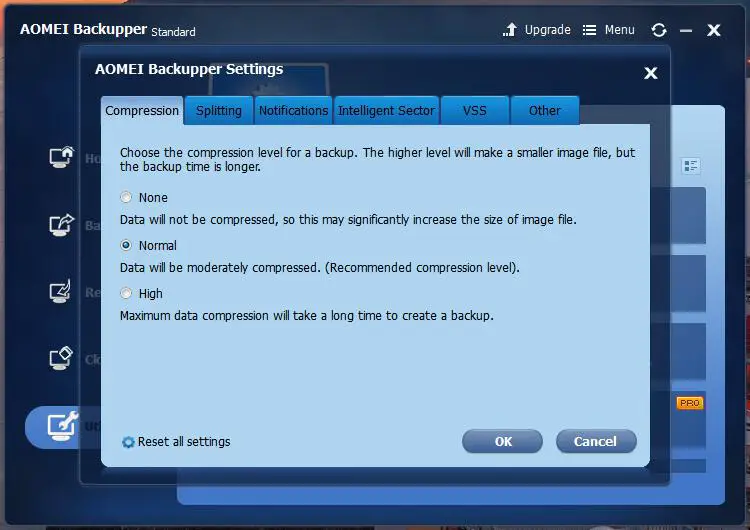
- Compression allows you to configure the amount which your backup’s image file is compressed. There are three options here: none, normal and high. None doesn’t compress the image file at all, so you’ll get quite a large image file. Normal is the default and recommended compression level and High is the maximum amount of compression, which will take the longest amount of time but will create a smaller image file.
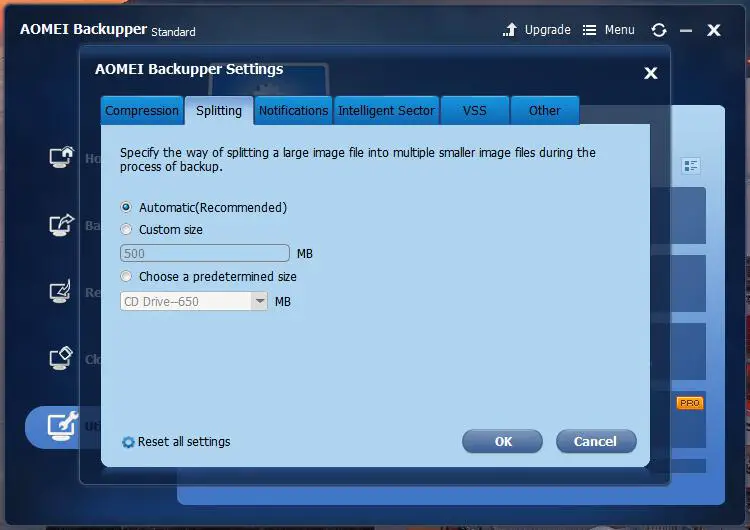
- Splitting allows you to split a large image file into smaller files (at a size that you specify) so that it will fit onto different storage media. So you could store an image file on multiple CDs for example. Alternatively, you can set it to Automatic and let the application decide for you which is the recommended size for your image file.
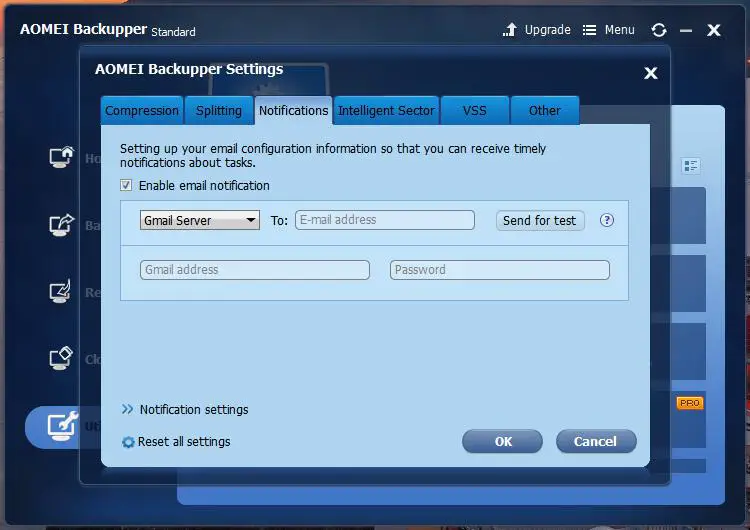
- Notifications allow you to receive emails when the backup process is complete, should you be away from your computer. To enable emails to be sent, check the “Enable email notification” checkbox and choose one of four SMTP servers for sending the email (options are Hotmail, Gmail, AOMEI or a custom server).
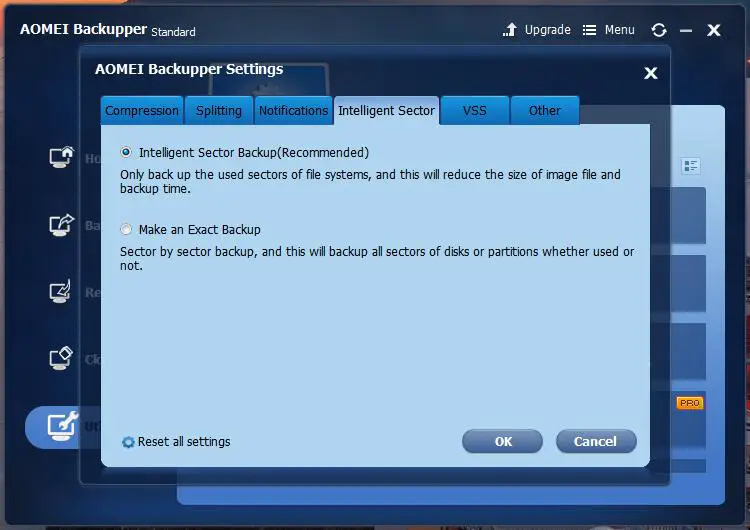
- Intelligent Sector basically helps to reduce the size of the your backup image file by only backing up used sectors on your file system. This is the default and recommended option but you can choose Make an Exact Backup which will backup everything on your disks or partitions including used and unused sectors.
- VSS (Volume Shadow Copy Service) is a Microsoft backup technique that makes sure that the backup is completed without interruption from Windows updates and the like. Alternatively, you can use the built-in technique but AOMEI recommend using VSS which is the default option.

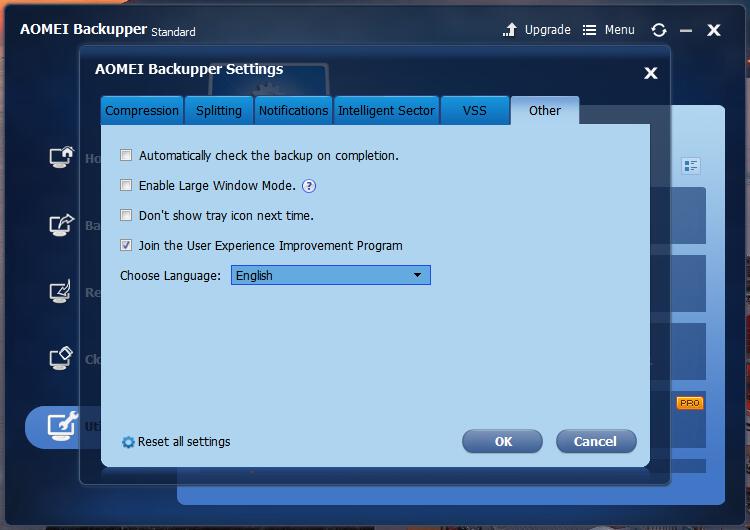
- Other provides a bunch of miscellaneous options including automatically checking the backup on completion, enabling large window mode, preventing the tray icon from displaying and an option to join the User Experience Improvement Program.
Speed and performance
The speed and performance of the application largely depends on what you’re backing up. Obviously, if you’re only backing up a couple of files then that’s going to be considerably quicker than backing up or cloning your entire hard disk.
However, to really judge how fast the backing up process was, I decided to find out how long it would take to backup my entire 1TB hard disk. In total there was 43.6GB of used space and the entire backup took just 8 minutes at a processing speed of around 96MB/second!
This is pretty amazing but there are a number of factors such as the amount of processing power you have and what processes might be running on your machine at the time which can affect the result.
Having said that, the software is very efficient and backed up my hard disk in a timely manner without any issues and didn’t hog my system (just 10-15% CPU usage).
If you want to improve the performance further, you can do that by reducing the amount of compression you use and using the recommended Intelligent Sector Backup option, both of which are available in the settings.
Pricing
You get quite a lot in the free version, but there are some options that are only available in the Pro version (Amazon, #CommissionsEarned), which is reasonably priced at $49.95 especially when you compare it to cloud based solutions. You also get free lifetime upgrades. If you need multiple licenses then you get them at a discounted price:
- Single License for one PC – $49.95 (without lifetime upgrades $39.95)
- Two licenses – $79.92 (without lifetime upgrades $63.92)
- Three licenses – $104.90 (without lifetime upgrades $83.90)
Support
Having used this software for over a week now, I haven’t come across any problems and I’m sure you’ll manage to use it without any issues too. However if you are unsure about anything, then there are some comprehensive tutorials on the website which pretty much explain the ins and outs of everything.
However, if you do come across any issues there’s a support page containing FAQs, documentation and a forum or you can send an email which will be responded to ASAP.
From a personal perspective, my correspondence with AOMEI has been excellent and they have responded to my queries promptly. So if this is anything to go by, then their customer support will be excellent.
The Downsides
To be honest, there aren’t many downsides to this software to speak of but if I were to nitpick, then I’d probably say the UI could do with an update. It looks a little dated, but the underlying functionality is superb, which matters a lot more than cosmetics in my opinion.
The only other downside is of course is that this software is only for creating locally stored backups. That being said, you could backup up to a folder on your hard disk that is synchronised with Google Drive or One Drive and then you have the best of both worlds.
Finally, it would be nice if there was a solution for Mac OS X users.
Final verdict
If you’re looking for software that creates locally stored backups, then AOMEI Backupper has you covered in more ways than one.
There’s a myriad of options to choose from ranging from backing up single files and folders, through to whole disk backups, clones and restoring. It’s fully configurable too and to be honest, I really don’t know what this software is missing.
In my opinion, this is a great piece of software, easy to use and very intuitive.
My advice is to protect yourself from future ransomware and start backing up your computer today! It will also give you peace of mind that, should anything happen to your computer, you know that you’re just one click away from restoring it back to how it was.
If you have any questions about this software, feel free to let me know in the comments and I’ll get back to you asap.
Cheers!