Wonderfox DVD Ripper Pro Review
First of all thank you to Echo and the Wonderfox team for getting in touch with me to write this Wonderfox DVD Ripper Pro Review. It’s a fantastic piece of software that’s very user friendly and I’ve enjoying using it and testing this last week.
First of all though, let me explain why you’d actually want to rip DVDs and then we’ll get into the nitty gritty of the application. This article is over 3000 words long as I’ve tried to cover everything a user would want to know. If there is something that I haven’t covered and you have a burning question to ask, feel free to contact me or leave a comment below.
Ready? OK, let’s go!
Why rip a DVD?
So, why would you need DVD ripping software when you can stream movies via Amazon Prime (Amazon, #CommissionsEarned) or Netflix? Or why you need to rip CDs when you can use a streaming service such as Spotify or watch music videos on YouTube?
Games have gone the same way – people are now downloading them rather purchasing physical games.
With the ability to stored games, music and movies in the cloud, they can be accessed from anywhere in the world and unlike their physical counterparts, nothing gets scratched!
Despite this awesome technology, there’s a few reasons why you’d still want to rip a DVD:
1. Digitize your old movie collection
Remember all those old movies and CDs that you own? Well, you could digitize them by converting the contents of your DVDs into video files and store them on your hard drive.
You could also them put them on a NAS drive (you can pick them up for a reasonable price now on Amazon, #CommissionsEarned) and build your own media server or store them in the cloud so you can keep them forever. It certainly beats buying the digital version of your whole movie collection again!
2. Watch you favorite movies on your phone or tablet
Most people enjoy watching movies and TV shows on their phone or tablet, so why not rip your favorite DVDs and watch them on the go.
In fact, Wonderfox DVD Ripper Pro has a superb feature that enables you to choose the output format that’s most suitable for your device.
With the ‘why’ out of the way, let’s get into the review and see what else this DVD ripper software can do for us shall we?
About Wonderfox
In case you haven’t heard of Wonderfox, they’re a software company that has been established since 2009. They specialize in video/audio converting and editing programs and their software is used by global clients in more than 150 countries.
Their software has also been reviewed and praised by leading editors including the likes of techradar and cnet.
Highlights and Features
- Super easy to use
- Convert to one of 200+ formats including MP3, MP4, AC3, WMA, OGG etc
- Bypasses DVD encryption effortlessly
- Great video quality
- Fast conversion
- Edit your videos – crop, flip, rotate, apply filters and more to your videos
- Add subtitles to your DVD movies
My Verdict
The Wonderfox DVD Ripper Pro is a fantastic piece of software that’s almost perfect. It effortlessly bypasses any encryption, converts to multiple formats, and provides editing options. The interface is very intuitive and easy to use, yet still offers plenty of options to control the DVD ripping process for advanced users.
Wonderfox DVD Ripper Pro Full Review
It’s worth noting here actually the difference between DVD ripping and copying. DVD copying first copies the data to your computer and then moves the data back to a new disc so that you end up with two identical discs.
DVD ripping on the other hand simply extracts the contents of the DVD onto your computer.
There’s more to DVD ripping than meets the eye. It can take a while to rip a DVD and the process behind it is quite complicated because there are security measures in place to try to prevent you from doing it.
The Wonderfox Pro DVD ripper software is very sophisticated and the company points out that not only can it bypass the DVD content scramble system (CSS) and region coding, but it can also remove a variety of protection techniques.
With that said, it’s possible to use this software for legal and illegal purposes. Of course it’s up to you what you choose to do with this software but I advise you to use it for your own personal use and keep within the constraints of the law in the country you reside in.
Installation
Wonderfox DVD ripper runs perfectly on Windows, even on older versions like Windows XP. However, it isn’t designed for Mac OS X or Linux users. So you’d have to use a Virtual Machine if you’re a user of one of these Operating Systems.
Installing this software is a piece of cake. The setup executable is only 32 MB, so the software installs in under a minute on my HP Envy laptop (Amazon, #CommissionsEarned). Installation time may be quicker or slower for you depending on the spec of your machine, in any case though, it shouldn’t take any longer than a few minutes.
So to get started, simply visit the wonderfox website and either hit the free download button or the Buy Now button to purchase a license.
Once you have downloaded the software to your PC you can start the installation by double clicking on the installer.
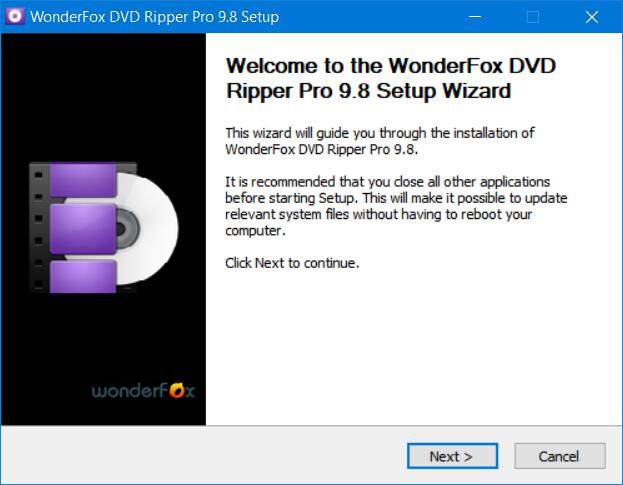
On the first step of the installation wizard, simply hit next.
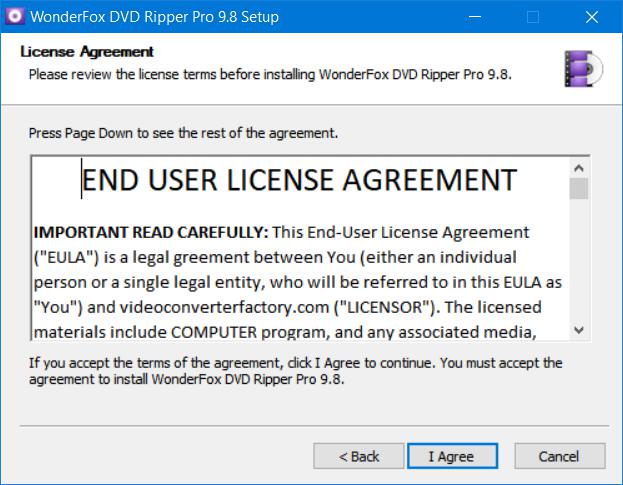
Next, click I agree, to accept the End User License Agreement (EULA)
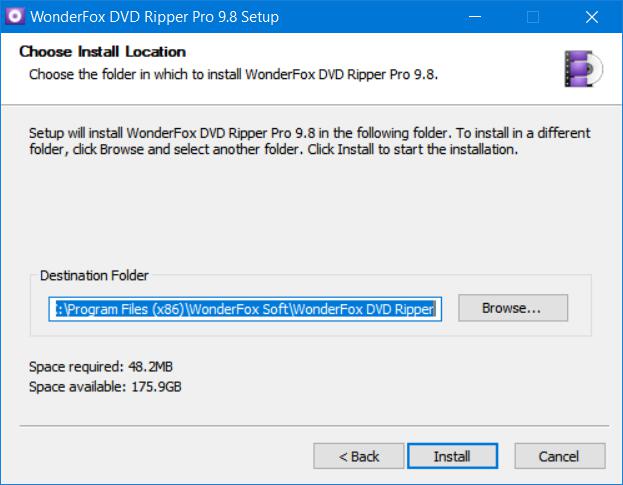
On the next step, you’ll be given the option to choose an Install Location. The default is location is in C:Program Files (x86). Feel free to change the Destination Folder or use the default location like I did. When you’re happy with the location, hit Install.
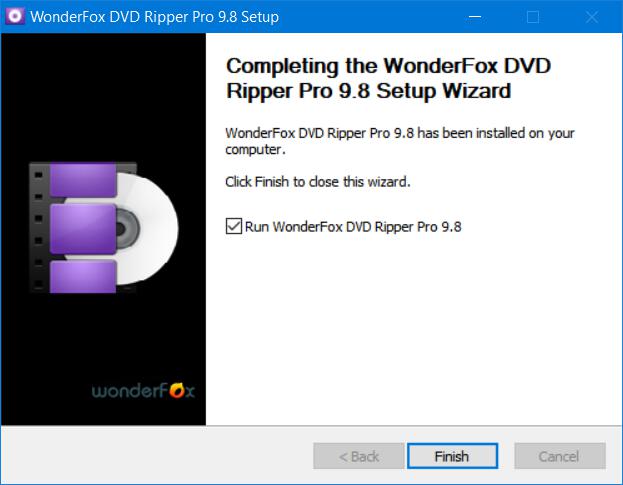
The DVD ripper should now be installed at the location that you selected. The last step of the wizard allows you to run the application. Just make sure that the Run Wonderfox DVD Ripper Pro 9.8 checkbox is selected.
Hitting Finish at this point will close the wizard and run the application if the checkbox was selected. If not, you can always run the application from the Start menu.
By the way, the total space that the application takes up once installed is just over 48 MB which is negligible.
Let’s have a look round at the User Interface (UI) now shall we? By the way, when I say User Interface, I mean the application itself and the menus, buttons and switches contained within it. Bascally everything you see within the application, is the “User Interface”.
User experience
As far as DVD rippers go, I think the UI is very intuitive and really easy to use. In fact, considering that DVD ripping is complicated, WonderFox DVD Ripper Pro makes the process deceptively simple.
There aren’t loads of confusing buttons and settings that you need to fiddle around with (although you can do if you are so inclined).
All you have to do is insert your DVD, your disc is analysed, press a button and your DVD is ripped. You can also do a bunch of other stuff including adding filters and effects and you can even trim the video to get rid of any black borders.
Let’s have a look at the process of ripping a DVD in more detail:
How to rip a DVD
This section will go over how to use the WonderFox DVD Ripper to rip a DVD in the most basic sense.
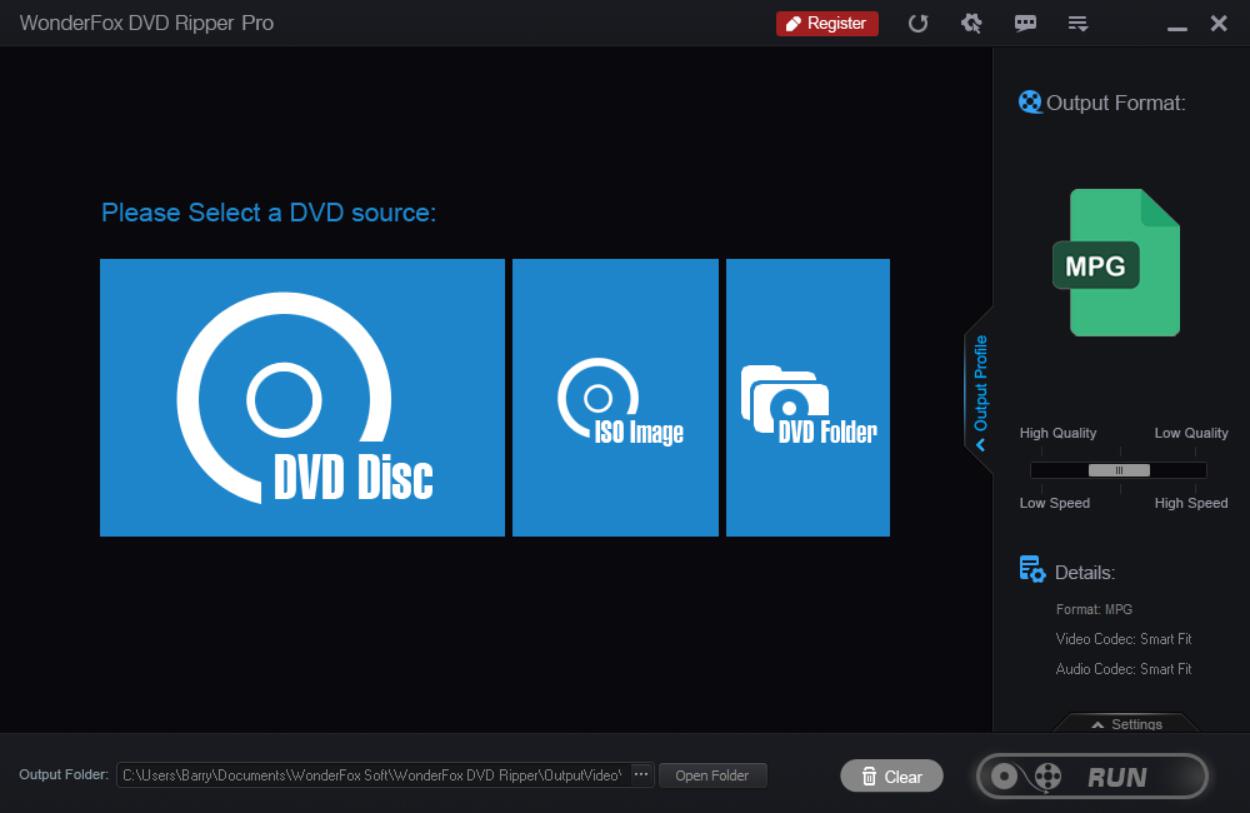
When you launch the application, you should see something like this:
Now there’s a bunch of options, settings, switches and so on to choose from, but you can do as little or as much as you like with this software, and as I mentioned before, the default settings are already optimized.
However, if you’re an advanced user or if you like tinkering with the settings like I do, then you can check out the various features in the next section.
So, the first thing you’ll notice is that on the home screen, most of the UI is taken up by three large blue buttons. These buttons are selected depending on where your DVD content is coming from.
Step 1
So, if you have a physical DVD that you’d like to rip, you’d select DVD Disc. Alternatively if you have an ISO file or files in a DVD folder, then select ISO Image or DVD Folder respectively. I have a DVD to hand, so I’m going to select DVD Disc.
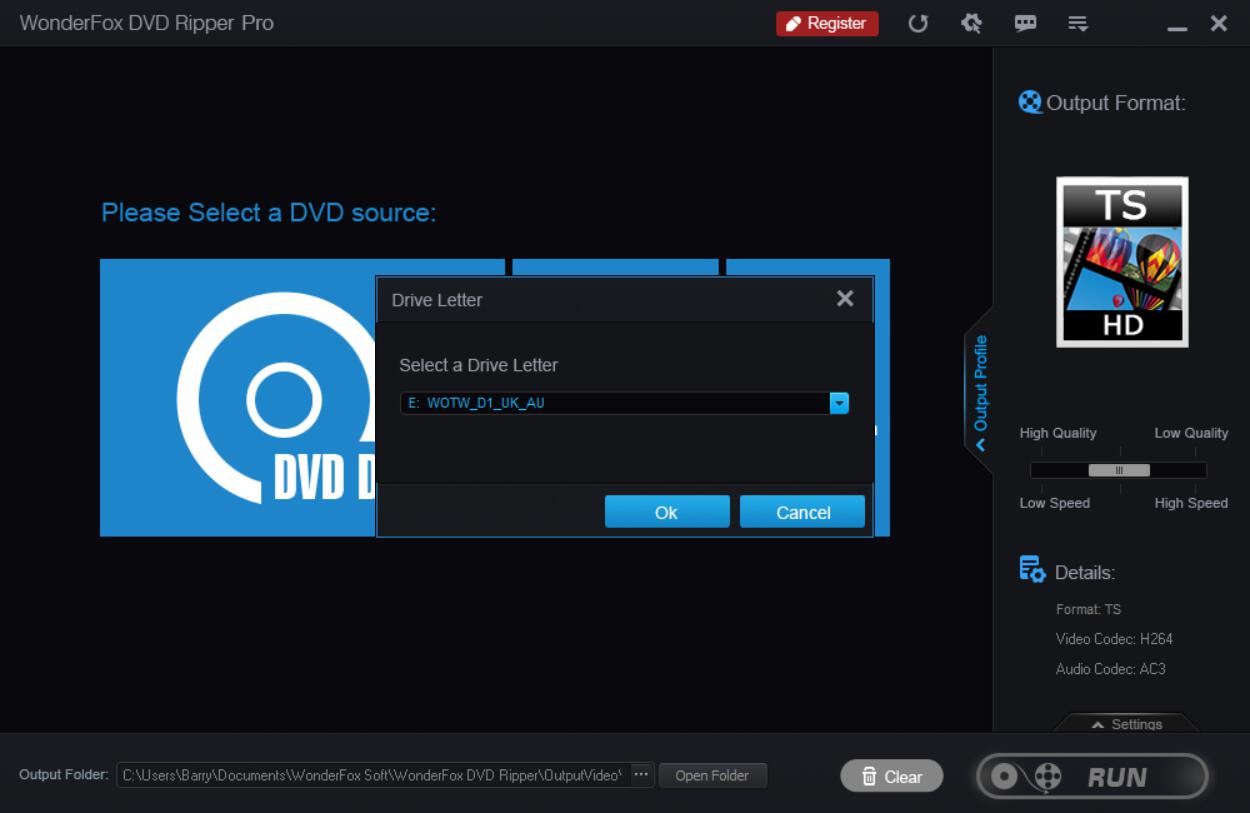
Once you’ve selected this button, you’ll be asked to select a drive letter. Select the drive letter corresponding to the drive containing your DVD and hit OK.
By the way, most laptops and computers don’t come with DVD drives these days and my laptop is no exception. So I’m using an external DVD drive that simply connects to my laptop using a single USB cable (the cable is used for both power and data transfer). You can pick up an external DVD player for your laptop from Amazon (#CommissionsEarned).
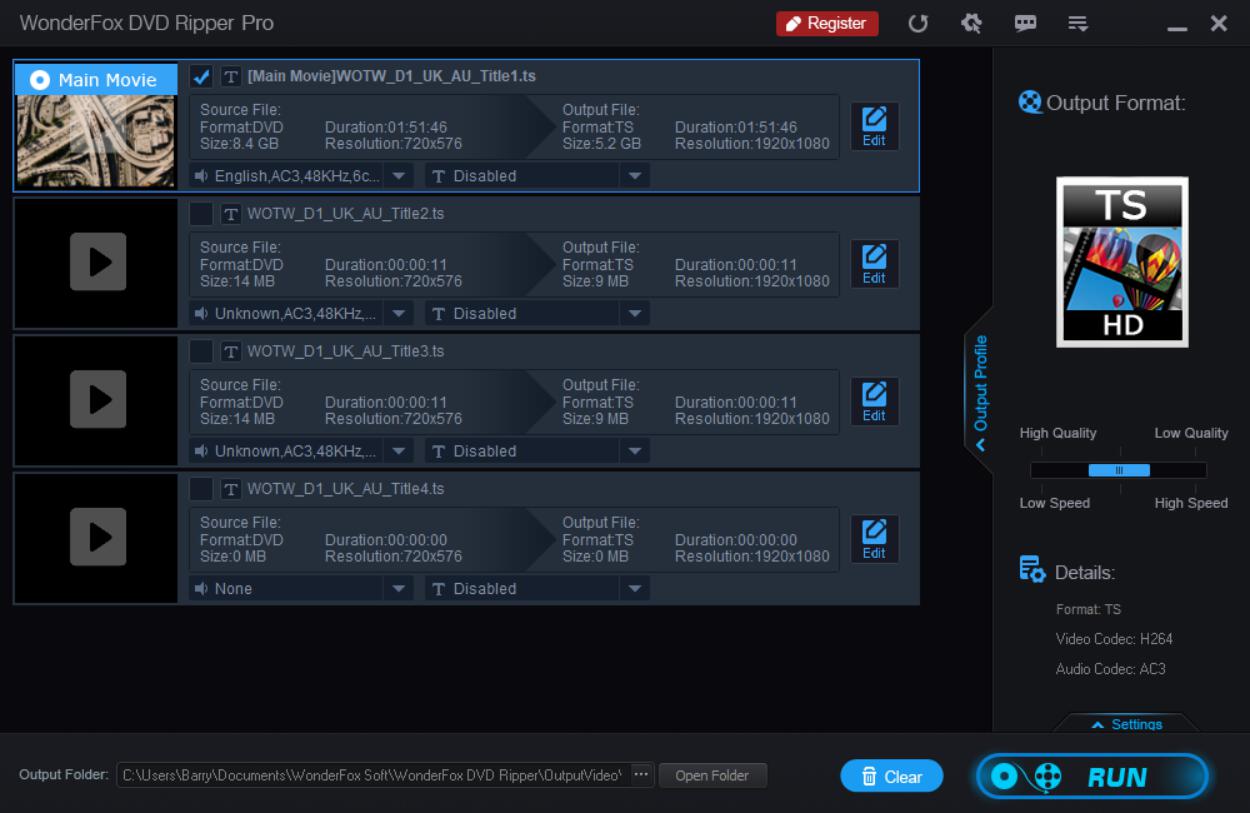
Step 2
Once you hit OK in the previous step, the application will read the disc, detect all the files and show you them in a table. You can see from the image below, that the files on my DVD are TS files. You can learn all about TS files here.
But for now, this isn’t important, all you need to do is make sure that the selected file is Main Movie, which it should be by default.
Step 3 (optional)
This is an optional step, but before you start ripping your DVD, you can select Edit to edit your video.
On this screen you can eliminate black edges and borders from your movie by selecting the area that you wish to keep using the dotted rectangle.
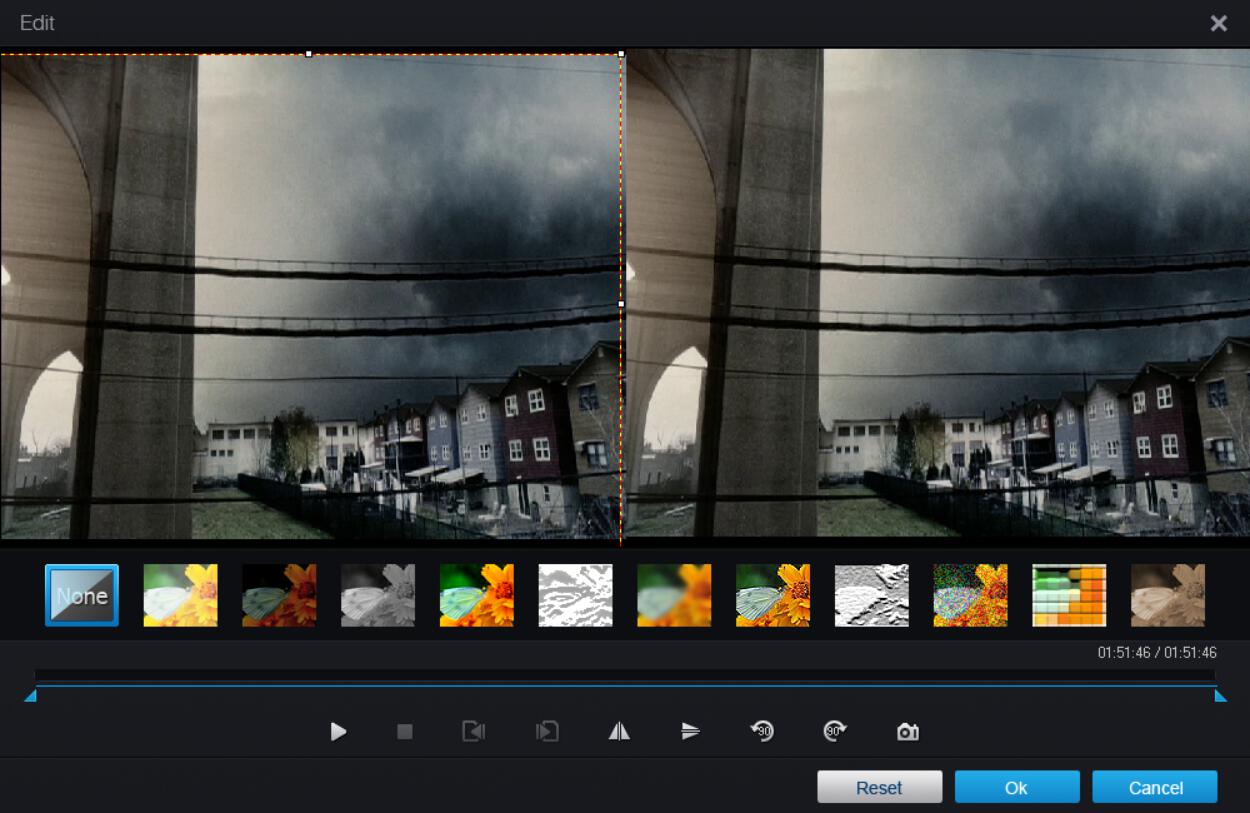
You can also clip the video and split it up into multiple parts or discard the credits and other bits of the movie that you don’t need.
Another cool feature is that you can download or add videos and merge all of your videos into one.
Finally, you can apply numerous filters to your video and you can even rotate, fip, or take screenshots. Once you’re happy with your editing, hit OK.
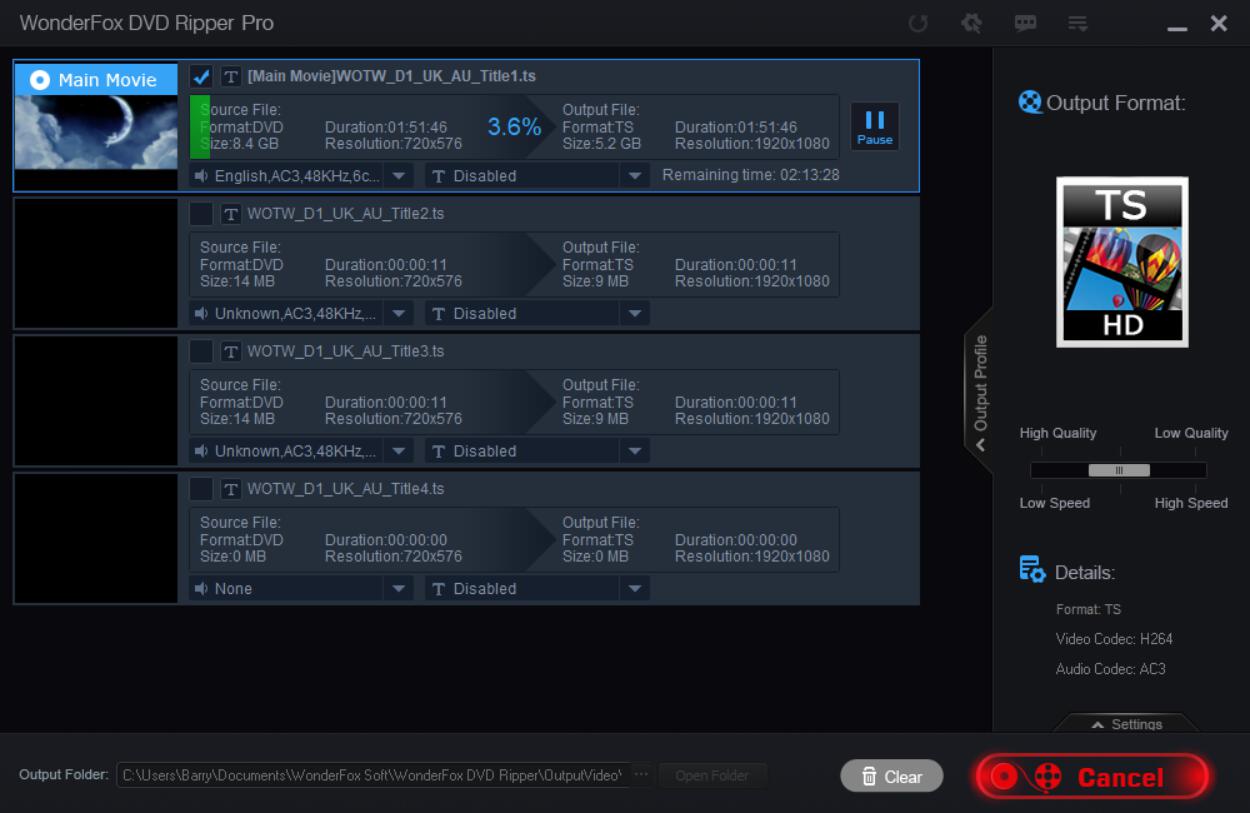
Step 4
The final step is to hit RUN. Now, if you’re running the free version, you will be shown a dialog outlining the limitations of the free version. Basically, with the free version you’re only able to rip 15 minutes worth of each DVD. You can either choose to buy a license or continue using the free version. When you hit continue, the RUN button turns into a red Cancel button. This allows you to interrupt the ripping process at any time.
Features
The default options should be good enough for most people and to be honest, the default settings are pretty optimized. If you do fancy playing about with some of the settings, here are some of the settings that are available to you:
Options
By clicking on the gear icon on the top right of the UI, you can access the options menu.
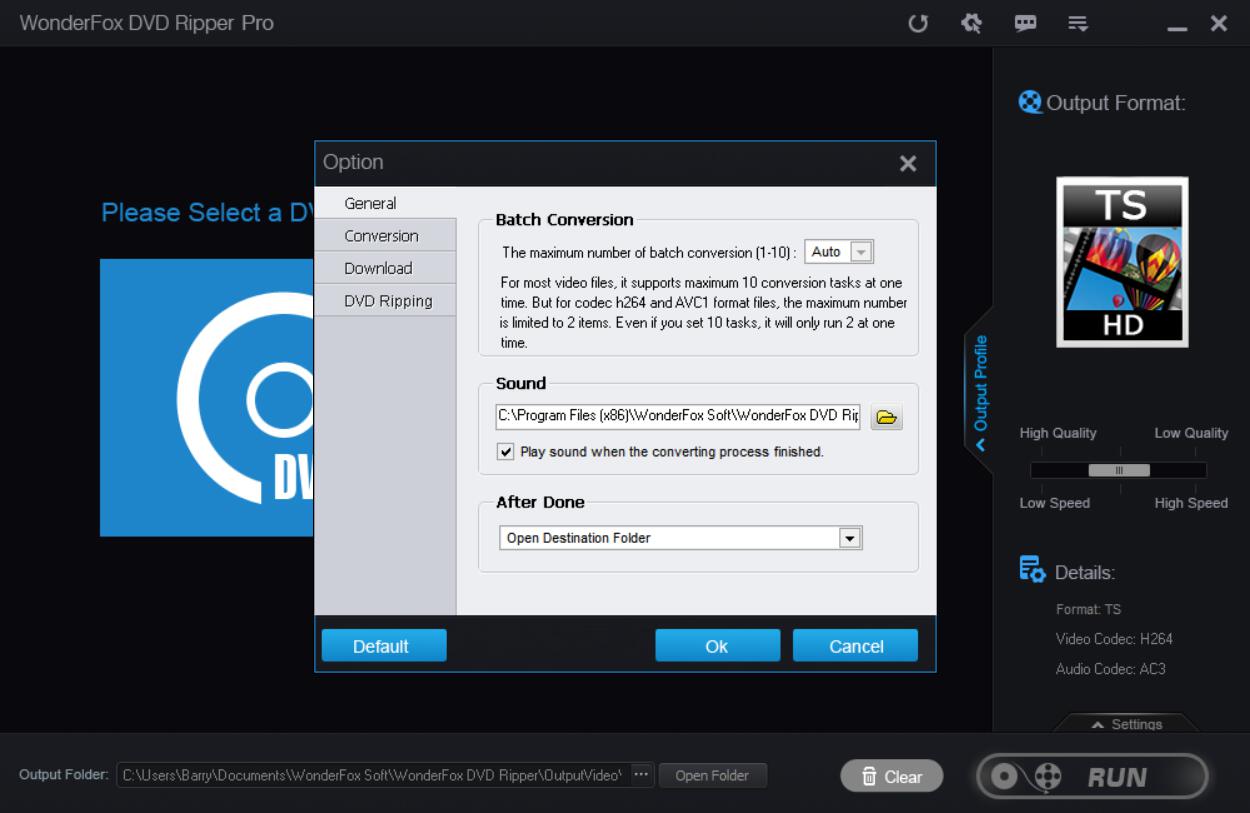
Within the options menu, you can select the number of video files you wish to convert simultaneously, up to a maximum of 10.
You can also choose the sound that is played once the conversion process is complete and set the action which will occur at the end. Actions include opening the destination folder, restarting your computer, shutting down your computer, no action, exit and exit and open the destination folder.
If you look in the “Conversion” tab, you can also configure the number of CPU cores to use during conversion, give the application more priority in terms of CPU usage and you can also choose whether or not to enable GPU acceleration.
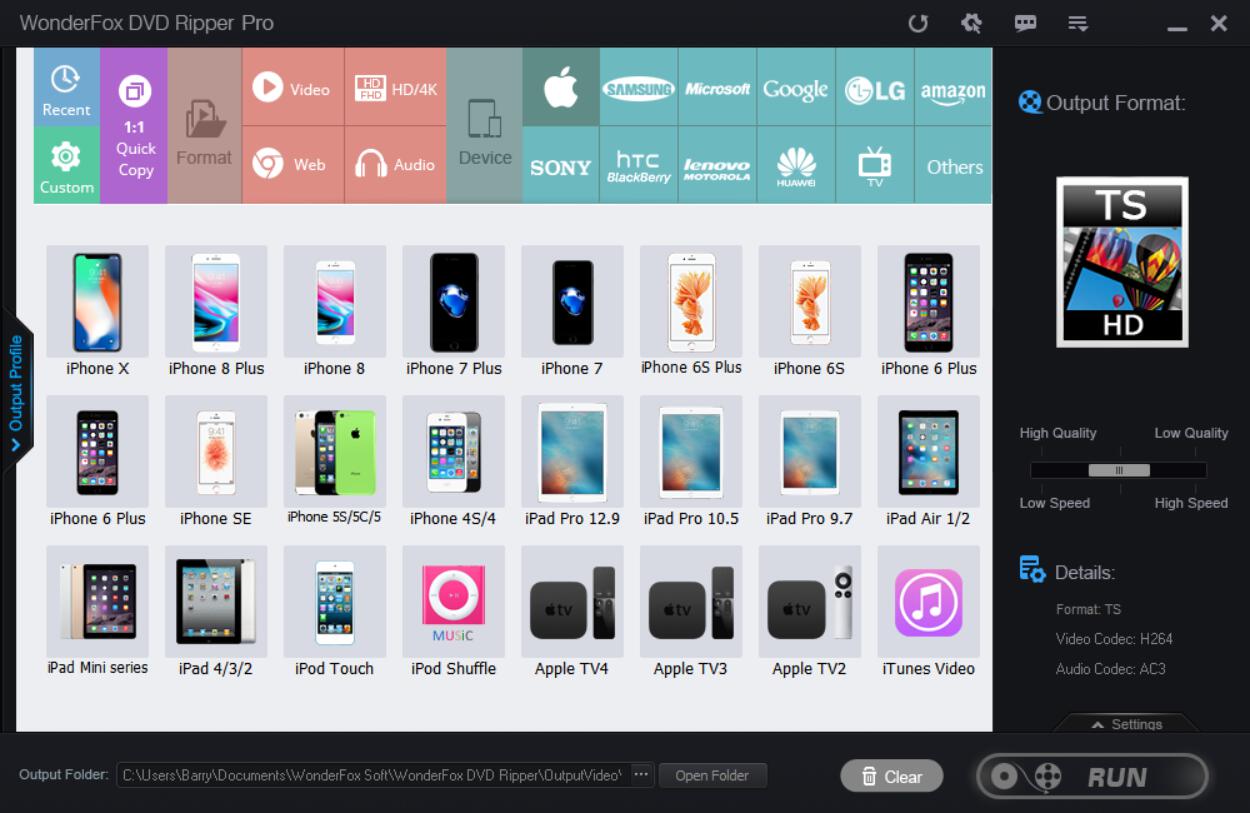
Output Profile
This is probably the best feature of the application in my opinion. Basically, it’s the ability to choose the format of your output video to best suit the device that it will be played on.
So, if you want to watch your video on a specific device then you first select the manufacturer and then a device. You can choose from most of the major manufacturers such as Apple, Samsung, Microsoft and more and most of the popular devices are available too such as the iPhone X, the Galaxy S8 and the HTC One M8 of course 😉 (one of the gadgets I own)
You can convert to other video formats too including AVI, MP4, WMV, MOV, XVID and more. Also, you can convert to formats that are supported in modern web browsers such as HTML5, OGV, WEBM and more.
Finally, if you like a particular soundtrack from a movie that you own, you can extract just the audio. Again there’s a variety of formats to choose from including MP3, AC3, WMA, OGG etc. You can even convert it to a ringtone format for both iPhone and Android devices.
The list is too long to list every format here as there are over 200 video and audio formats to choose from!
Output Folder
At the bottom of the UI there is an input field (see the image above) where you can choose where your video will end up once the conversion is complete. Pretty self explanatory really.
High Quality/Low Quality Slider
You can adjust the quality of your video by using a slider which ranges from ‘High Quality/Low Speed’ through to ‘Low Quality/High Speed’ and every variation in between.
The only slight negative with this is that if you adjust the slider, you can’t reset it back to its exact original position unless you hit the Clear button at the bottom. However, if you hit the clear button, then you’ll have to re-read the disc again. This doesn’t take long though, so it’s not really an issue.
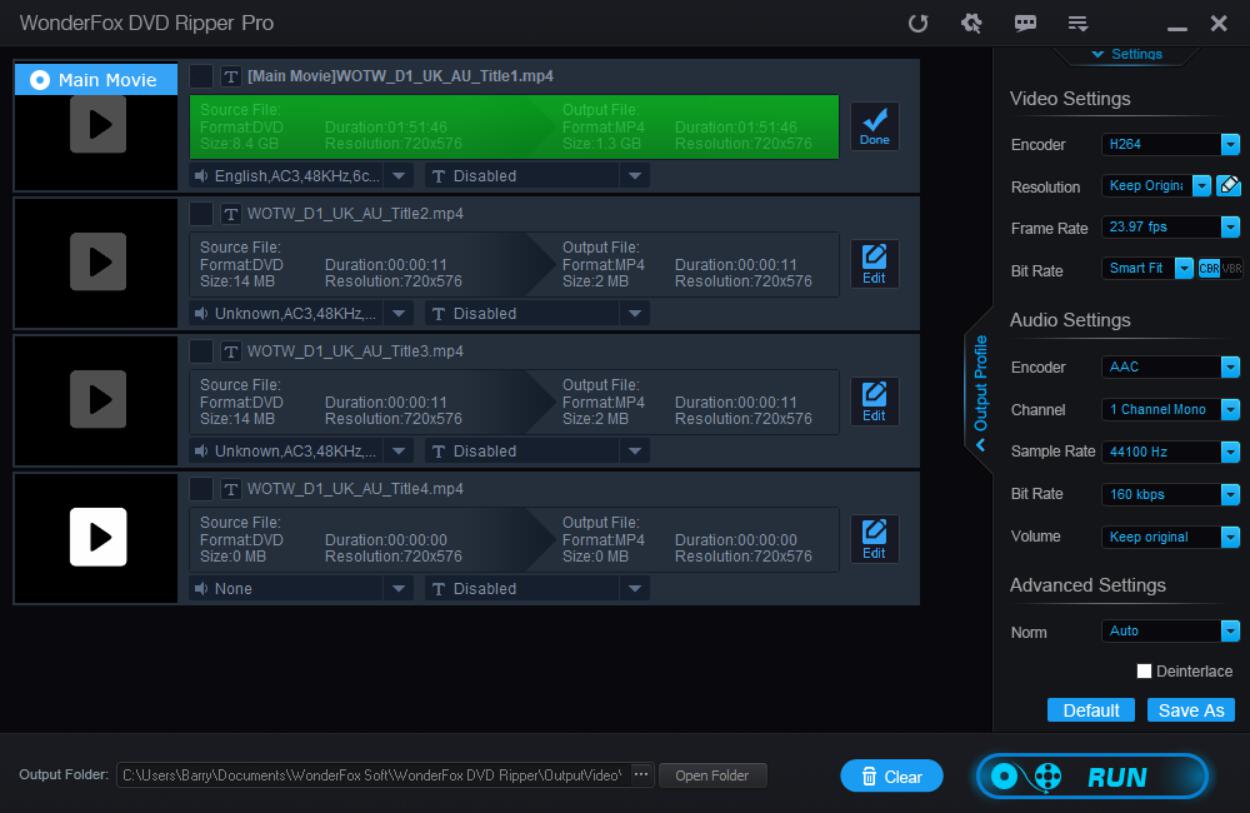
Settings
Last but certainly not least is the Settings menu. This menu is for more advanced users or for those that like to tinker and have a bit more control over the DVD ripping process.
The settings are split up into Video Settings and Audio Settings. In the video settings you can set the resolution, frame rate and the bit rate. The frame rate is adjustable from 12 fps up to 60 fps and the bit rate is adjustable from 3000 kbps through to 30000 kbps. The default option for both of these settings is “smart fit” which will set the frame rate and bit rate to optimal values.
You can also choose to have a variable bit rate (VBR) rather than a constant bit rate (CBR). Typically, with CBR the data is processed faster than VBR. However, with VBR you can get smaller files because the bitrate is altered depending on the actual content of the audio or video.
I would recommend using VBR for both the video and audio as you will get the best balance between quality and file size. You can find out more about the difference between CBR and VBR here.
In terms of the audio settings, you can adjust the channel (either 2 channels stereo or 6 channels), sample rate (from 32 kHz to 48 kHz), bit rate (128 kbps to 640 kbps) and the volume. With the volume, you can either “keep original” or adjust the volume from between 0% and 200%.
There’s the option to choose both the encoder for video and audio, however the only options available are H264 and AC3 respectively.
Finally, you can choose between Auto, PAL or NTSC formats and there’s also a checkbox to deinterlace which can convert DVD video (which is typically interlaced) into full frames. Checking this option can improve the quality of the video depending on the display you’re viewing it on. However, if the video is not interlaced to start with, then the output can be worse than the original video.
Speed and performance
Ripping a DVD is not a two minute job, not only because of the size of the DVD itself which can be several gigabytes, but also because of the process involved.
The content on DVDs are stored in multiple VOB files for video and there are separate tracks for the audio and then there’s the menu system. On top of that most DVDs are encrypted using the Content Scrambling System (CSS) and then there’s additional transformations such as encoding, converting between formats and so on.
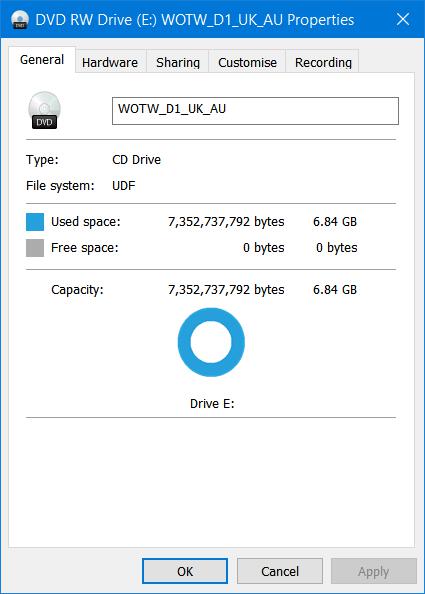
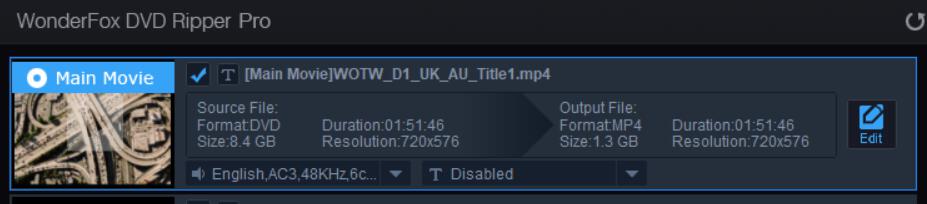
So there’s a lot going on here. But to test the performance of the application, I decided to rip a DVD, which according to Windows explorer was 6.84 GB but was reported by the software as 8.4 GB, so there’s a large dependency here and I’m not sure why or which is correct.
In terms of the settings, I kept the defaults and didn’t select any of the advanced settings. I ripped the DVD into TS format and the end result was a 5.16 GB file.
In total, the DVD ripping process took 1 hours and 35 minutes to complete which is less time than it would take to watch the movie in real time which is (1 hour 51 minutes).
I also tried selecting the iPhone X profile, and ripping the DVD again. This time, it took just 26 minutes and the size of the output file was compressed to just 1.23 GB which is amazing!
And having looked at the output videos for both formats, there was no noticeable difference in quality compared to the original DVD.
Pricing
In terms of the pricing, there are different licensing options available depending on your needs and how many PCs you plan to use the software on:
- Single License for one PC – $29.95
- Discount Pack including DVD Ripper and Video Converter software for one PC – $39.95
- Family License for up to 3 PCs – $69.95
There’s also a 30-day money back guarantee if you are not happy with your purchase.
Support
Having used this software for over a week now, I haven’t come across any problems and I’m sure you’ll manage to use it without any issues too. However, if you do come across any issues there’s a support page containing FAQs, user guides and tutorials but should you need to contact somebody, it’s good to know that your emails will be responded to within 24 hours.
From a personal perspective, my correspondence with Wonderfox has been excellent. I was approached by the company to review their software and they have responded to my queries promptly. So if this is anything to go by, then their customer support will be excellent.
The Downsides
To be honest, it’s hard to find fault with this product. It rips DVDs perfectly and the number of output formats it can convert to is amazing. However, there’s no such thing as a perfect product.
The only possible downside is a possible incorrect reporting of the DVD size. This may or may not be correct, but it is different to what is reported by Windows. For example, Windows reported the size to be 6.84 GB:
However, Wonderfox DVD Pro DVD ripper reports it to be 8.4 GB:
Other than this, I can’t find any fault with the software and does exactly as you’d expect.
Should you buy the licence? – Final verdict
In a word, yes. The free version is fine, but only allows you to rip the first 15 minutes of a DVD, so you need to buy the full version to rip an entire DVD.
If you have a collection of DVDs lying around, I strongly recommend ripping them as this will avoid any potential damage to the physical discs. It’s also more convenient to watch the digitized versions on a NAS drive using a Plex Media Server or similar. If you haven’t got a NAS drive, you can pick one up from Amazon (Amazon, #CommissionsEarned).
In my opinion, this is a great piece of software. It makes a complicated job of ripping a DVD incredible simple, there’s lots of features if you’re an advanced user and the number of output formats you can convert to is amazing.
If you have any questions about this software, feel free to let me know in the comments and I’ll get back to you asap.
Cheers!
