More and more people are becoming aware of online security and their privacy and we are doing more as individuals to try and protect our data and make it safe and secure whilst online.
The most popular social networking sites, like Facebook and Twitter for example, have now provided us with the tools to help protect our privacy by offering privacy settings to their users so that they can decide what to share and who to share it with. But there’s absolutely no point in having these privacy controls, if you have a weak password. But let’s face it, it’s a trade off between creating a password that’s easy to remember yet complex enough so that hackers can’t guess it and meddle around in your account.
Obviously choosing a strong password should be your first priority, and if you’re not sure how to do this, then read how to create a secure password. Once you’ve done this though, how can you further protect your Facebook account from being hacked?
Well this is where two-factor authentication comes in.
Now Facebook actually calls its two-factor authentication “Login Approvals”, but the idea is exactly the same as any other type of two-factor authentication. Two-factor authentication basically means “something you know” (like a password) and “something you have”, which can be a physical object like a phone.
So by enabling two-factor authentication on your Facebook account, it will mean that signing in from a new browser will require something you have (like your phone) as well as something you know (your password), which gives your account that extra layer of protection.
So if you don’t fancy having your Facebook account compromised by a hacker or by any of your practical joker friends, then follow the steps below to enable two-factor authentication on your Facebook account.
How To Enable Two Factor Authentication in Facebook
For those that aren’t aware of two-factor authentication, the basic process that I’m going to run through is to add your mobile number to your Facebook account. Once you’ve done that, every time you (or someone else) tries to log into your account, a code will be sent to your phone (one that you’ve previously registered) and you will have to enter both your password and the code in order to gain access to your Facebook account.
So let’s go through the steps necessary and make your Facebook account extra secure shall we?
Instruction #1
Login to Facebook as normal and click on the small downward-facing arrow in the upper right-hand corner and at the bottom of the popup menu click on “Settings”.
Instruction #2
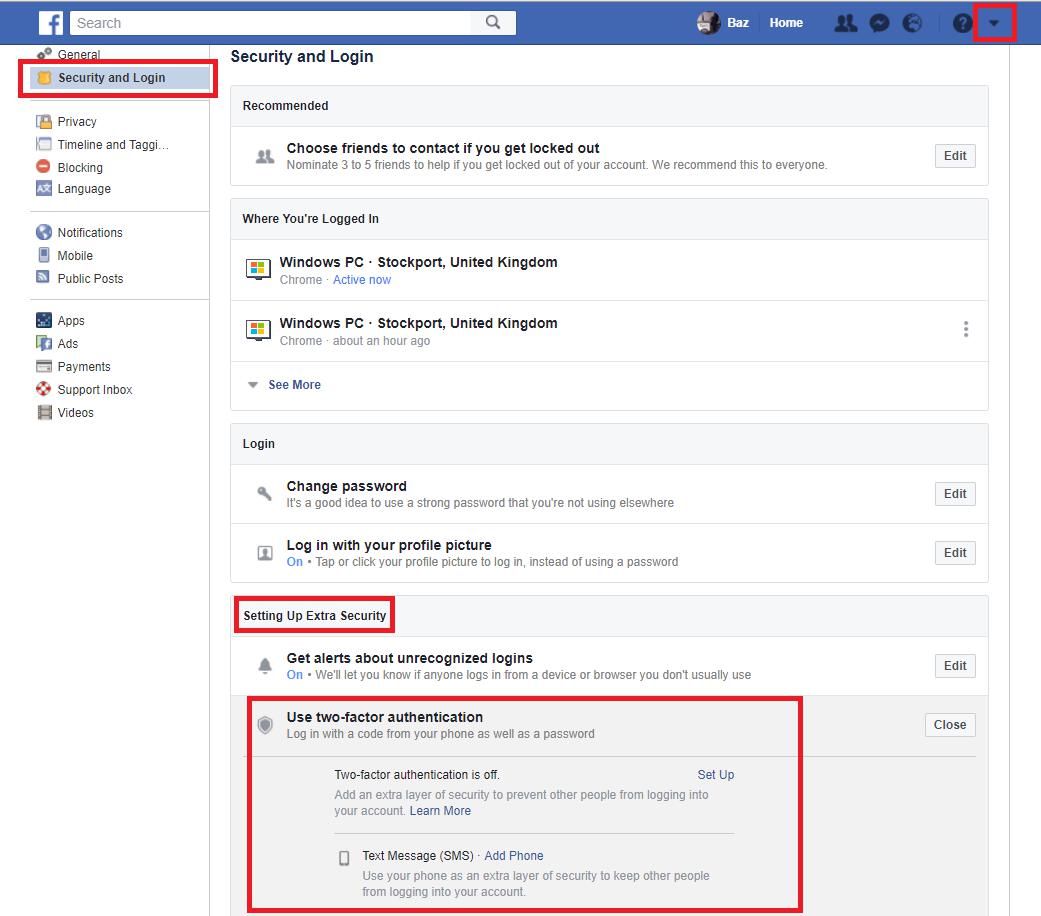
From the settings page, click on “Security and Login” on the left and scroll down to the bottom of the page until you see “Setting Up Extra Security”.
Instruction #3
Select “Use two-factor authentication” or click the Edit button next to it which will expand to reveal a number of different options.
To make it easy, I’ve highlighted what you should click on in the image below:
Instruction #4
If you haven’t already added your phone number to your Facebook account, then you need to click “Add Phone” which will bring up a dialog asking you to enter your mobile number.
It’s worth noting here actually that this number is only visible to you, not to friends or others who can see your profile. Obviously Facebook will have access to your phone number in order to send two-factor text messages to it.
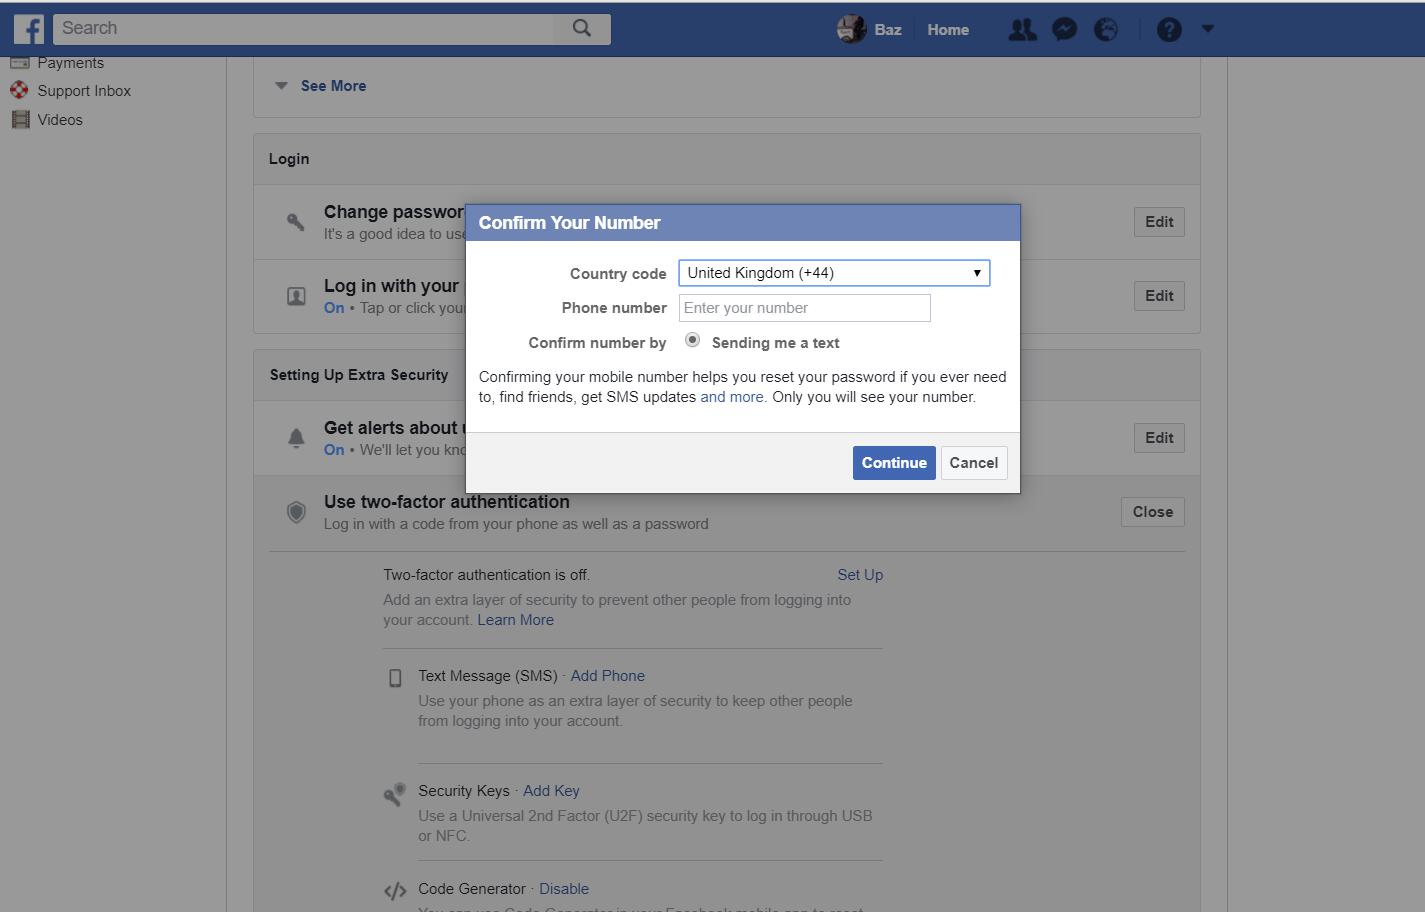
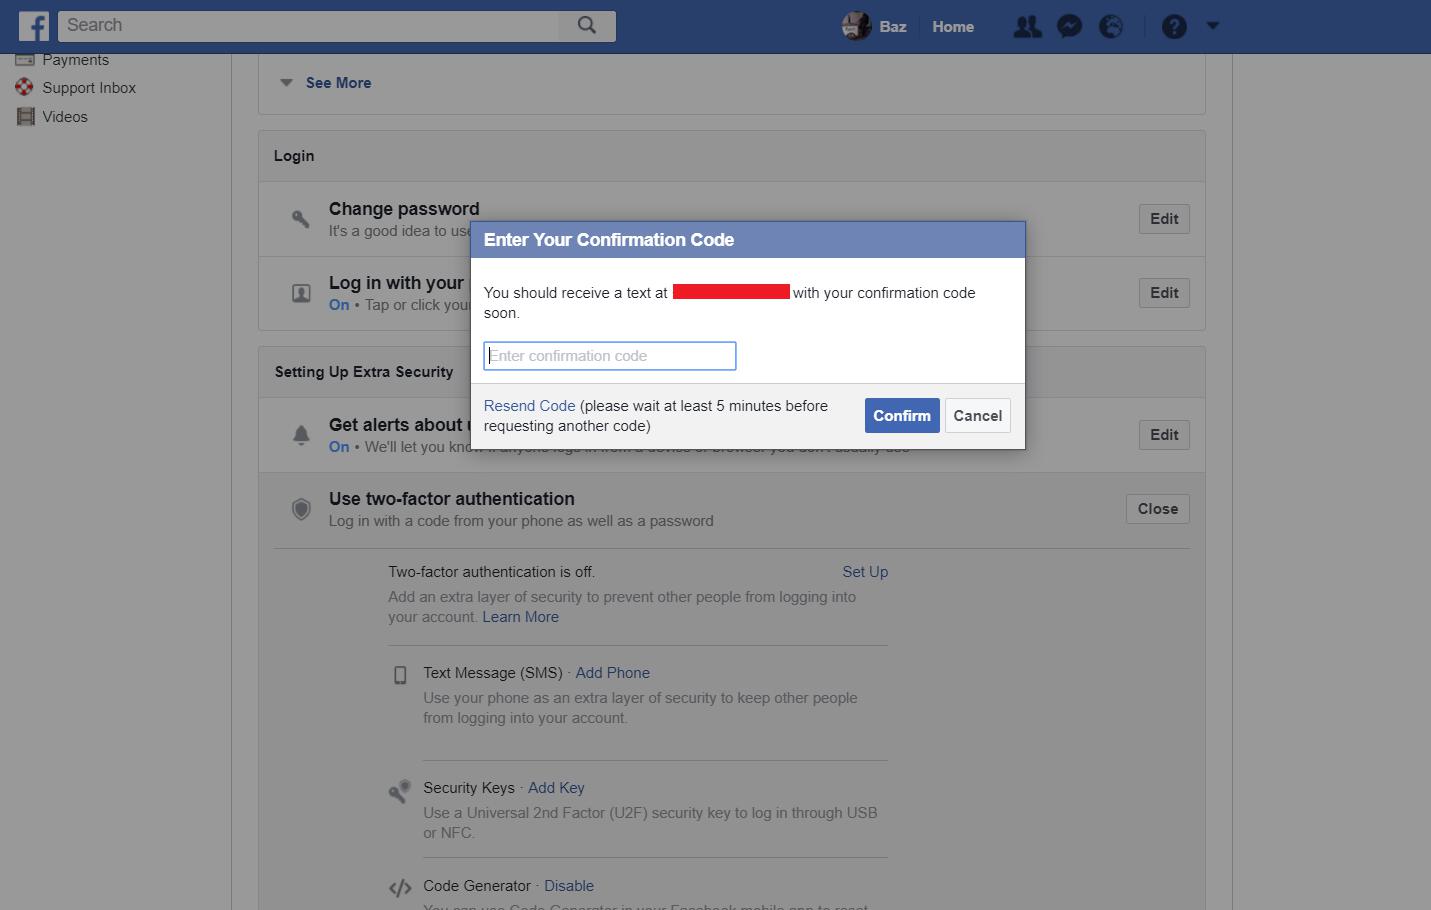
Once you’ve entered your number, click “Continue” and Facebook will text you a code. Enter it and hit “Confirm” (see image below).
Instruction #5
Once you’ve added your number, click “Enable” under “Text Message (SMS)” and another dialog will pop up giving you the option to cancel two-factor authentication without your phone within a week. I recommend unticking this box and securing your settings right away.
Finally in the same dialog, hit Enable (see image below).
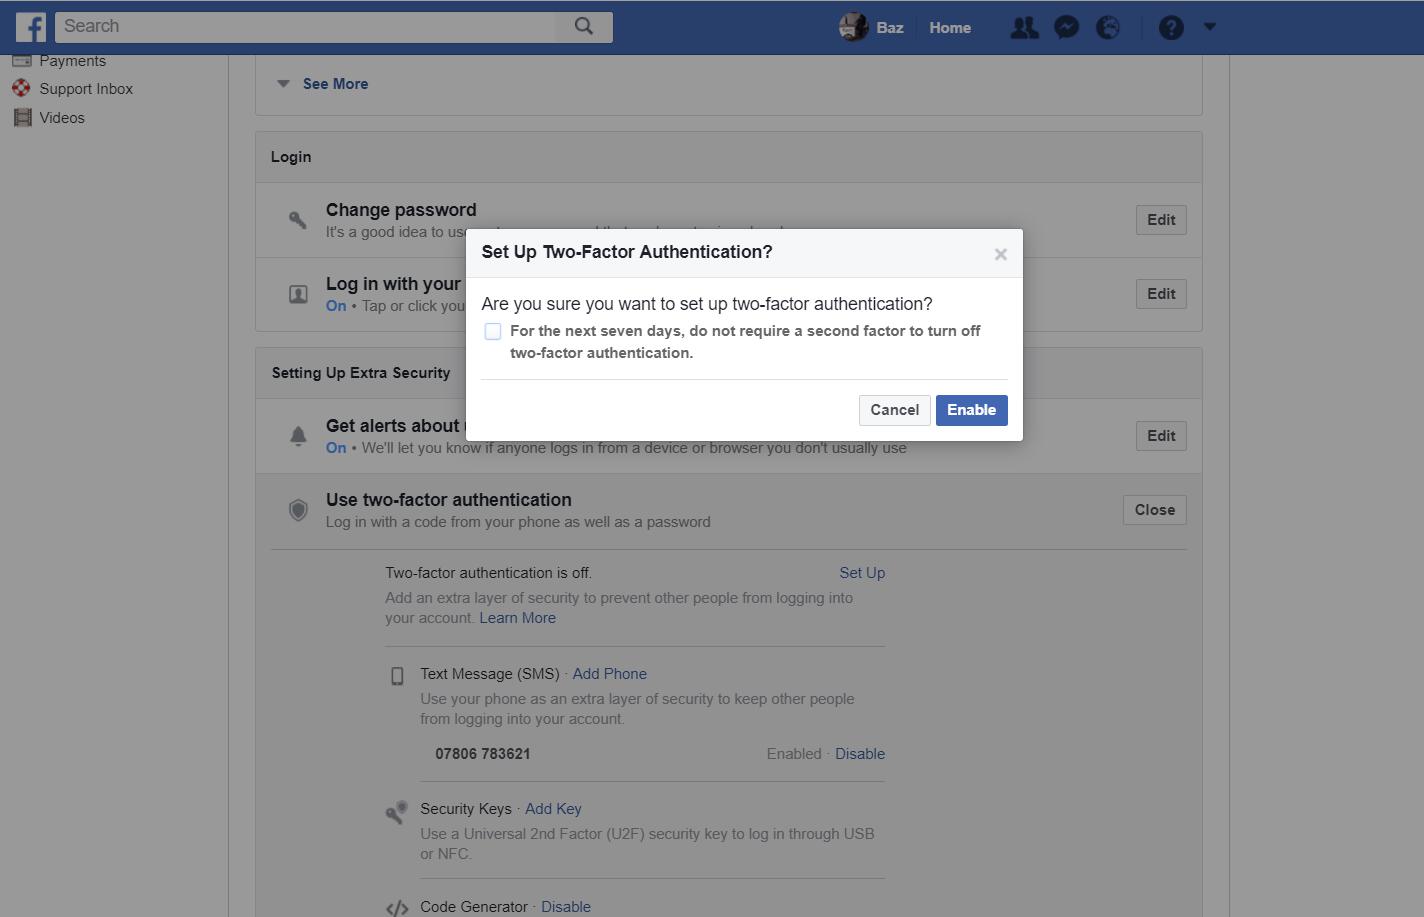
If you’ve done everything correctly, two-factor authentication should now be activated on your account and you should see this dialog:
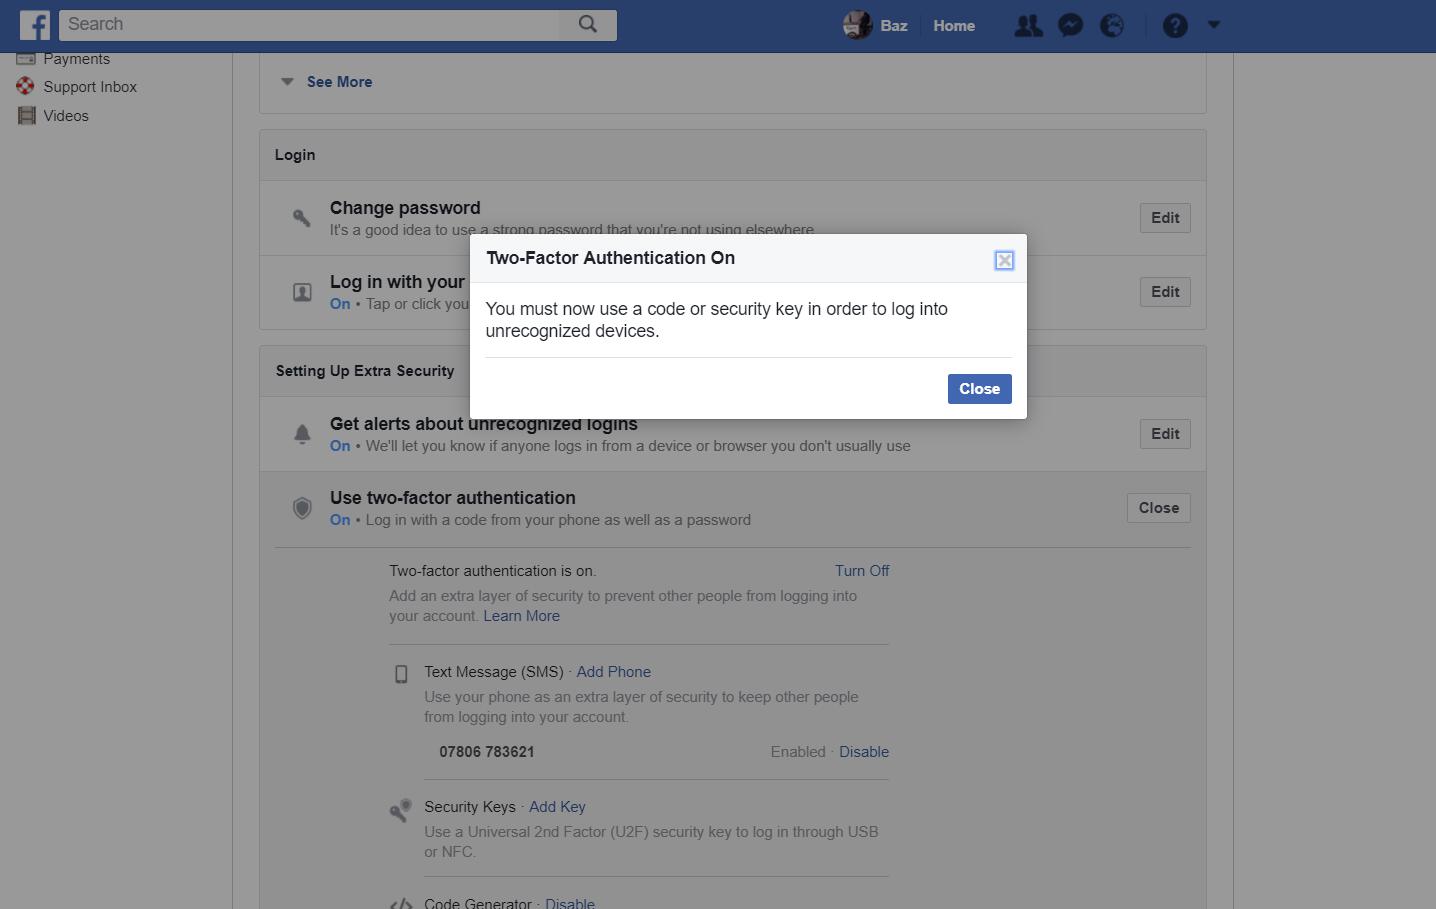
What this means is that from now on, every time you sign in using a device for the first time, you will receive a code to your mobile phone which you will have to enter along with your password in order to gain access to your account.
In addition to receiving a text message with a code, if you go into security settings you’ll find that there are more two-factor options. For example you can start using the Facebook app’s code generator which will generate a special security code that you can use to authenticate your login attempt on another computer or mobile device, and you can also get printable codes to keep in hard-copy (though I would swerve this option if you can avoid it). You can also learn about app passwords which are one-time use passwords that you can use for devices and applications without having to wait to receive a code.
Say yes to two-factor authentication!
So that’s Facebook’s two-factor authentication, but you’ll find that a lot of other social networks and online accounts that you use on a day-to-day basis also offer two-factor authentication. For example, if you have a Google account (like most of us have), you should also enable Google’s two-factor authentication to make your Gmail account more secure. You can even use Google Prompt to make two-factor authentication less cumbersome!
Granted, two-factor authentication isn’t infallible (man-in-the-middle attacks) and there are some two-factor misconceptions, but you should take definitely take advantage of it where possible. Lot’s of accounts including Facebook accounts get hacked every day — so don’t let your personal or business account be next!
P.S If you’re really paranoid, or you’d like to protect your accounts even further, why not get a Universal Two Factor Authentication USB (Amazon, #CommissionsEarned) for extra protection?
Cheers!
